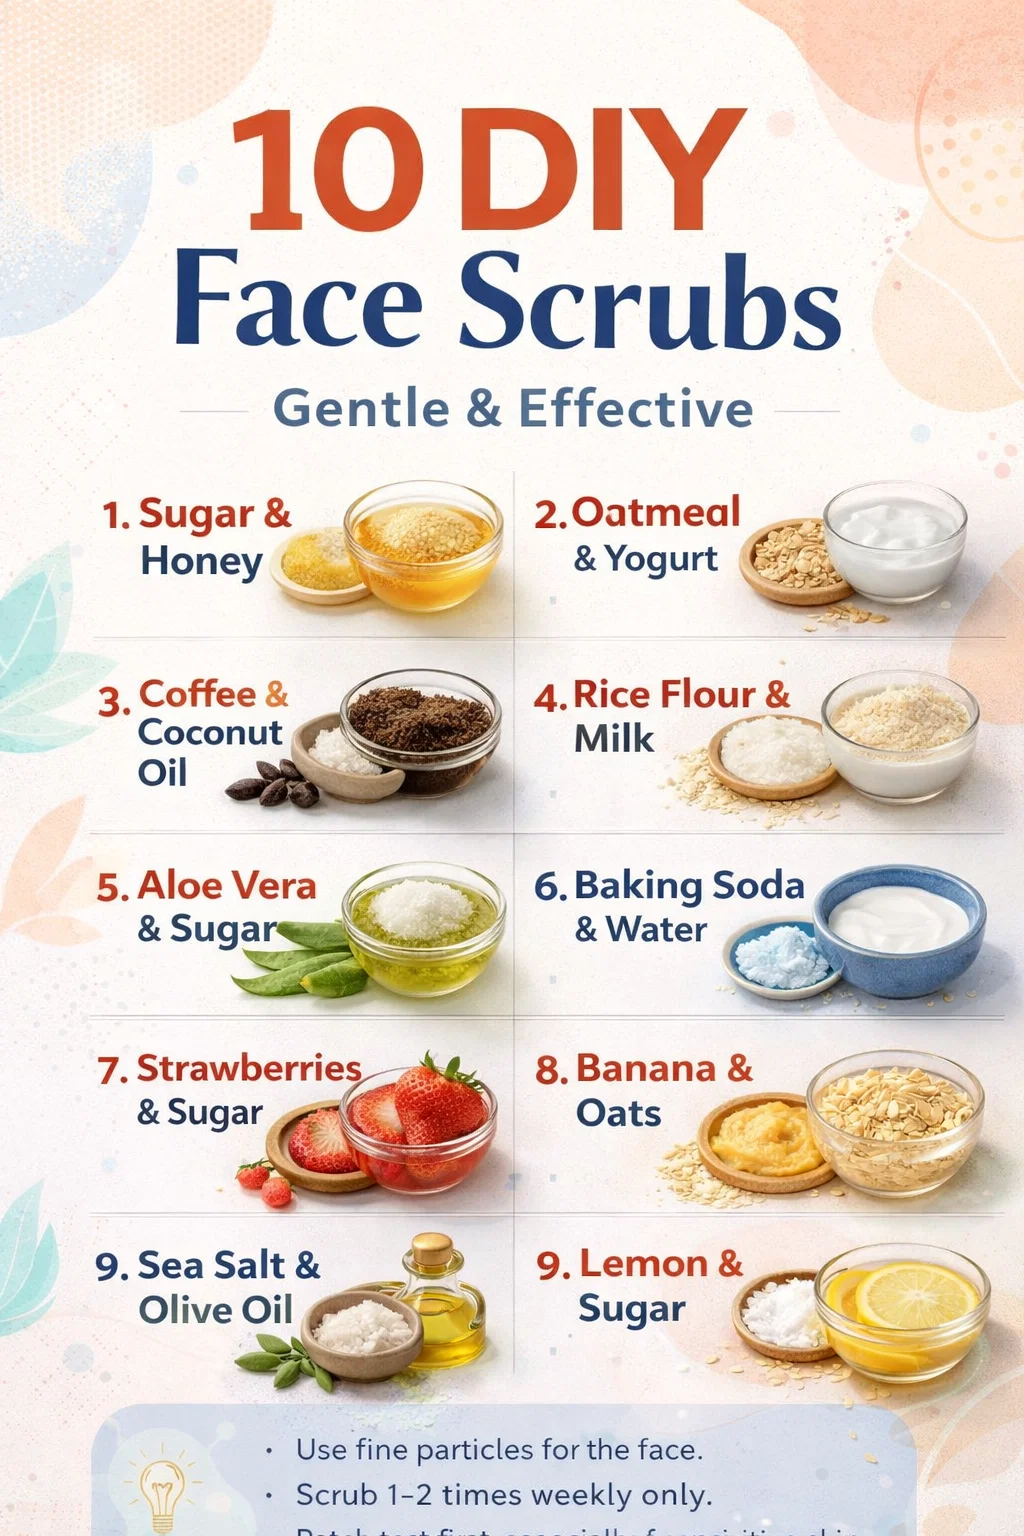
10 DIY Face Scrubs for Glowing Skin Easy Homemade Facial Exfoliator Recipes
Stepping into your kitchen can often feel like walking into a high end apothecary. Between the jars of honey, bags of organic oats, and the scent of fresh lemons, you have everything you need to transform your skincare routine without spending a fortune at a beauty counter. Many of us are moving away from synthetic exfoliants and microbeads, seeking a more grounded, natural approach to glowing skin. That is where the magic of DIY face scrubs comes in. By using simple, whole ingredients, you are not only saving money but also ensuring that exactly what touches your face is pure, effective, and tailored to your specific needs.
Exfoliation is a vital step in any skincare regimen, but it is one that many people get wrong. The goal is to gently lift away dead skin cells and clear out pores without causing micro tears or irritation. When you make your own scrubs, you control the texture and the potency. Whether you are dealing with a mid winter dullness or an oily summer T zone, there is a homemade blend that can restore your natural radiance. In this guide, we will break down ten incredible recipes that prove professional results are just a pantry raid away.
The Science of Natural Exfoliation
Before we dive into the recipes, it is important to understand why your skin craves this process. Your skin is constantly regenerating, pushing new cells to the surface. However, as we age, the natural shedding process slows down. This leads to a buildup of dry, flaky skin that can clog pores and make your complexion look tired. Physical exfoliants, like the ones found in these DIY scrubs, manually nudge those old cells out of the way.
The beauty of using ingredients like sugar, coffee grounds, or rice flour is that they provide varying levels of grit. Sugar is a natural humectant, meaning it draws moisture into the skin while it works. Coffee is packed with antioxidants and caffeine, which can temporarily tighten the skin and reduce puffiness. By choosing the right base for your scrub, you are treating your skin to a multi functional experience that cleanses, hydrates, and protects all at once.
1. The Classic Sugar and Honey Hydrator
If you are new to the world of DIY skincare, the Sugar and Honey scrub is the perfect place to start. It is a powerhouse duo that targets two main concerns: texture and moisture. Honey is a natural antibacterial and humectant, making it incredible for soothing any minor breakouts while locking in hydration.
How to Mix It
- 1 tablespoon of fine granulated sugar
- 1 tablespoon of raw, organic honey
Mix these until you have a thick, tacky paste. When you apply this to your face, use very light, circular motions. The sugar works to buff away the rough patches while the honey leaves a protective, silky film on the skin. It is the ultimate solution for those who want a glow without the tightness that often follows store bought cleansers.
2. Oatmeal and Yogurt for Sensitive Souls
Not everyone can handle the grit of sugar or salt. If your skin tends to turn red or feel itchy easily, you need something that prioritizes calming properties. Oatmeal contains compounds called avenanthracides, which are highly anti inflammatory. Paired with the lactic acid found in yogurt, this scrub provides a very mild chemical exfoliation alongside a soft physical one.
The Benefits
The yogurt works to dissolve dead skin cells gently, while the oats provide a cushion that prevents irritation. This is the go to recipe for anyone suffering from seasonal dryness or skin sensitivity. It leaves your face feeling calm, cool, and incredibly soft to the touch.
3. Coffee and Coconut Oil for a Brightening Wakeup
If your skin looks a bit sallow or tired, caffeine is your best friend. A coffee scrub is essentially an energy drink for your face. The grounds provide a medium level of exfoliation, while the caffeine stimulates blood flow to the surface of the skin, giving you an instant flush of health.
We combine this with coconut oil to ensure the skin is deeply nourished. Coconut oil is rich in fatty acids, making it a heavy hitter for dry skin types. However, if you are prone to acne, you might want to swap the coconut oil for a lighter carrier oil like jojoba or sweet almond oil to keep your pores clear.
4. Rice Flour and Milk: The Ancient Brightening Secret
Rice flour has been used in Asian beauty rituals for centuries. It is prized for its ability to brighten the complexion and even out skin tone. Unlike sugar, rice flour has a very fine, almost starchy texture that provides a sophisticated level of exfoliation. When mixed with milk, which contains brightening lactic acid, you get a double dose of radiance.
Application Tips
Apply this mixture and let it sit for a minute or two before you start scrubbing. This allows the enzymes in the milk to start breaking down debris. When you finally rinse it off, you will notice an immediate clarity in your skin tone that looks like you just stepped out of a professional facial.
5. Aloe Vera and Sugar for Soothing Refreshment
Aloe vera is often reserved for sunburns, but it is actually a daily skincare hero. It is incredibly lightweight and hydrating, making it the perfect base for a sugar scrub if you have oily skin that still needs exfoliation. This blend feels cooling and refreshing, especially during the warmer months.
The sugar provides the necessary friction to clear out pores, while the aloe ensures that the skin barrier remains intact and hydrated. It is a non greasy formula that rinses away cleanly, leaving nothing behind but a smooth surface.
6. Deep Cleansing with Baking Soda
Baking soda is a controversial ingredient in skincare, but when used correctly and infrequently, it is a fantastic deep cleanser. Its fine particles are excellent at dislodging stubborn blackheads. Because it is alkaline, it is important to follow this scrub with a pH balancing toner to keep your skin happy.
Simply mix a small amount of baking soda with water to form a paste. Focus this specifically on your T zone or areas where your pores are most visible. It acts like a vacuum for your pores, pulling out oil and dirt that regular soap might miss.
7. The Strawberry Glow Scrub
Strawberries are naturally rich in vitamin C and salicylic acid. Salicylic acid is a BHA (beta hydroxy acid) that is famous for its ability to deep clean inside the pores. By mashing up a few strawberries with a bit of sugar, you are creating a natural acne fighting treatment that also smells delicious.
This scrub is particularly good for those with oily or combination skin. The seeds of the strawberry provide a tiny bit of extra exfoliation, while the fruit acids work to brighten any dark spots or lingering acne scars.
8. Banana and Oat Softening Blend
Got a brown banana on the counter? Do not throw it away. Bananas are loaded with potassium and moisture. When mashed and mixed with ground oats, they create a thick, nourishing mask-scrub hybrid. This is a heavy moisture recipe, perfect for those with mature skin or chronic dryness. It softens the texture of the skin while providing a rich dose of vitamins.
9. Sea Salt and Olive Oil for Oily Skin
It might seem counterintuitive to put oil on oily skin, but olive oil is excellent at dissolving excess sebum. Sea salt provides a much stronger exfoliation than sugar, which can be helpful for the thicker skin on the chin or forehead. Salt also has natural antiseptic properties, which can help keep bacteria at bay. This is a robust scrub that leaves the skin feeling purified and firm.
10. Lemon and Sugar Brightening Boost
Lemon juice is a natural astringent and a powerful source of Vitamin C. It works to lighten dark spots and tighten the appearance of pores. When combined with sugar, it creates a refreshing, citrusy scrub that wakes up the senses and the skin. Be sure to use this one in the evening, as citrus can make your skin more sensitive to the sun.
Best Practices for DIY Skincare
While these recipes are natural, they are still potent. To get the best results without any mishaps, keep these golden rules in mind. First, always use fine particles. If you are using sea salt or sugar, ensure the grains are small to avoid scratching the delicate skin on your face. Second, consistency is key, but do not overdo it. Scrubbing one to two times a week is plenty for most skin types.
Finally, always perform a patch test. Apply a small amount of your DIY mixture to the inside of your wrist or behind your ear and wait twenty four hours. This ensures you do not have an undiagnosed allergy to any of the food based ingredients. Natural does not always mean non-reactive, so it is better to be safe.
Storage and Freshness
Because these recipes do not contain preservatives, they are best made in single use batches. If you do make extra, store it in a clean glass jar in the refrigerator for no more than two or three days. Fresh is always best when it comes to kitchen beauty.
Conclusion
Embracing a DIY approach to skincare is about more than just saving money. It is about taking a moment for self care and connecting with the simple, powerful ingredients that nature provides. Whether you choose the brightening power of lemon, the soothing touch of oatmeal, or the invigorating scent of coffee, you are giving your skin a customized treatment that honors its unique needs. Start small, experiment with what is in your pantry, and enjoy the process of discovering your most radiant self. Your skin will thank you for the extra love and the natural, healthy glow that follows.