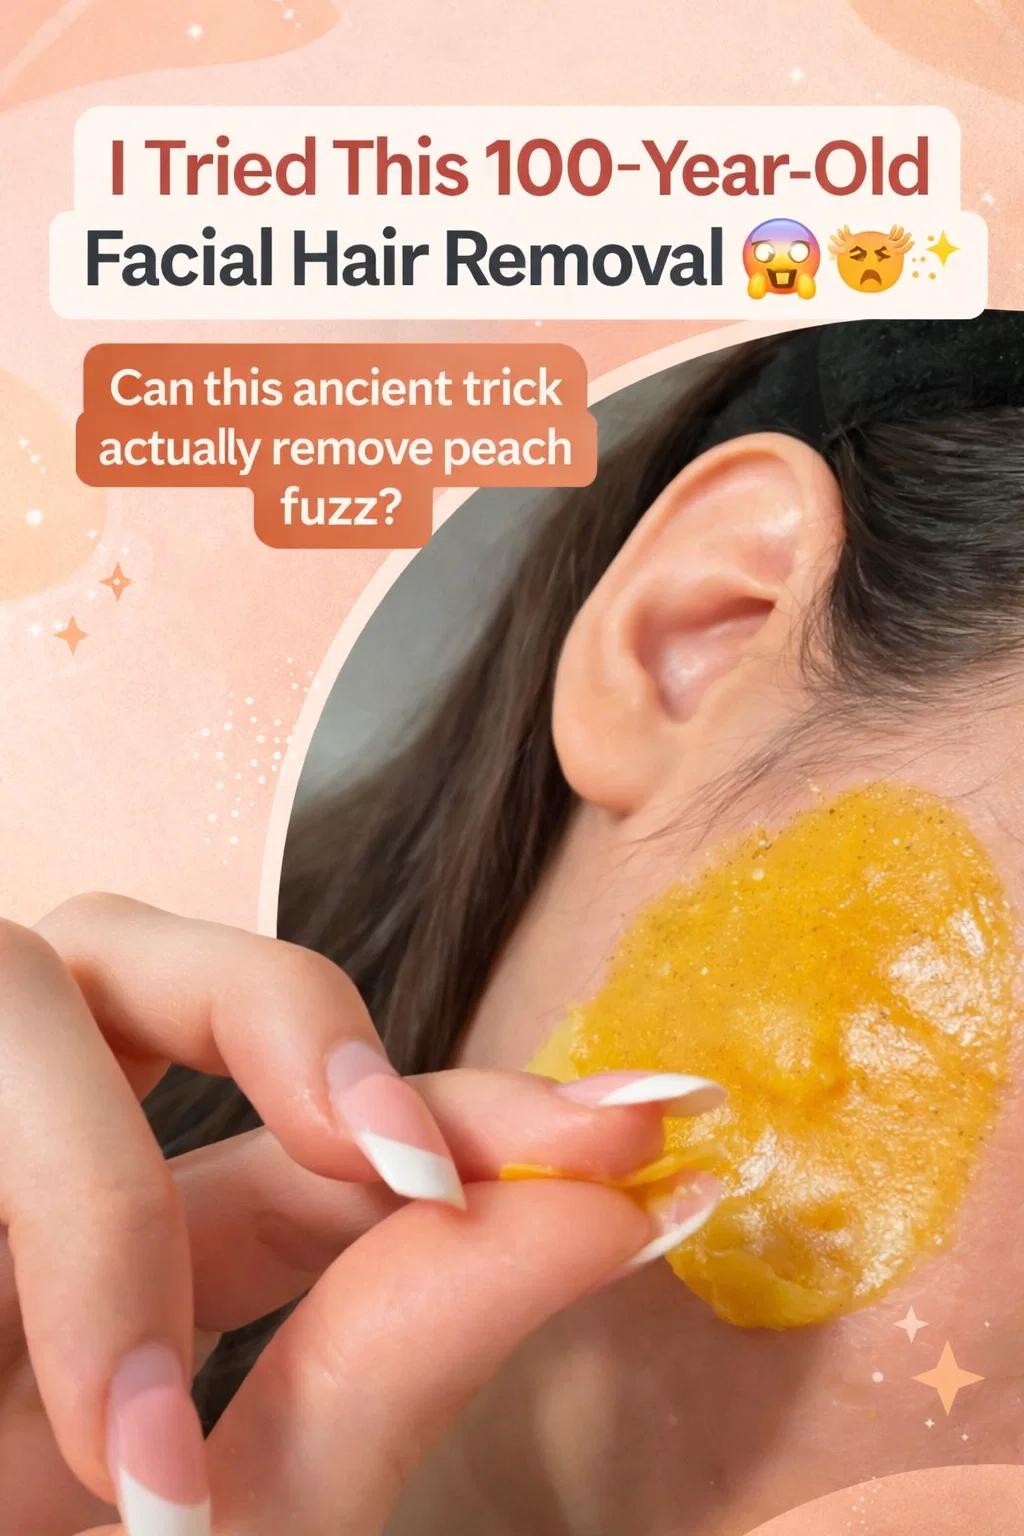
100 Year Old DIY Facial Hair Removal Remedy Natural Turmeric Wax Peel Off Mask At Home
The beauty world is currently obsessed with “glass skin” and professional dermaplaning, but sometimes the most effective secrets aren’t found in a sterile med-spa. They are found in the handwritten recipe books of our grandmothers. Lately, a viral sensation has been taking social media by storm: a vibrant, golden peel-off mask that promises to banish unwanted facial hair and leave skin glowing. This 100 year old facial hair removal remedy relies on the power of traditional ingredients to achieve results that modern chemicals often struggle to match without irritation.
If you have ever felt frustrated by the constant cycle of threading, waxing, or shaving, you are not alone. Facial hair is perfectly natural, but for many, it can affect how makeup sits on the skin or how confident they feel in bright sunlight. This ancient remedy doesn’t just pull hair from the root; it treats the skin underneath. By blending the antiseptic properties of turmeric with natural binding agents, this DIY treatment offers a holistic approach to grooming. Let us dive deep into why this century-old secret is making such a massive comeback and how you can replicate it in your own bathroom.
The Science and History Behind the Golden Glow
While the image of a bright yellow mask might look like a modern TikTok trend, the use of turmeric (Curcuma longa) for hair inhibition dates back thousands of years, particularly in Ayurvedic traditions. In many cultures, turmeric was applied to the skin of brides-to-be and even infants to soften the hair and naturally reduce its regrowth over time. This is not just a folklore tale; there is a level of biological logic to it.
Turmeric contains curcumin, a bioactive compound known for its potent anti-inflammatory and antioxidant properties. When applied regularly in a thick paste, it is believed to weaken the hair follicles. While it won’t work as instantly as a laser treatment, the cumulative effect is a thinning of the hair shaft and a slower growth cycle. When combined with ingredients that create a “peel-off” texture, like chickpea flour (besan) or egg whites, it acts as a mechanical epilator, grabbing the fine vellus hair (often called peach fuzz) and lifting it away as the mask dries.
Why Choose This 100 Year Old Remedy Over Modern Methods
You might be wondering why you should spend time mixing a paste when you could just grab a razor or book a waxing appointment. The answer lies in the long-term health of your skin barrier. Many modern hair removal methods are incredibly aggressive. Shaving can cause micro-cuts and ingrown hairs, while chemical depilatory creams often use high-pH salts that can cause chemical burns on sensitive facial skin.
Gentle Exfoliation and Brightening
Unlike a standard wax that can lift the top layer of skin and leave you red for days, this traditional remedy acts as a dual-purpose treatment. As you peel or scrub the mask away, you are removing dead skin cells along with the hair. The turmeric works to brighten hyperpigmentation and even out your skin tone, meaning you wake up with a glow that no razor could ever provide.
Cost-Effective and Sustainable
The ingredients for this remedy are likely already sitting in your kitchen pantry. In an era where a single professional dermaplaning session can cost upwards of eighty dollars, returning to these roots is a win for your wallet. Plus, you are avoiding the plastic waste associated with disposable razors and the synthetic fragrances found in commercial waxes.
The Essential Ingredients for Your DIY Mask
To get the results shown in the viral photos, you need the right balance of grip and skin-soothing properties. While there are variations of this recipe, the most effective “peel-off” version usually involves a few key players. Here is what you will need to gather:
- Wild Turmeric (Kasturi Manjal): If possible, use wild turmeric instead of regular kitchen turmeric. It is non-staining and has more potent skin benefits.
- Chickpea Flour (Besan): This acts as the structural base of the mask. It is famous for its ability to absorb excess oil and “grab” onto fine hairs.
- Milk or Rose Water: This provides the moisture needed to create a spreadable paste. Milk contains lactic acid, which adds a boost of chemical exfoliation.
- Natural Binder: To get that satisfying peel-off effect seen in the image, many people add a small amount of unflavored gelatin or a thick layer of egg white. If you prefer a “scrub-off” method, you can omit the binder and let the flour do the work.
Step-by-Step Guide to the Perfect Application
The secret to success with this 100 year old remedy is in the application and the timing. You cannot rush the process if you want the mask to bond with the facial hair effectively. Follow these steps for the best results:
1. Prepare Your Canvas
Start with a clean, dry face. Remove all makeup and oils. It is often helpful to use a warm towel on your face for two minutes before starting to open up the pores and soften the hair follicles.
2. Mixing the Paste
Combine two tablespoons of chickpea flour with half a teaspoon of turmeric. Slowly add your liquid (milk or rose water) until you have a thick, glue-like consistency. If you are using a binder like gelatin, dissolve it in the warm liquid first before adding the powders.
3. Directional Application
Use a brush or your fingers to apply a thick layer to the areas where you want to remove hair. Crucially, apply the mask in the direction of hair growth. This ensures the paste coats the entire hair shaft down to the skin level.
4. The Waiting Game
Allow the mask to dry completely. This usually takes twenty to thirty minutes. You will feel your skin tightening significantly. Avoid talking or smiling during this time, as cracking the mask will reduce its effectiveness in pulling the hair.
5. The Removal Process
This is where the magic happens. Once the mask is bone-dry, begin peeling it off in the opposite direction of hair growth. Use quick, small motions. If you did not use a binder and the mask is crumbly, use dampened fingers to scrub the mask off in circular motions, which effectively “rolls” the hair out of the follicle.
Managing the Yellow Tint: Tips and Tricks
The biggest fear most people have when trying a turmeric-based remedy is walking away with a yellow face. This is a valid concern, especially if you have a very fair complexion. However, it is easily managed.
First, always try to source Kasturi Manjal. Unlike the turmeric used in curry, this variety is specifically for cosmetic use and does not stain the skin. If you only have kitchen turmeric, use it sparingly. If you do find a yellow tint remaining after removal, do not panic. Simply soak a cotton pad in whole milk or a gentle facial oil (like jojoba or coconut oil) and wipe your face. The fats in the milk or oil will bind to the turmeric pigment and lift it right off.
Important Safety Considerations
Even though this is a natural remedy, “natural” does not always mean “non-irritating.” Turmeric is a powerful spice, and your skin might react to it. Always perform a patch test on your jawline or the inside of your wrist before applying it to your entire face. Wait twenty-four hours to ensure there is no redness or itching.
Additionally, if you have active acne, cystic breakouts, or very broken skin, skip the peel-off method. The pulling sensation can aggravate inflamed skin and spread bacteria. Stick to a simple turmeric and honey spot treatment instead until your skin has healed.
What to Expect: Results Over Time
It is important to manage expectations. This is not a magic eraser that will stop hair from growing forever after one use. Traditional remedies are a marathon, not a sprint. After your first session, you will notice that your skin feels incredibly smooth and the “peach fuzz” is gone, making your foundation look like a second skin.
With consistent use (typically once a week), many enthusiasts report that the hair grows back finer, lighter, and much slower. Over several months, the cumulative effect of the turmeric can lead to a significant reduction in visible facial hair. It is a ritual of patience that rewards you with long-term skin health rather than just a quick fix.
The Holistic Benefits Beyond Hair Removal
What makes this remedy truly special is that it serves as a full-spectrum facial treatment. While you are focusing on hair removal, the ingredients are working overtime on other issues. Chickpea flour is an incredible deep cleanser that pulls toxins and excess sebum from the pores, making it a favorite for those with oily or combination skin.
The antioxidant boost from the turmeric helps to combat environmental damage from pollution and UV exposure. By the time you finish the treatment, you aren’t just hair-free; you have effectively performed a detoxifying, brightening, and exfoliating facial. It is this multi-tasking nature that has kept this remedy alive for over a hundred years.
Conclusion: Embracing Ancient Wisdom
In our fast-paced world, there is something deeply grounding about returning to the beauty rituals of the past. The 100 year old facial hair removal remedy shown in this viral trend is more than just a way to groom; it is a testament to the power of simple, natural ingredients. By stepping away from harsh chemicals and embracing the golden glow of turmeric and chickpea flour, you are treating your skin with the respect it deserves.
Whether you are looking to save money, avoid irritation, or simply want to try a piece of history, this DIY mask is a must-try. Just remember to be patient, perform your patch tests, and enjoy the process of self-care. Your skin will thank you for the extra attention and the chemical-free break. So, the next time you see those little hairs catching the light, head to your kitchen instead of the salon. You might just find that the best beauty solution was waiting for you in your spice cabinet all along.
Would you like me to create a printable recipe card or a shopping list for these ingredients?