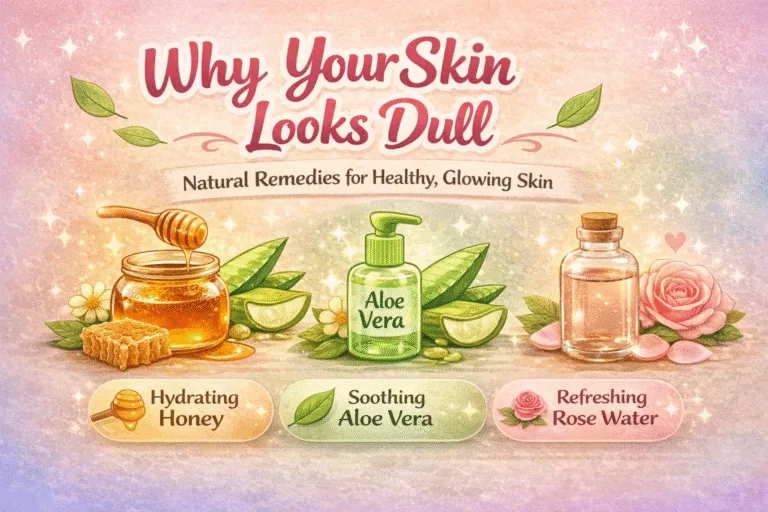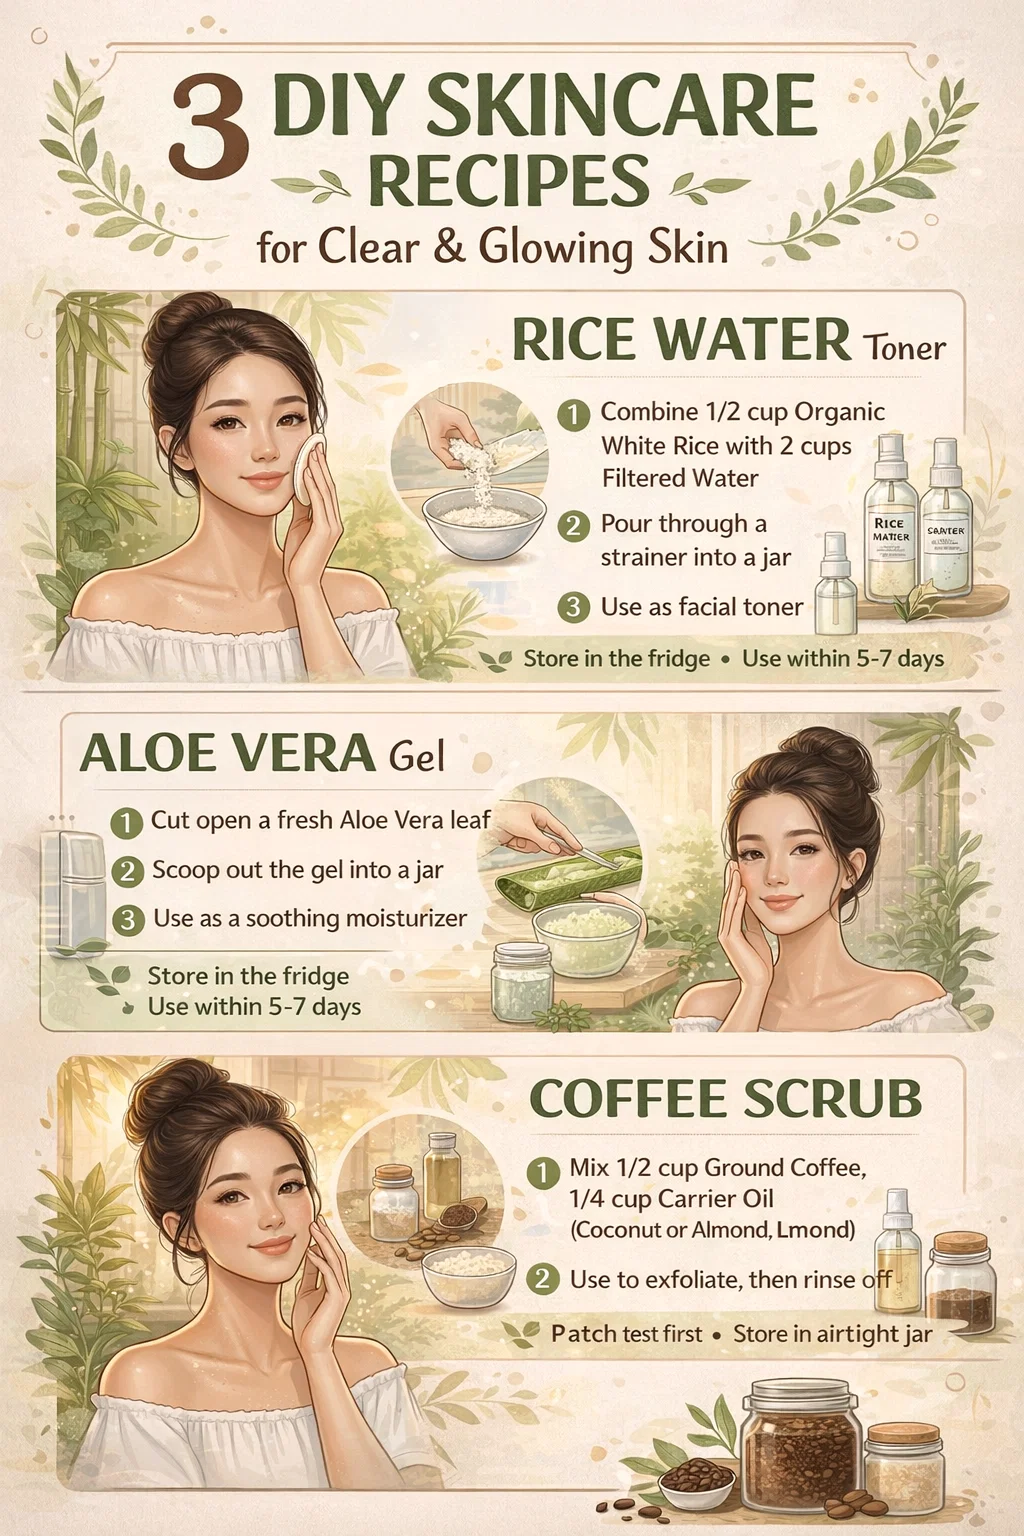
3 DIY Skincare Recipes for Glass Skin Rice Water, Aloe Vera Coffee Scrub
Welcome to a journey where your pantry meets your vanity! There is something immensely satisfying about crafting your own beauty products. It is not just about saving money; it is about taking full control over what touches your skin. You are ditching the complex chemical cocktails for pure, potent, and single-source ingredients. The image we are discussing today is a treasure trove of this exact philosophy, providing us with three phenomenal, time-tested recipes: Rice Water Toner, Fresh Aloe Vera Gel, and a robust Coffee Body Scrub. Let’s dive deep into the secrets of these simple, powerful, and natural skincare solutions.
The Resurgence of Ancient Beauty Secrets
In our modern quest for the perfect ‘glass skin’ or ‘clear complexion,’ it is easy to get lost in an endless aisle of expensive serums and exotic botanical extracts. But sometimes, the most effective answers are the ones that cultures have used for centuries, passing them down through generations. The beauty rituals from Asia and the Americas are often rooted in ingredients found right in the kitchen. What makes these recipes so enduring is their inherent simplicity and undeniable results. The image perfectly encapsulates this, presenting easy to follow guides that require minimal equipment and just a few key components.
This is not just skincare; it is a moment of self-care. It is about taking the time to peel an aloe leaf or slowly brew a potent toner. These activities can be grounding and meditative, a wonderful contrast to our fast-paced lives. When you make these products yourself, you are infusing them with intention, and that energy translates to how you treat your own body.
Recipe 1: Your Path to Porcelain ‘Glass Skin’ – Rice Water Toner
First up is the holy grail of radiant skin: Rice Water. This unassuming ingredient is the secret behind the luminous, poreless complexions often associated with Japanese and Korean beauty traditions. Rice water is packed with vitamins, minerals, and amino acids that are incredibly beneficial for the skin. It works as a gentle astringent, helps to brighten the complexion, minimizes the appearance of pores, and can even calm inflammation. The image provides a flawless step-by-step to harness this ancient magic.
Your Ingredients Checklist:
- 1/2 cup Organic White Rice: Use high-quality, organic rice to ensure you are not introducing pesticides to your delicate facial skin.
- 1 cup Filtered Water: Using filtered or distilled water prevents chlorine and other tap water impurities from being part of your toner.
How to Prepare the Toner: Step by Step
The process is wonderfully simple but requires a little patience to unlock the full potential of the rice.
First, place your rice in a bowl and cover it with the filtered water. Give it a gentle swish to get the process started. Now, here is the secret sauce: let the rice soak for a full 12 hours. This period is crucial for the water to absorb all the starch, vitamins, and minerals. Some people even prefer to let it ferment for a day to enhance the nutritional profile and lower the pH of the water, making it even more skin-friendly.
After the long soak, your water will be a beautiful, milky white. This is your toner! Take a mesh strainer and position it over a clean bowl. Carefully pour the rice and water mixture through the strainer. The strainer catches all the rice grains, which you can discard (or use in a homemade face mask, but that’s a story for another post!). What you have left in the bowl is your precious rice water toner.
The final step is to carefully pour your new toner into a clean spray bottle or a bottle with a tight-fitting lid. And voila! You have made your own premium-grade rice water toner, all for pennies.
Essential Tips for Using and Storing:
Because this product is all-natural with absolutely no preservatives, you must treat it like fresh produce. Store your rice water toner immediately in the refrigerator. Use it consistently but aim to finish the entire bottle within 5-7 days. If you notice any sour smell, discard it and make a fresh batch. Apply it after cleansing your face, either by spritzing it directly or using a cotton pad. It’s the first step to that coveted glass skin glow.
Recipe 2: The Original Skin Soother – How to Extract Fresh Aloe Vera Gel
Moving on to another skincare superstar: Aloe Vera. This plant is a true miracle of nature, often referred to as the ‘plant of immortality’ in ancient Egypt. While you can buy bottled aloe gel, nothing compares to the potency and freshness of gel straight from the leaf. It is intensely hydrating, incredibly cooling, and possesses powerful anti-inflammatory and antibacterial properties. It is perfect for sunburns, acne-prone skin, dry patches, and pretty much everything in between.
The key here, as shown in the middle panel of our guide, is not just about the recipe, but about the technique of extraction. This is a critical point that many people miss, often resulting in a product that is not as pure or safe as it could be.
Your Ingredients Checklist:
- 1 fresh Aloe Vera Leaf (mature): Choose a larger, plumper leaf from an established plant. The older, mature leaves have the highest concentration of that precious gel.
How to Prepare Fresh Gel: The Crucial Technique
This is where the magic (and a bit of caution) comes in. The image highlights a step that is paramount: letting the leaf bleed. When you first cut an aloe leaf, you might notice a yellowish-orange sap called ‘aloin’ seeping out from the base. This substance can be incredibly irritating to the skin for many people and should be completely removed before extraction.
Take your freshly cut leaf and stand it up vertically in a glass or jar. The guide suggests letting it bleed for at least 30 minutes. This gives the aloin ample time to drain away, ensuring your final gel is pure and non-irritating. Don’t skip this step!
Once the bleeding is complete and you’ve rinsed the leaf, it is time for extraction. With clean hands and a sharp knife, carefully peel off the flat skin of the leaf. You want to work slowly, filleting the skin as thinly as possible to save all the gel underneath. This will reveal the glistening, translucent inner gel.
With a clean spoon, you can then effortlessly scoop out the thick, mucilaginous gel into a clean bowl. For a smoother, easier application, you can place this raw gel into a blender and pulse it for a few seconds. The resulting liquid gel is perfect for spreading.
Essential Tips for Use and Storage:
Similar to the rice water, fresh aloe gel is highly perishable. Refrigerate it immediately. This has a fantastic side benefit: the cold gel is a heavenly treat on a hot day or to soothe an angry breakout. Plan to use your fresh gel within 7-10 days for peak freshness. You can apply it generously as a face mask, a moisturizer, or spot treatment.
Recipe 3: Energize Your Skin and Your Senses – The Coffee Scrub
The final recipe in our natural beauty trio is a powerful, invigorating Coffee Scrub. This is the heavy lifter of the bunch, designed to address dullness, dry skin, and, as the image prominently features, to aid in ‘tan removal.’ Coffee scrubs are a sensation for good reason. The caffeine is not just a morning jolt for your brain; it is a vasoconstrictor for your skin, which can temporarily reduce the appearance of redness and puffiness. More importantly, the mechanical exfoliation from the coffee grounds removes dead skin cells, revealing the brighter, smoother skin underneath.
This recipe is incredibly straightforward and a fantastic way to repurpose your morning coffee grounds, though using fresh, unused grounds will give you a more potent caffeine kick and a better exfoliation.
Wait, before we start mixing, a small but important note of caution for our lovely darker-skinned readers: while the guide lists this scrub for “Tan Removal,” this is a phrase for mechanical exfoliation. It is not about lightening your beautiful natural skin tone, but about buffing away dead, dull, and hyperpigmented surface skin cells, which can make any complexion, from porcelain to deep mocha, look more vibrant and even. We always want to be precise with our language in the beauty world! The brown sugar also acts as a gentler, secondary exfoliant, making this scrub suitable for less rough areas of your body.
Your Ingredients Checklist:
- 1/2 cup Ground Coffee: Again, fresh grounds are potent, but you can absolutely use dry, used grounds from your coffee maker for an eco-friendly scrub.
- 1/4 cup Carrier Oil: This is what gives the scrub its slip and leaves your skin feeling incredibly soft. Coconut oil and almond oil are fantastic choices, but you could also use olive, jojoba, or avocado oil.
- 1/4 cup Brown Sugar (optional): This adds another layer of exfoliation and a hint of sweetness to the aroma.
How to Prepare the Scrub:
This process could not be easier. Simply take your carrier oil (if you’re using coconut oil, you may need to gently melt it first) and pour it into your bowl of ground coffee. Add in your brown sugar, if you’re using it.
Now, take a spoon and start mixing. You are looking to combine all the ingredients until you have a thick, fragrant paste. It should feel like damp sand. If it is too dry, add a tiny bit more oil. If it is too oily, add a few more coffee grounds. The final product is a sensory-rich scrub that smells like a gourmet coffee shop.
Essential Tips for Use and Storage:
Before you jump in the shower, always remember the golden rule of new skincare: the patch test. Apply a small amount of the scrub to the inside of your elbow or wrist and wait 24 hours to ensure you have no negative reaction. When you are ready for a full-body experience, take the scrub with you into the shower or tub. In circular motions, gently massage the scrub onto your skin, paying special attention to areas that tend to be rougher like elbows, knees, and heels. The aroma alone will boost your mood! After massaging, rinse it off with warm water.
For storage, transfer your scrub to a clean, airtight jar. Unlike the first two recipes, this one has a longer shelf life due to the lack of water in the recipe, but we still recommend using it within a month or two for the best fragrance and to ensure it remains fresh. Just be careful not to introduce too much water into the jar while you are using it in the shower, as water is the enemy of all-natural, preservative-free products.
Conclusion
And there you have it: three incredible, natural skincare recipes directly from the wonderful illustrated guide. This is about more than just a quick beauty fix. It is about a fundamental shift in perspective. It is about trusting in the power of simple, natural ingredients and taking back the power over what we use on our bodies. The results speak for themselves, not just in the short-term glow, but in the long-term health and vitality of your skin. So, go ahead, rummage in your pantry, and treat your skin to the fresh, nourishing goodness it deserves. The journey to glass skin, a clear complexion, and a vibrant body might just begin with the ingredients you already own. We can’t wait to hear about your experience. Go forth and glow, naturally!