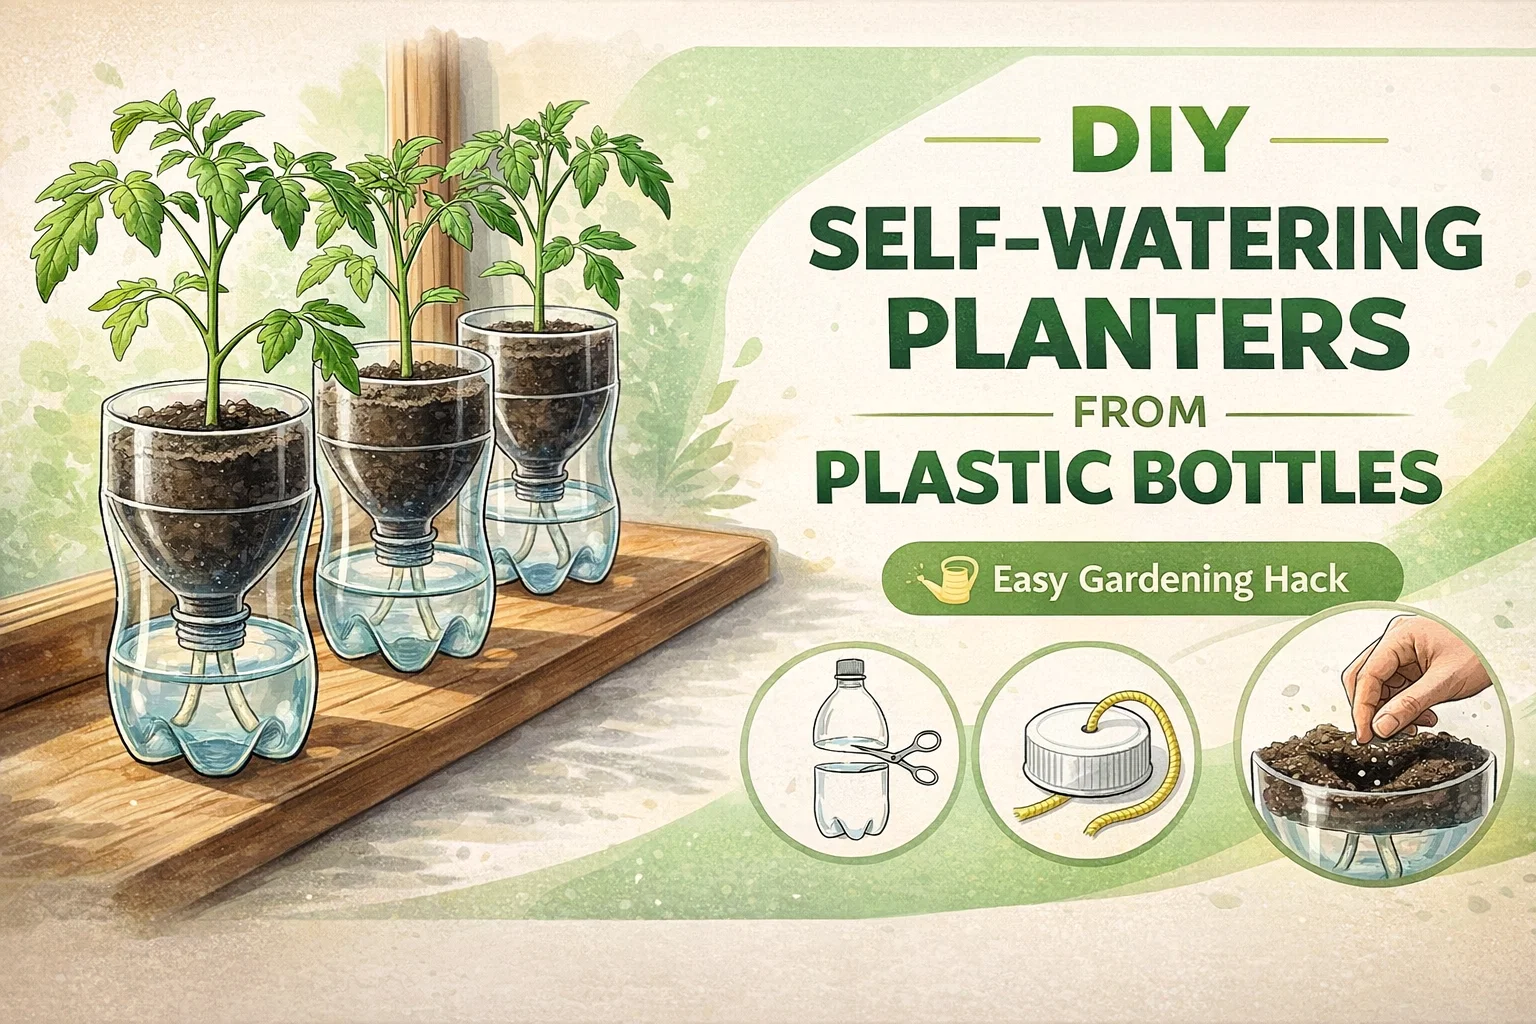
How to Make a DIY Self-Watering Planter from Plastic Bottles Easy Upcycled Gardening Hack
Turning a simple plastic bottle into a thriving home for your plants is one of the most rewarding ways to practice sustainable gardening. If you have ever felt guilty about the amount of plastic waste that passes through your household, or if you have struggled to keep your seedlings hydrated during a busy work week, this DIY self watering planter is the perfect solution. It is a brilliant blend of upcycling and functional design that ensures your plants get exactly the amount of moisture they need without constant supervision. By using a basic wicking system, you can create a consistent environment for growth that rivals expensive store bought systems.
The Magic of Wicking Systems in Home Gardening
The core principle behind this project is capillary action. In nature, plants draw water from the soil through their roots using this exact mechanism. In our DIY version, we use a piece of wicking fabric to act as a bridge between the water reservoir at the bottom and the soil at the top. This allows the soil to stay perfectly damp, never soggy and never bone dry. It is an ideal setup for moisture loving plants like tomatoes, peppers, and various kitchen herbs.
One of the biggest challenges for new gardeners is mastering the art of watering. Overwatering can lead to root rot, while underwatering can stunt growth or kill a delicate seedling in hours. A self watering planter removes that human error. The plant effectively drinks when it is thirsty, creating a self sustaining loop that saves you time and conserves water resources.
Materials You Will Need for Your Upcycled Planter
Before you start cutting, gather these simple household items. You likely already have most of these in your recycling bin or craft drawer. Using what you have is the best way to stay true to the spirit of sustainable living.
- A 2 liter plastic bottle: Clear bottles are great because they allow you to monitor the water level and root health easily.
- Wicking fabric: A strip of Pellon Thermolam Plus or a similar absorbent material like a cotton rope or strips of an old cotton t-shirt.
- Potting mix: Use a lightweight, soil less blend featuring peat or coco coir and perlite to ensure the wicking action works efficiently.
- A sharp pair of scissors or a utility knife: You will need these to make clean cuts through the plastic.
- Organic fertilizer: A small handful mixed into your soil will provide the nutrients your plant needs to thrive.
- Seeds or seedlings: Tomato seeds are a fantastic choice for this specific setup.
Step by Step Guide to Building Your Planter
Preparing the Bottle
Start by cleaning your 2 liter bottle thoroughly to remove any soda residue. Measure approximately 5 inches up from the base and mark a line around the circumference. Use your scissors to cut the bottle in half. The bottom portion will serve as your water reservoir, while the top portion, when flipped upside down, becomes the planting funnel. This design is compact enough to fit on most windowsills, making it perfect for apartment dwellers.
Creating Ventilation and Drainage
Near the top of the bottle, which is the wider part of your funnel, puncture several small holes about one inch apart. These holes are crucial for air circulation. Roots need oxygen just as much as they need water, and these vents prevent the soil from becoming anaerobic. Ensure the holes are about 3/8 of an inch in diameter to allow for sufficient airflow without letting too much soil escape.
Setting Up the Wick
Cut two strips of your chosen wicking fabric, roughly 4 inches long and 1 inch wide. Feed these through the neck of the bottle so that half of the fabric hangs out into the reservoir and the other half sits inside the funnel where the soil will go. If you are using a bottle cap, you can drill a hole through it to thread the fabric, but leaving the cap off entirely often works just as well to ensure the fabric makes direct contact with the water.
The Best Soil Mix for Self Watering Containers
Not all soil is created equal when it comes to wicking. If you use heavy garden soil, it will become compacted and waterlogged, which suffocates the roots. For the best results, use a damp, soil less potting mix. A combination of peat moss and perlite is highly recommended because it is airy and has excellent capillary properties. Before adding it to your planter, pre moisten the mix so it is damp to the touch but not dripping.
As you fill the funnel, mix in a handful of organic fertilizer. Since the water is coming from the bottom, the nutrients will stay concentrated in the soil rather than washing away as they might with traditional top watering. Place your seeds or a small seedling in the center and press down gently to ensure good contact with the growing medium.
Why This Method Beats Traditional Pots
Consistency is Key
Plants thrive on stability. Traditional pots undergo a cycle of being soaked and then drying out. This fluctuation can stress the plant, leading to split fruit in tomatoes or bitter leaves in herbs. A self watering system provides a steady, even moisture level that keeps the plant in a state of constant growth.
Water Conservation
In a traditional pot, a lot of water is lost to evaporation from the surface or drainage out the bottom. In this DIY setup, the water is contained in a closed reservoir at the base. The only way out is through the plant itself. This makes it an incredibly efficient way to garden, especially in drier climates or during the heat of summer.
Space Saving for Urban Gardeners
You do not need a backyard to be a gardener. These bottle planters are narrow and tall, allowing you to line up several of them along a sunny window ledge. You can grow a variety of greens, herbs, and small vegetables in a space no larger than a few square feet. It is the ultimate hack for anyone looking to increase their self sufficiency in a city environment.
Common Challenges and How to Solve Them
Algae Growth in the Reservoir
Since the reservoir is clear and sits in the sun, you might eventually see some green algae forming in the water. While this is usually harmless to the plant, it can look untidy. To prevent this, you can wrap the bottom half of the bottle in a piece of dark fabric or paint it with an opaque color to block out the light. This keeps the water clear and fresh.
Monitoring Water Levels
It is easy to forget to check the reservoir because the plant looks so healthy. Make it a habit to peek at the bottom of the bottle every few days. You want to refill it before it goes completely dry to maintain the wicking tension. When you do refill, you can simply lift the top funnel out, pour water into the base, and set the funnel back in place.
Expanding Your Indoor Garden
Once you have mastered the tomato seedling, consider what else you can grow. Herbs like basil, mint, and cilantro love the consistent moisture of a wicking system. You can even experiment with different bottle sizes. Smaller 500ml bottles are great for single herbs, while larger jugs can be used for more substantial leafy greens like kale or Swiss chard.
This project is also a fantastic educational tool for children. They can see the roots growing through the clear plastic and watch the water level drop as the plant drinks. It is a tangible way to teach them about biology, recycling, and the origins of their food.
Embracing a Greener Lifestyle
Small actions lead to big changes. Choosing to reuse a plastic bottle instead of throwing it away might seem like a minor gesture, but it represents a shift in mindset. You are looking at waste as a resource. When you combine that with the act of growing your own food, you are reducing your carbon footprint and connecting with the natural world in a meaningful way.
Gardening should be accessible to everyone, regardless of their budget or living situation. This DIY project removes the barrier of expensive equipment and replaces it with creativity and basic science. It proves that with a little bit of ingenuity, you can create life and beauty out of items that were destined for the landfill.
Final Thoughts on Your DIY Journey
Creating your own self watering planters is just the beginning of a more sustainable gardening journey. As you watch your seedlings grow into strong, productive plants, you will find yourself looking for more ways to integrate upcycling into your daily routine. This simple hack saves time, saves water, and brings a touch of vibrant green into your home. Grab a bottle, find a sunny spot, and start planting today. You will be amazed at how much you can grow with just a little bit of plastic and a lot of heart. Happy gardening!