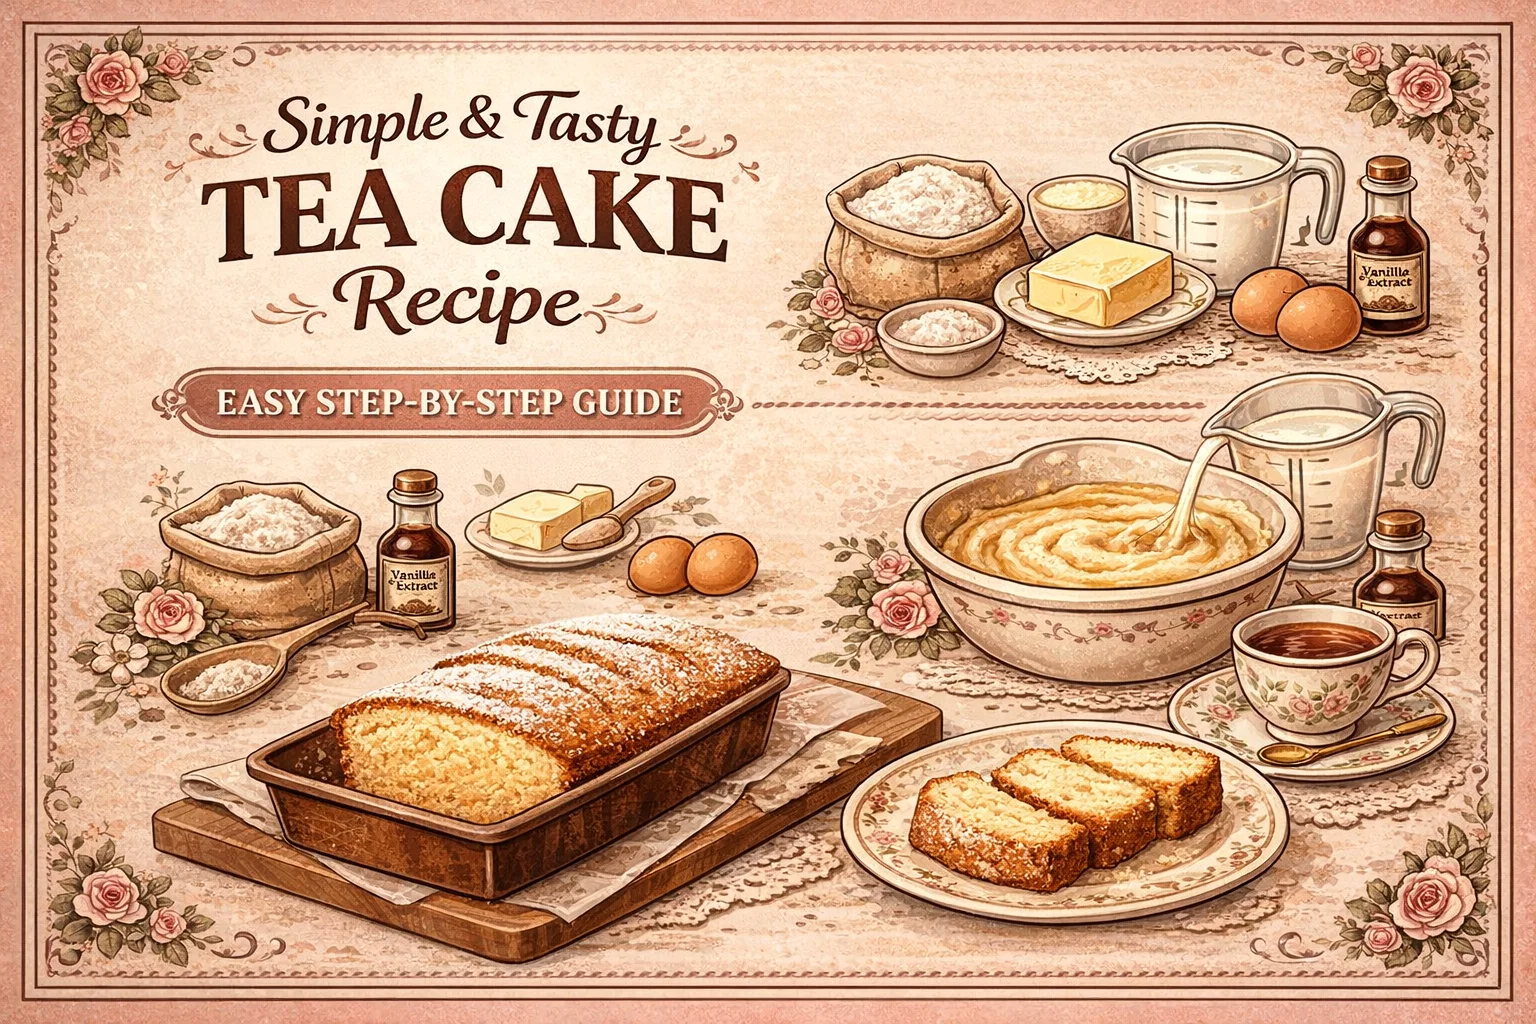
Easy Simple Tea Cake Recipe Moist Fluffy Vanilla Loaf Cake with Tea
There is something undeniably nostalgic about a golden loaf of cake sitting on a lace doily, paired with a steaming cup of Earl Grey. It evokes memories of quiet afternoons, grandmothers’ kitchens, and the simple joy of a treat made from scratch. If you have been searching for that perfect, dependable recipe that turns basic pantry staples into a centerpiece, look no further. This Simple and Tasty Tea Cake is the quintessential bake for beginners and seasoned pros alike. It is light, buttery, and possesses a delicate crumb that practically melts in your mouth.
The beauty of a tea cake lies in its restraint. Unlike heavy chocolate cakes or over-the-top frosted confections, a tea cake relies on high quality vanilla and the perfect balance of fats to create a satisfying experience. It is not trying to be the loudest dessert in the room; it is the comforting companion to your caffeine fix. In this guide, we will break down exactly how to achieve that iconic golden crust and fluffy interior using the visual roadmap provided in our classic recipe illustration.
The Essential Ingredients for a Perfect Tea Cake
Before you preheat your oven to 350°F, let us take a closer look at the building blocks of this recipe. The secret to a professional-grade loaf is using ingredients at the right temperature and measuring them with precision. Even though this is a simple recipe, the chemistry of baking remains the same.
All-Purpose Flour and Leavening
The foundation of our cake is 1.5 cups of all-purpose flour. This provides the structure needed to hold the shape of a loaf without being as heavy as bread flour. To give it that signature lift, we use 0.5 teaspoon of baking powder. This leavening agent reacts with the heat of the oven to create tiny air bubbles, resulting in a sponge that is airy rather than dense.
The Importance of Softened Butter
You will notice the recipe calls for 0.5 cup of unsalted butter, specifically noted as softened. This is perhaps the most crucial step in the preparation. Softened butter (not melted!) allows for the proper aeration during the creaming process. If your butter is too cold, it will not trap the air needed for a fluffy cake. If it is melted, your cake will be greasy and flat. Aim for a temperature where your finger leaves a slight indentation when you press the stick.
Sugar and Flavor Enhancers
We use 0.5 cup of granulated sugar to provide sweetness and help with the browning of the crust. To round out the profile, a full teaspoon of high-quality vanilla extract is essential. Since this is a simple cake, the vanilla really shines through, so try to use a pure extract rather than an imitation version. A pinch of salt is the final touch, acting as a flavor enhancer that makes the sweetness pop.
Step-by-Step Guide to the One-Loaf Wonder
Baking is often seen as a daunting task, but the method for this tea cake is incredibly linear and logical. By following these four distinct phases, you ensure that your batter is stable and your cake rises evenly every single time.
Step 1: Preparing the Dry Foundation
Start by whisking together your flour, baking powder, and salt in a medium-sized bowl. Many people skip this step and just dump everything into the wet ingredients, but whisking serves two purposes. First, it ensures the baking powder is evenly distributed so you do not end up with large holes in one side of the cake and a flat bottom on the other. Second, it aerates the flour, removing any large clumps before they hit the moisture.
Step 2: The Creaming Method
This is where the magic happens. In a separate large bowl, beat your softened butter and sugar for at least two full minutes. You are looking for a transformation from a grainy, yellow paste to a pale, fluffy mixture. Once that texture is achieved, mix in your eggs one at a time, followed by the vanilla extract. Adding eggs gradually prevents the emulsion from breaking, keeping your batter smooth and creamy.
Step 3: Combining the Elements
Now, it is time to bring the wet and dry components together. Alternate adding your dry mixture and the 0.5 cup of milk into the butter mixture. Start with a bit of flour, then some milk, and finish with the remaining flour. This technique prevents the gluten in the flour from over-developing, which is the main cause of “tough” cakes. Mix until just combined. Over-mixing at this stage will lead to a rubbery texture, so keep a light hand.
Step 4: The Golden Bake
Pour your smooth batter into a greased loaf pan. Smooth the top with a spatula to ensure an even rise. Slide it into your preheated oven at 350°F and set your timer for 45 minutes. Every oven is slightly different, so keep an eye on it as it nears the 55-minute mark. You are looking for a deep golden brown color on the top and a toothpick that comes out clean when inserted into the thickest part of the loaf.
Pro Tips for Customizing Your Tea Cake
Once you have mastered the base recipe shown in the illustration, you can start to get creative. A tea cake is a fantastic “canvas” for other flavors. While the vanilla version is a timeless classic, here are a few ways to elevate the experience depending on the occasion.
- Lemon Zest: Grate the zest of one large lemon into the sugar before creaming it with the butter. The oils from the lemon will infuse the entire cake with a bright, citrusy aroma.
- Almond Variation: Swap half of the vanilla extract for almond extract and top the batter with sliced almonds before baking for an elegant, nutty crunch.
- Berry Swirl: Gently fold in half a cup of fresh blueberries or raspberries right before pouring the batter into the pan. Just be sure to toss them in a teaspoon of flour first so they do not sink to the bottom.
- The Earl Grey Infusion: For a true tea lover’s cake, warm the milk and steep a tea bag in it for five minutes. Let the milk cool before adding it to the batter to give the cake a subtle bergamot flavor.
The Art of Serving: Beyond the Slice
The visual guide suggests dusting the cake with powdered sugar, which is a simple and effective way to make it look professional. However, how you serve the cake can change the entire vibe of your afternoon. If you are serving it warm, a small dollop of clotted cream or a spread of high-quality strawberry preserves can take it to the next level.
For a formal afternoon tea, slice the cake into uniform rectangles rather than thick wedges. This makes it easier to handle alongside finger sandwiches and scones. If you are enjoying a casual morning, a thick slice toasted slightly with a bit of salted butter is a revelation. Because this cake is not overly sweet, it functions beautifully at any time of the day.
Common Baking Questions and Troubleshooting
Even with a simple recipe, things can occasionally go sideways. If your cake did not turn out exactly like the picture, here are a few potential reasons why and how to fix them for next time.
Why did my cake sink in the middle?
A sinking center usually happens for two reasons. Either the oven door was opened too early, causing a sudden temperature drop before the structure was set, or the baking powder was expired. Always check the date on your leavening agents! Another possibility is over-creaming the butter and sugar, which incorporates too much air that eventually collapses.
How do I prevent the cake from sticking to the pan?
While greasing the pan with butter or oil is a start, the best insurance policy is a parchment paper “sling.” Cut a strip of parchment paper that fits the width of your pan and hangs over the long sides. Once the cake is cool, you can simply lift it out by the edges of the paper without any risk of the bottom staying behind.
What is the best way to store leftovers?
This tea cake stays moist for about three to four days if kept in an airtight container at room temperature. If you want to keep it longer, you can wrap individual slices in plastic wrap and freeze them. They thaw beautifully in a toaster oven, making for a quick and easy breakfast or snack later in the week.
Bringing the Tea Cake Tradition Home
In a world that often feels rushed and digital, taking the time to measure out flour and whisk eggs is a form of meditation. The Simple and Tasty Tea Cake is more than just a recipe; it is an invitation to slow down. Whether you are baking this for a friend who needs a pick-me-up or simply to fill your own home with the scent of vanilla and butter, the result is always rewarding.
The beauty of this specific recipe is its accessibility. You do not need fancy equipment or hard-to-find ingredients. With just a loaf pan, a whisk, and an hour of your time, you can create something that looks like it came straight out of a boutique bakery. The next time you find yourself with a spare afternoon, follow these steps, put the kettle on, and enjoy the simple luxury of a homemade tea cake.
Baking is a journey of constant learning, and every loaf you bake brings you closer to perfection. We hope this deep dive into our favorite tea cake recipe inspires you to get into the kitchen and start whisking. After all, the best memories are often made over a shared slice of cake and a good conversation.
Would you like me to suggest some specific tea pairings for this cake, or perhaps provide a recipe for a simple lemon glaze to pour over the top?