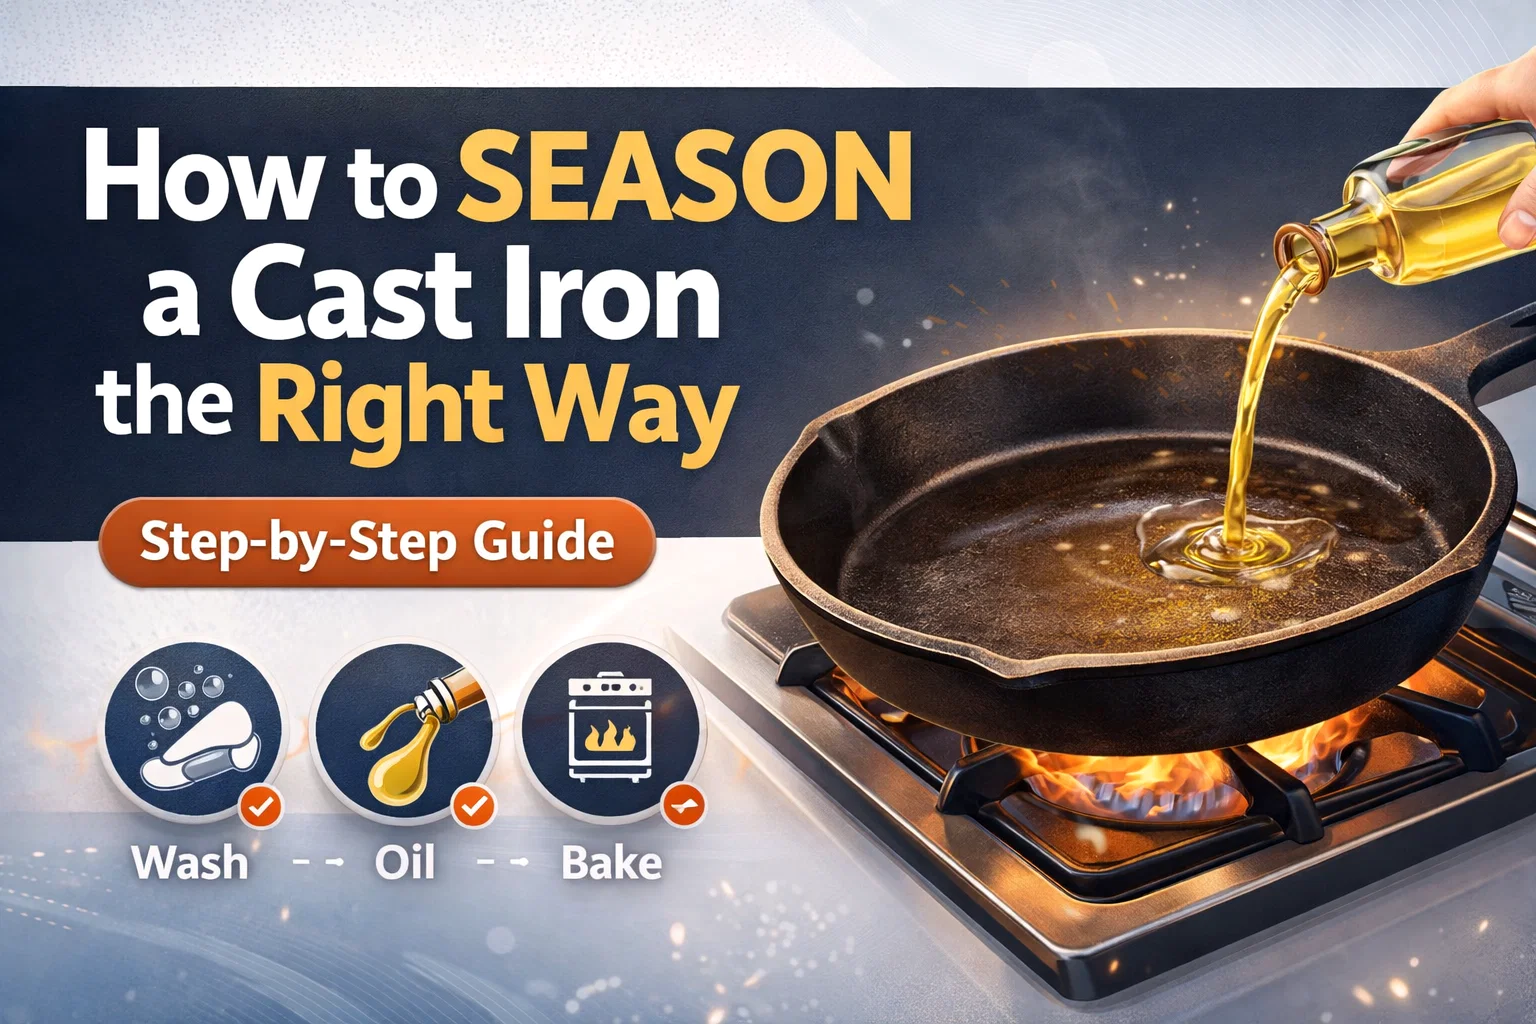
How to Season a Cast Iron Skillet Step-by-Step Guide for a Perfect Non-Stick Surface
If there is one kitchen tool that carries the weight of history and the promise of a perfect sear, it is the cast iron skillet. Passed down through generations, these heavy, black pans are the workhorses of the culinary world. However, for many home cooks, the idea of maintaining cast iron feels like a high-stakes science project. We have all heard the warnings: do not use soap, do not leave it wet, and whatever you do, make sure it is seasoned. The truth is that seasoning a cast iron skillet is not a mysterious ritual reserved for professional chefs. It is a straightforward, logical process that transforms a piece of raw metal into a non-stick masterpiece. By following a few specific steps, you can ensure your cookware remains slick, rust-free, and ready for everything from Sunday morning eggs to a perfectly crusty cornbread.
Understanding the Science of Seasoning
Before diving into the how-to, it is essential to understand what seasoning actually is. Many people mistake seasoning for a simple layer of grease or a leftover flavor from previous meals. In reality, seasoning is the result of a chemical process called polymerization. When a thin layer of fat or oil is heated to a specific temperature, it undergoes a transformation. The liquid oil turns into a hard, plastic-like solid that bonds to the metal surface. This creates a protective barrier that prevents oxygen and moisture from reaching the iron, which is what stops rust in its tracks. More importantly for the cook, this smooth surface provides the non-stick properties that make cast iron so desirable. Every time you cook with fat in your pan, you are adding tiny layers to this seasoning, making it stronger and slicker over time.
Choosing the Right Oil for the Job
Not all oils are created equal when it comes to seasoning. To achieve a durable finish, you need an oil with a high smoke point that is also rich in unsaturated fats. Many modern cooks swear by grapeseed oil or flaxseed oil because they bond effectively to the metal. Traditionalists often stick with vegetable oil or shortening, which are affordable and highly effective. The key is to avoid fats that can go rancid easily, like unrefined butter or extra virgin olive oil, which have low smoke points and can leave a sticky, uneven residue. For the method outlined here, a standard vegetable oil or a dedicated cast iron seasoning blend works best to achieve that deep, black patina we all crave.
Step 1: The Initial Wash
The first step in the seasoning process often surprises people: you need to use soap. While the common myth suggests that soap is the enemy of cast iron, a mild dish soap is actually necessary when you are starting a fresh seasoning cycle or cleaning a brand-new pan. You need to scrub away any old food particles, burnt-on grease, or factory coatings. Use hot, soapy water and a stiff brush or a scouring pad. The goal here is to get down to the base layer of the pan. Once you have a clean surface, the new oil will have the best possible chance to bond directly to the iron. Remember, this is one of the few times you will use heavy soap on your skillet, so make it count.
Step 2: The Importance of Total Dryness
Water is the primary enemy of cast iron. Even a small amount of moisture trapped under a layer of oil can lead to rust spots. After washing your pan, do not just let it air dry. Use a clean rag or a heavy-duty paper towel to wipe every single inch of the metal. Pay close attention to the handle, the exterior, and the edges. To be absolutely sure the pan is bone-dry, many experts recommend placing the skillet on a warm stove burner for a minute or two. The heat will evaporate any microscopic droplets of water lingering in the pores of the iron, leaving you with a perfectly dry canvas for the oiling stage.
Preheating for Better Absorption
While the pan is drying, it is a great idea to let it get slightly warm. Applying oil to a cold pan is fine, but applying it to a warm pan is better. When iron is heated, the pores of the metal expand. This allows the oil to penetrate more deeply and creates a more uniform bond during the baking process. A few minutes on a low flame is all it takes to prep the metal for the next stage.
Step 3: The Heating Phase
Before you apply your oil, you want to bring the pan up to a steady temperature on the stovetop. Heat the skillet over medium heat for about five to ten minutes. This controlled heating ensures that the metal is uniform in temperature. It also serves as a final check to ensure all moisture is gone. If you see the pan start to look a bit dull or “thirsty,” it is ready for the fat. This step bridges the gap between cleaning and the actual chemical transformation of the oil.
Step 4: Applying the Oil
Now comes the most critical part of the process: applying the fat. You do not need much; about one tablespoon of oil is usually sufficient for a standard twelve-inch skillet. Pour the oil into the center of the warm pan. It might seem like you should use more to get a “thick” coating, but that is actually a mistake. Thicker layers of oil do not polymerize correctly; instead, they become sticky and gummy. The secret to a perfect cast iron finish is multiple thin layers rather than one thick one. One tablespoon provides enough coverage to coat the entire surface without leaving excess puddles.
Step 5: Coating the Entire Surface
Using a clean paper towel or a lint-free cloth, spread the oil across the entire interior of the skillet. Do not stop there. A properly seasoned pan is protected on all sides. Rub the oil over the exterior, the bottom, and especially the handle. You want the skillet to look shiny and wet, but not dripping. Once you have covered every inch, take a fresh, dry paper towel and wipe the pan again as if you are trying to remove all the oil you just put on. It sounds counterintuitive, but you only want a microscopic film left behind. If the pan looks like it is dripping with oil, wipe it more. This thin film is what creates the glass-like finish after baking.
Step 6: The Bake
The real magic happens in the oven. Heat your oven to 450 degrees Fahrenheit. This high temperature is necessary to reach the smoke point of the oil and trigger the polymerization process. Place your skillet inside the oven upside down. This is a pro-tip that ensures any excess oil drips out of the pan rather than pooling in the bottom and creating sticky spots. To keep your oven clean, place a sheet of aluminum foil or a large baking tray on the bottom rack to catch any stray drips. Let the pan bake for a full hour. During this time, the house might smell a bit like hot oil, so it is a good idea to turn on a kitchen vent or crack a window.
The Cooling Process
Once the hour is up, turn off the oven but do not remove the pan immediately. Let the skillet cool down slowly inside the oven. Sudden temperature changes can occasionally cause the metal to warp or the seasoning to crack. Allowing it to come back to room temperature gradually ensures the bond is stable and the finish is set.
Step 7: Repeat for Perfection
When you pull the pan out after the first bake, it will already look better. However, one round of seasoning is rarely enough for a truly non-stick experience. Most experts recommend repeating the oiling and baking process two to three more times. Each cycle adds another ultra-thin layer of polymer, filling in the microscopic pits of the iron and building a durable, resilient surface. It takes a bit of time, but the result is a pan that can handle fried eggs without a struggle.
Maintaining Your Hard Work
Now that your pan is seasoned, the goal is to keep it that way. Maintenance is much easier than the initial seasoning. After each use, rinse the pan with hot water. If there are stuck-on bits of food, use a chainmail scrubber or a bit of coarse salt to gently abrade the surface without stripping the seasoning. Most importantly, always dry the pan immediately and apply a very light coat of oil before storing it in a dry place. If you notice the surface looking dull or if food starts to stick, simply run through the seasoning process again. Cast iron is incredibly forgiving; you can always bring it back to life.
Conclusion: A Lifetime of Flavorful Cooking
Seasoning a cast iron skillet is more than just a maintenance task; it is an investment in your culinary future. By taking the time to wash, dry, heat, oil, and bake your pan, you are creating a kitchen tool that actually gets better the more you use it. There is a deep sense of satisfaction that comes from seeing a well-maintained skillet gleaming on your stovetop. It represents a connection to a simpler way of cooking where quality materials and proper care result in superior meals. Whether you are searing a steak to perfection or baking a giant chocolate chip cookie, your seasoned cast iron will be your most reliable companion. Follow this method, stay consistent with your care, and you will enjoy a perfect non-stick surface for decades to come. Happy cooking!