DIY Easy Napkin Folding Tutorial 35×35 cm Napkin Art Ideas for Dinner Table Decor
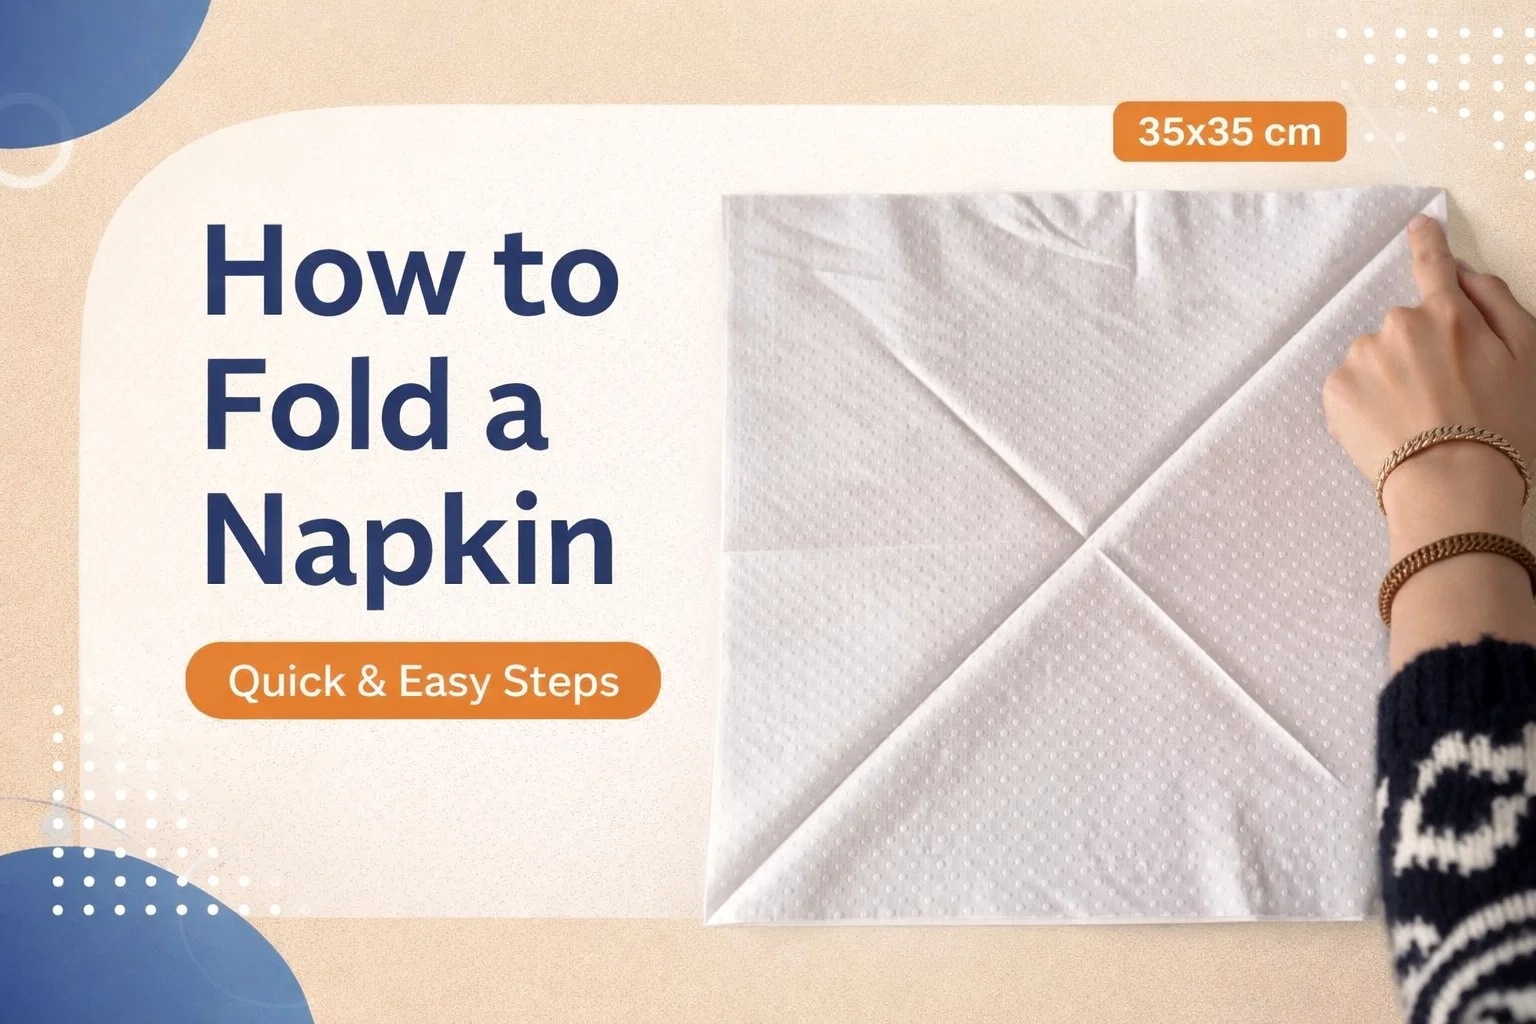
Mastering the art of the perfect table setting often feels like a task reserved for high end restaurants or professional event planners. However, the secret to a stunning dinner display usually lies in the smallest details, such as the way you fold your napkins. In the image provided, we see a simple yet foundational step in creating a beautiful tablescape: the diagonal crease on a 35×35 cm square napkin. This specific measurement is the gold standard for lunch and informal dinner napkins, offering enough fabric to create structure without overwhelming the place setting. Whether you are hosting a festive holiday brunch or a quiet Tuesday night dinner, learning to manipulate a simple square of fabric can transform your dining room atmosphere instantly.
The Importance of Napkin Selection and Sizing
Before you even begin the folding process, the material and size of your napkin play a crucial role in the final result. A 35×35 cm napkin is particularly versatile. It is large enough to handle complex folds like the Bishop Hat or the French Pleat, but small enough to look neat when folded into a simple rectangle or triangle. When choosing napkins, consider the weight of the fabric. Starched cotton or linen holds a crease much better than synthetic blends, which is vital when you want those crisp lines shown in the tutorial image.
Paper vs. Cloth: Which Should You Choose?
While the image features a high quality paper napkin with a textured dot pattern, the same techniques apply to cloth. Paper napkins are excellent for casual gatherings, outdoor picnics, or large parties where cleanup needs to be quick. Modern paper napkins often come with embossed patterns that add a tactile element to the table. On the other hand, cloth napkins are the sustainable choice. They add weight, luxury, and a sense of permanence to the meal. If you are practicing your folds for the first time, using a paper napkin is a great way to learn because the paper holds the fold exactly where you press it.
Step by Step: Creating the Foundation Diagonal Fold
The image highlights the very first step in many advanced napkin designs: the corner to corner diagonal alignment. This creates a large triangle which serves as the base for many classic shapes. To achieve this look perfectly, follow these steps:
- Lay it Flat: Start with the napkin completely unfolded on a clean, flat surface. Ensure there are no stray crumbs or moisture on the table that could stain the fabric.
- Identify the Center: As seen in the visual, the goal is to bring one corner across the center point to meet its opposite match.
- The Finger Press: Use your fingertips to press down firmly along the fold. In the image, the hand is shown guiding the edge to ensure the corners meet exactly. Precision here prevents the final shape from looking lopsided.
- Check Your Symmetry: Look at the resulting triangle. The edges should be perfectly flush. If they are not, unfold and try again. Symmetry is the difference between a DIY project and a professional looking table.
Creative Ideas for 35×35 cm Napkin Folds
Once you have mastered the basic diagonal fold, you can move on to more decorative shapes. The 35×35 cm size is ideal because it creates a manageable scale for most dinner plates. Here are a few popular styles you can try once you have reached the stage shown in the image.
The Classic Standing Triangle
This is perhaps the easiest fold to master. After creating the diagonal fold seen in the photo, you simply fold the triangle in half again. When you stand it up on the plate with the open edges facing down, it creates a tent like shape that adds height to your table. Height is a key element in professional food photography and event design because it draws the eye upward and makes the table feel more dynamic.
The Elegant Silverware Pouch
If you want to keep your table looking organized, you can turn your square napkin into a pocket for your forks and knives. This requires a series of rectangular folds rather than the diagonal ones, but it starts with the same flat, square orientation. This is particularly useful for buffet style service where guests need to grab their utensils and napkin all at once.
The Psychology of a Well Set Table
You might wonder why we put so much effort into folding a piece of cloth or paper that is eventually going to be used to wipe a mouth. The answer lies in the psychology of hospitality. When a guest sits down to a table where the napkins are neatly folded, it sends an immediate signal that the host has put thought and care into the evening. It creates a sense of occasion. A well set table tells your friends and family that they are worth the extra five minutes of effort. It elevates a simple meal into an experience.
Setting the Mood with Color and Texture
The white, textured napkin in the image is a blank canvas. White is classic, clean, and professional. It allows the colors of the food to be the star of the show. However, do not be afraid to experiment with color. Deep navy or forest green napkins can make a gold rimmed plate pop, while bright yellow or orange can bring energy to a summer breakfast. Texture also plays a role. The raised dots on the napkin in the photo add a modern, geometric feel that would look great in a minimalist or contemporary home.
Pro Tips for Perfect Folds Every Time
Even the most experienced hosts can struggle with napkins that just won’t stay in place. Here are some professional tips to ensure your table looks like it belongs in a magazine.
- Use Steam: If you are using cloth, a quick hit of steam from an iron while you fold will “set” the shape. This is especially helpful for standing folds that might otherwise flop over.
- Napkin Rings: If you find complex folding too difficult, the diagonal fold can be pulled through a decorative napkin ring. This provides a polished look with almost zero effort.
- Scale Matters: Always ensure your napkin size matches your plate. A 35×35 cm napkin is perfect for a standard 10 inch dinner plate. If you use a massive charger plate, you might want to upgrade to a 50×50 cm napkin.
- Practice Makes Perfect: Do not wait until your guests are knocking on the door to try a new fold. Practice a few days before while you are watching TV so the movements become second nature.
Common Mistakes to Avoid
One of the most common mistakes is using napkins that are too thin. If the material is translucent or flimsy, it will not hold any shape, and your hard work will result in a limp piece of fabric. Another mistake is ignoring the “wrong side” of the fabric. Most napkins have a side where the hem is visible. Always make sure the finished side is the one facing your guests. Finally, avoid over handling the napkins. The more you touch and refold, the more likely the fabric is to become wrinkled or soiled. Try to get the fold right in the first two attempts.
Conclusion: The Final Touch to Your Culinary Creations
At the end of the day, the art of napkin folding is about more than just aesthetics. It is a bridge between the kitchen and the dining room. It prepares the guest for the meal to come and sets a tone of elegance and respect. As shown in the simple 35×35 cm tutorial image, you do not need expensive tools or hours of time to create something beautiful. With just a few precise movements and a bit of creativity, you can turn a basic square of paper or cloth into a work of art. Next time you host a dinner, take those few extra moments to press your creases and align your corners. Your guests will notice the difference, and you will feel a sense of pride in the beautiful environment you have created. Happy folding and bon appetit!