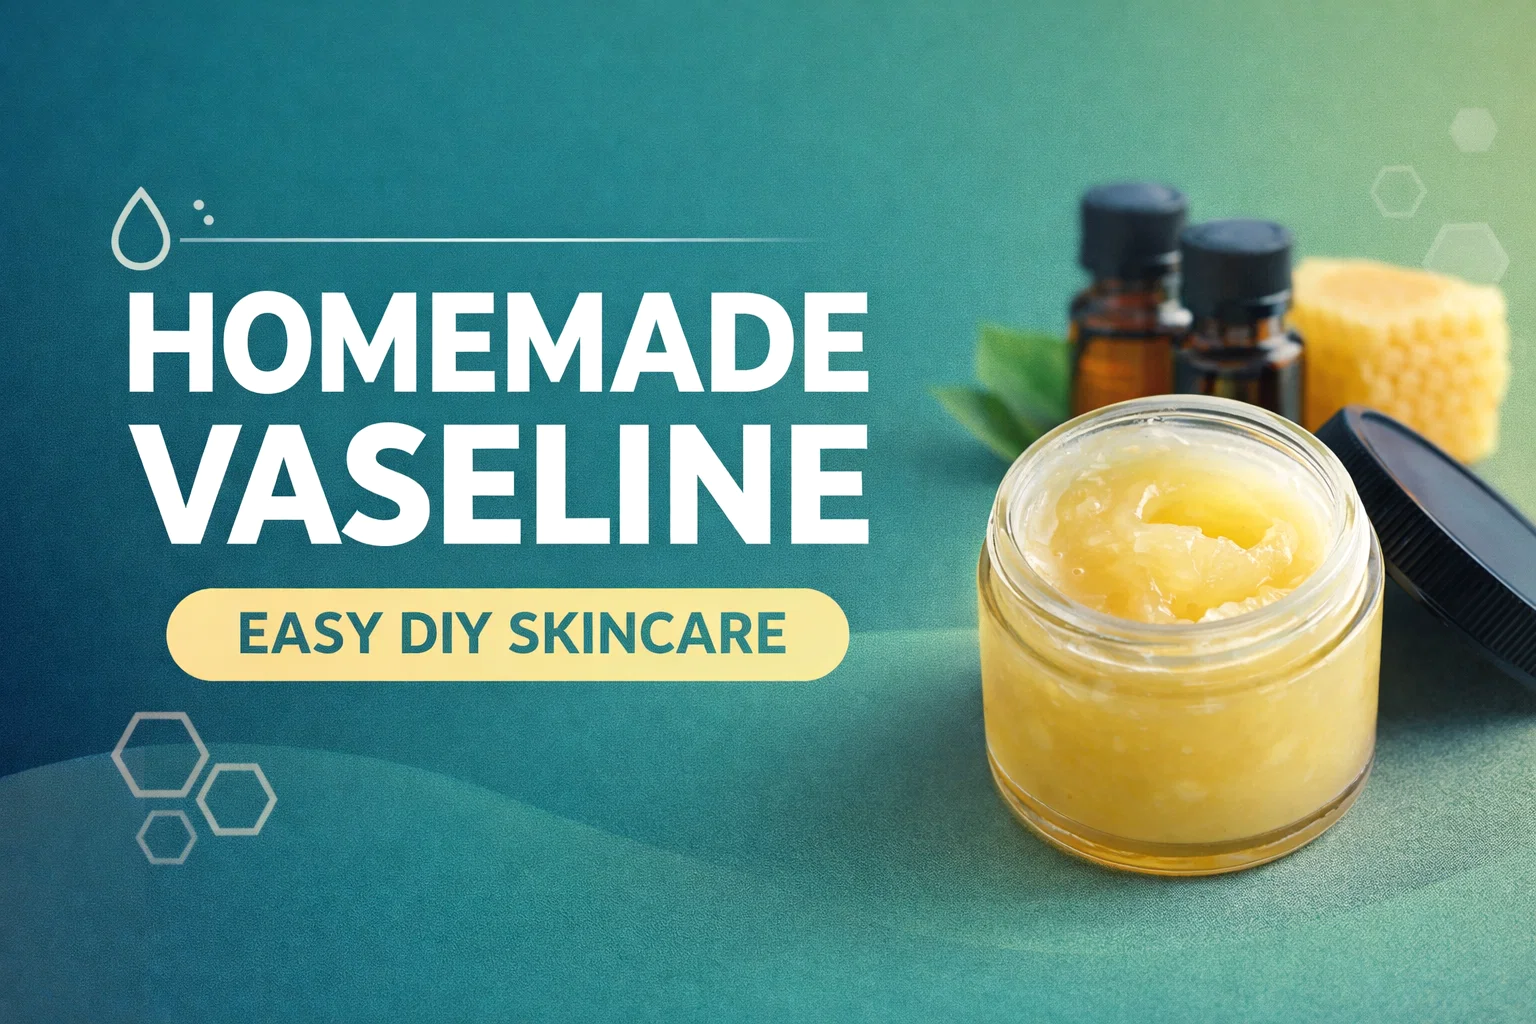
DIY Homemade Vaseline 2-Ingredient Natural Alternative
Welcome to the world of natural, do-it-yourself skincare! If you are looking for a clean, non-toxic way to lock in moisture and protect your skin, you are in the perfect place. For generations, traditional petroleum jelly has been a staple in medicine cabinets around the globe. It is famous for healing chapped lips, soothing dry patches, and acting as a protective barrier against harsh weather. However, as more of us become highly conscious of the ingredients we put on our bodies, the demand for natural, earth-friendly alternatives is absolutely skyrocketing. Today, I am thrilled to share an incredibly easy, two-ingredient homemade vaseline recipe that will completely transform your daily beauty routine.
Creating your own skincare products might sound intimidating at first, but it is actually one of the most rewarding and simple habits you can adopt. By making your own natural moisturizer, you take full control of the ingredients, ensuring that no hidden chemicals, artificial fragrances, or petroleum byproducts touch your skin. This DIY jelly mimics the incredible occlusive properties of commercial brands but uses deep-conditioning gifts from nature to nourish your skin barrier rather than simply sitting on top of it.
Why Switch to a Natural Petroleum Jelly Alternative?
Before we dive into the recipe, it helps to understand why so many beauty enthusiasts are making the switch to homemade alternatives. Traditional petroleum jelly is a byproduct of the oil refining process. While it is highly refined for cosmetic use, many people prefer to avoid fossil fuel derivatives in their personal care routines. Furthermore, traditional vaseline acts as a true occlusive. This means it creates an impenetrable seal over the skin. While this is great for locking in existing moisture, it can also trap dirt, sweat, and bacteria if the skin is not perfectly clean, which might lead to breakouts for those with acne-prone skin.
Our homemade version provides that same desirable protective barrier but allows your skin to breathe just a little bit more. Best of all, the ingredients we are using actually provide vitamins, antioxidants, and active nourishment to your skin cells. It is a win-win situation for your health and your glow!
The Magic of Our Two Simple Ingredients
You will be amazed to learn that you only need two everyday items to create this luxurious balm. Both of these ingredients have been celebrated for centuries in natural medicine and beauty.
Beeswax: Nature’s Ultimate Protector
Beeswax is the structural foundation of our DIY vaseline. It gives the product its firm yet spreadable texture. Beyond its structural role, beeswax is a skincare powerhouse. It is a natural humectant, which means it attracts water molecules from the air and helps keep your skin hydrated over time. It also contains vitamin A, which supports cell turnover and reconstruction. When applied to the skin, beeswax forms a protective, breathable shield that defends against environmental stressors like cold wind and dry indoor heating.
Olive Oil: Deep Hydration and Liquid Gold
To soften the beeswax and create that classic jelly consistency, we rely on high-quality olive oil. Olive oil is incredibly rich in healthy fatty acids, antioxidants, and squalene. Squalene is a lipid that our skin naturally produces, making olive oil exceptionally compatible with our natural skin barrier. It absorbs beautifully, delivering deep hydration without leaving a sticky or tacky residue. The antioxidants in olive oil, particularly vitamin E, help fight off free radicals that contribute to premature aging.
The Easy DIY Homemade Vaseline Recipe
Are you ready to become a kitchen chemist? Gathering your supplies is the hardest part of this entire process. You can whip up a fresh batch of this natural jelly in less than fifteen minutes.
Ingredients You Will Need:
- 1 ounce (1/8 cup) of cosmetic-grade beeswax: You can use beeswax pastilles or grate a solid block. Pastilles melt much faster!
- 1/2 cup of high-quality olive oil: Extra virgin olive oil is fantastic, but you can also use a lighter olive oil if you prefer a milder scent.
Step-by-Step Instructions:
Step 1: Combine the Ingredients. Start by grabbing a small saucepan or setting up a simple double boiler. Place your 1 ounce of beeswax and your 1/2 cup of olive oil into the pan or the top glass bowl of your double boiler.
Step 2: Melt Slowly. Turn your stove to very low heat. Patience is key here! You want to gently warm the oil just enough to melt the beeswax completely. Stir the mixture frequently with a wooden skewer or a dedicated cosmetic spoon to encourage even melting. Never let the mixture come to a boil, as excessive heat can degrade the wonderful healing properties of the olive oil.
Step 3: Pour and Store. Once the liquid is completely transparent and free of any beeswax lumps, carefully remove it from the heat. While the mixture is still warm and liquid, pour it directly into a clean, sterilized glass jar or a collection of small metal cosmetic tins.
Step 4: Cool and Solidify. Let your containers sit completely undisturbed at room temperature. As the mixture cools, it will transform from a golden liquid into a semi-solid, buttery balm. This usually takes an hour or two. Once it is fully set, cap your jars tightly.
Customize Your Jelly: Optional Essential Oil Additions
One of the absolute best parts of making your own skincare is the ability to customize it to your exact needs. While the plain beeswax and olive oil base is practically perfect on its own, you can easily enhance your homemade vaseline by adding a few drops of pure essential oils just before you pour the liquid into your jars. Here are some incredible targeted additions to consider:
Eucalyptus Oil for Respiratory Benefits
If you are battling winter sniffles or seasonal congestion, stir in 5 to 10 drops of eucalyptus essential oil. You can rub this custom blend onto your chest and throat before bed. The natural warmth of your skin will release the invigorating eucalyptus vapors, acting as a soothing, natural vapor rub to help open your airways.
Tea Tree Oil for Antibacterial Properties
Tea tree oil is famous for its natural antibacterial and antifungal properties. Adding a few drops of tea tree oil to your homemade vaseline turns it into a fantastic healing ointment for minor scrapes, bug bites, or troubled cuticles. It is a great protective salve to keep in your first aid kit.
Peppermint Oil for a Cooling Effect
For tired, aching feet or sore muscles, peppermint oil is a game changer. The menthol in peppermint provides a lovely cooling, tingling sensation that instantly refreshes the skin. A peppermint-infused vaseline is the ultimate treat for a DIY foot massage after a long day of standing or walking.
Lavender Oil for Soothing and Relaxation
Lavender is the undisputed queen of calming skincare. Adding lavender essential oil creates a beautiful, aromatic nighttime balm. You can massage it into your hands and dry patches before going to sleep. The gentle floral scent will help quiet your mind, while the rich balm works its moisturizing magic overnight.
Top Ways to Use Your Natural Vaseline
Once you have a jar of this liquid gold sitting on your bathroom counter, you will find endless ways to use it. Because it is completely natural and food-safe, you can use it confidently from head to toe.
- Everyday Lip Balm: Say goodbye to dry, cracked lips. Dab a small amount on your lips throughout the day for a soft, glossy finish that actually heals the delicate skin.
- Cuticle Rescuer: Massage a tiny amount into your nail beds every night to prevent hangnails and promote healthy, strong nail growth.
- Cracked Heel Treatment: Slather a generous layer onto rough heels before bed, slip on a pair of cozy cotton socks, and wake up to remarkably softer feet.
- Gentle Makeup Remover: The oils in this balm easily break down stubborn eye makeup and waterproof mascara. Gently massage a small amount over your eyelids and wipe it away with a warm, damp cloth.
- Chafing Prevention: Apply a light layer to areas prone to chafing before long runs or hikes to create a friction-free barrier.
- Eyebrow Tamer: Use just a microscopic dab on your fingertip to groom and set unruly eyebrows in place all day long.
Important Tips for Storage and Shelf Life
Because this recipe contains absolutely no water, it naturally has a fantastic shelf life without the need for artificial preservatives. Bacteria and mold require water to grow, so as long as you keep moisture out of your jar, your homemade vaseline will last a long time.
Always make sure your hands are clean and dry before dipping your fingers into the balm. Store your jars in a cool, dry place away from direct, harsh sunlight. Extreme heat will cause the balm to melt again, which is not harmful, but it can affect the smooth texture when it re-solidifies. Under proper storage conditions, your DIY jelly should stay fresh and effective for six to twelve months.
Conclusion
Taking a few minutes out of your weekend to whip up this DIY homemade vaseline is a beautiful act of self-care. It proves that you do not need a complicated, expensive vanity full of synthetic products to achieve deeply nourished, glowing skin. With just beeswax, olive oil, and perhaps a dash of your favorite essential oil, you can create a versatile, clean beauty staple that your whole family will love using.
Whether you need a heavy-duty winter moisturizer, a soothing chest rub, or a reliable daily lip balm, this simple recipe delivers incredible results. I highly encourage you to gather these two basic ingredients and try this recipe for yourself. Enjoy your journey into natural DIY skincare, and your skin will undoubtedly thank you for it!