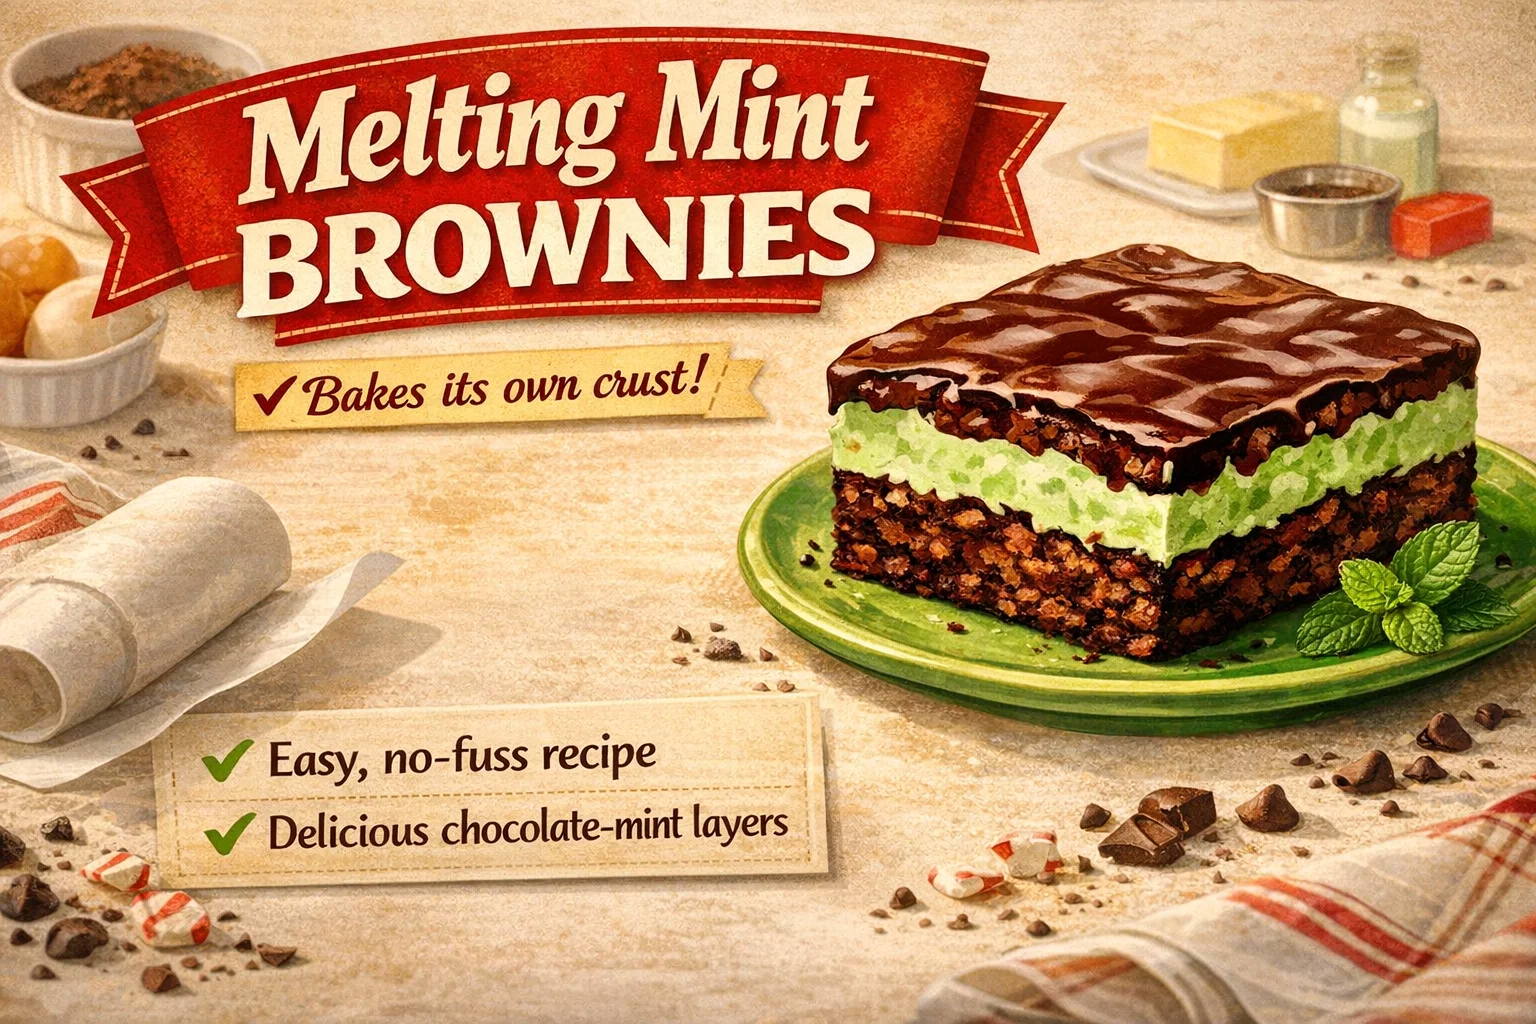
Melting Mint Brownies Recipe Easy Homemade Chocolate Mint Layer Brownies
There is something undeniably magical about the combination of cool peppermint and rich, dark chocolate. It is a flavor profile that transcends seasons, appearing as a refreshing summer treat or a cozy winter indulgence. Today, we are diving deep into a vintage classic that has graced dessert tables for generations: Grandma’s Melting Mint Brownies. This particular recipe is a standout not just for its incredible taste, but for its unique method. Unlike traditional brownies that require a separate crust layer, this clever batter bakes its own crust, creating a multi-textured masterpiece with minimal effort. If you have been searching for that perfect, nostalgic green-layered brownie that tastes like it came straight from a 1950s bake sale, you have found it.
The Anatomy of a Perfect Mint Brownie
What makes a melting mint brownie different from a standard cocoa square? It is all about the architecture of the layers. A truly great mint brownie consists of three distinct components that must work in harmony. First, you have the base. In this specific recipe, the base is a dense, fudgy chocolate layer that provides the structural integrity of the dessert. Because it bakes its own crust, you get a slightly chewy edge with a soft, melt-in-your-mouth center.
The second component is the signature mint frosting. This is where the melting sensation comes into play. By using a combination of softened butter, confectioners sugar, and a touch of sour cream, the filling becomes incredibly silky. The addition of peppermint extract provides that sharp, refreshing contrast to the sugar, while a few drops of green food coloring give it that iconic visual appeal. Finally, many bakers choose to top this with a thin layer of chocolate glaze or melted peppermint patties to seal in the moisture and add an extra snap of texture.
Why the No Fuss Method Wins Every Time
In the world of modern baking, we often overcomplicate things with complex techniques and specialty equipment. The beauty of this vintage recipe lies in its simplicity. The phrase no crust, no fuss is more than just a catchy slogan; it represents a philosophy of efficient baking. By mixing the butter, sugar, and cocoa directly and then incorporating the eggs and flour, you create a batter that naturally settles into a crust-like bottom while remaining tender on top.
This method is ideal for busy parents, holiday hosts, or anyone who wants a gourmet result without spending hours in the kitchen. You do not need to pre-bake a graham cracker base or press shortbread into a pan. Everything happens in one go, allowing the flavors to meld perfectly during the twenty-five to thirty minutes it spends in the oven at 350 degrees.
Essential Ingredients for Success
To achieve the best results, the quality of your ingredients matters. Let’s break down the key players in this recipe:
- Unsweetened Cocoa Powder: This provides the deep chocolate soul of the brownie. Using a high-quality cocoa ensures a rich color and a sophisticated flavor that is not overly sweet.
- Peppermint Extract: A little goes a long way. This is what provides that cooling sensation. Be careful not to substitute with spearmint, as the flavor profile is quite different and will change the nostalgic taste of the dish.
- Sour Cream: This is the secret weapon in the frosting. It adds a subtle tang that cuts through the sweetness of the confectioners sugar and creates a much smoother, creamier mouthfeel.
- Green Food Coloring: While optional for flavor, it is essential for the classic look. It alerts the senses that a refreshing mint experience is coming.
Step by Step Guide to Baking the Best Brownies
Baking is a science, but it is also an art. To ensure your Melting Mint Brownies turn out perfectly every time, follow these refined steps. Start by creaming your melted butter with the sugar and cocoa. This creates a smooth base and ensures the cocoa is fully hydrated. When you add your eggs, beat them in one at a time. This incorporates just enough air to give the brownies a slight lift without making them cake-like. You want to maintain that fudgy density.
Once your flour and baking powder are folded in, pour the batter into a prepared pan. Using parchment paper is a highly recommended tip here. It allows you to lift the entire block of brownies out of the pan once they are cooled, making the frosting and glazing process much cleaner. Bake until a toothpick comes out with just a few moist crumbs. Overbaking is the enemy of the fudge brownie, so keep a close eye on the oven around the twenty-five minute mark.
The Secret to the Creamy Mint Layer
While the brownies cool, you can prepare the mint frosting. The key here is the temperature of your butter. It must be softened but not melted. If the butter is too soft, the frosting will be runny; if it is too cold, it will be lumpy. Sift your confectioners sugar to avoid any grit. When you add the milk, do it one teaspoon at a time. You want a consistency that is thick enough to hold its shape but soft enough to spread without tearing the surface of the brownie base.
Advanced Tips for Professional Results
If you want to take these brownies to the next level, consider a few professional baker secrets. First, the chill factor is non-negotiable. After you have applied the mint frosting and any optional chocolate topping, the brownies must be refrigerated for at least two hours. This setting period allows the layers to bond. If you try to cut them while they are room temperature, the mint layer will squish out the sides, and you will lose those beautiful, sharp lines.
When it comes time to cut, use a large, sharp knife. Dip the knife in hot water and wipe it clean between every single cut. This seems tedious, but it is the only way to get those perfect, bakery-style squares where the green mint layer stays perfectly distinct from the dark chocolate base. If you are feeling extra indulgent, you can press small peppermint patties into the top of the batter before baking for hidden pockets of minty surprise.
Variations for Every Occasion
While the classic version is hard to beat, there are ways to customize this recipe for different holidays. For a festive Christmas version, you can sprinkle crushed candy canes over the top of the frosting. For a decadent dessert at a dinner party, serve a square of the brownie slightly warmed with a scoop of vanilla bean ice cream on the side. The contrast between the warm chocolate and the cool mint frosting creates a sensational experience for the palate.
You can also experiment with the chocolate glaze. Instead of a simple cocoa mix, try melting high-quality semi-sweet chocolate chips with a tablespoon of coconut oil. This creates a Ganache-style topping that has a beautiful shine and a soft snap when bitten into. The coconut oil keeps the chocolate from becoming too hard to cut once refrigerated.
The Nostalgia of Vintage Baking
There is a reason why recipes like Grandma’s Melting Mint Brownies endure through the decades. They represent a time when baking was about sharing love and creating something special from pantry staples. Looking at the vintage illustrations of these recipes reminds us of the joy found in the kitchen. These brownies are more than just a sugar fix; they are a bridge to the past, reminding us of family gatherings, holiday traditions, and the simple pleasure of a homemade treat.
The visual appeal of the vibrant green sandwiched between deep browns is instantly recognizable. It is a look that evokes memories of retro diners and grandmotherly kitchens. In a world of fast food and pre-packaged snacks, taking the time to measure out the cocoa, crack the eggs, and whip up a minty frosting is a rewarding act of mindfulness that results in something far superior to anything you can buy at a store.
Final Thoughts and Serving Suggestions
To truly enjoy these Melting Mint Brownies, serve them with a cold glass of milk or a strong cup of black coffee. The bitterness of the coffee perfectly complements the sweet and minty notes of the brownie. If you are bringing these to a potluck or a party, they are best kept in a cooler or refrigerator until serving time to maintain the integrity of that melting mint layer.
Don’t be afraid to make a double batch. These brownies actually freeze remarkably well. You can wrap individual squares in plastic wrap and store them in a freezer bag for up to three months. This way, whenever the craving for a chocolate-mint fix hits, you have a gourmet treat ready to go. Just let them thaw in the fridge for an hour before eating to regain that perfect texture.
Grandma’s Melting Mint Brownies are a testament to the fact that the best recipes are often the ones that have stood the test of time. With their easy no fuss preparation, their stunning layered appearance, and that unmistakable flavor combination, they are sure to become a staple in your baking repertoire. Whether you are baking for a special occasion or just to brighten up a weekday, these brownies deliver a slice of nostalgia that everyone will love. Happy baking, and enjoy every minty, chocolatey bite!