Matildas Legendary Chocolate Cake Ultra Moist Recipe
Have you ever watched a certain classic nineties movie and found yourself desperately craving a slice of that massive, decadent dessert? You know exactly the scene and the cake I am talking about. Today, we are bringing that childhood fantasy to life with a recipe that perfectly captures the magic of Matilda’s legendary chocolate cake. This is not just any ordinary baked good. It is an ultra-moist, deep chocolate, cafeteria classic that will transport you straight back to the nostalgic days of comforting homemade treats. Get ready to experience the ultimate chocolate lover’s dream, complete with a rich batter and an unforgettable fudge topping.
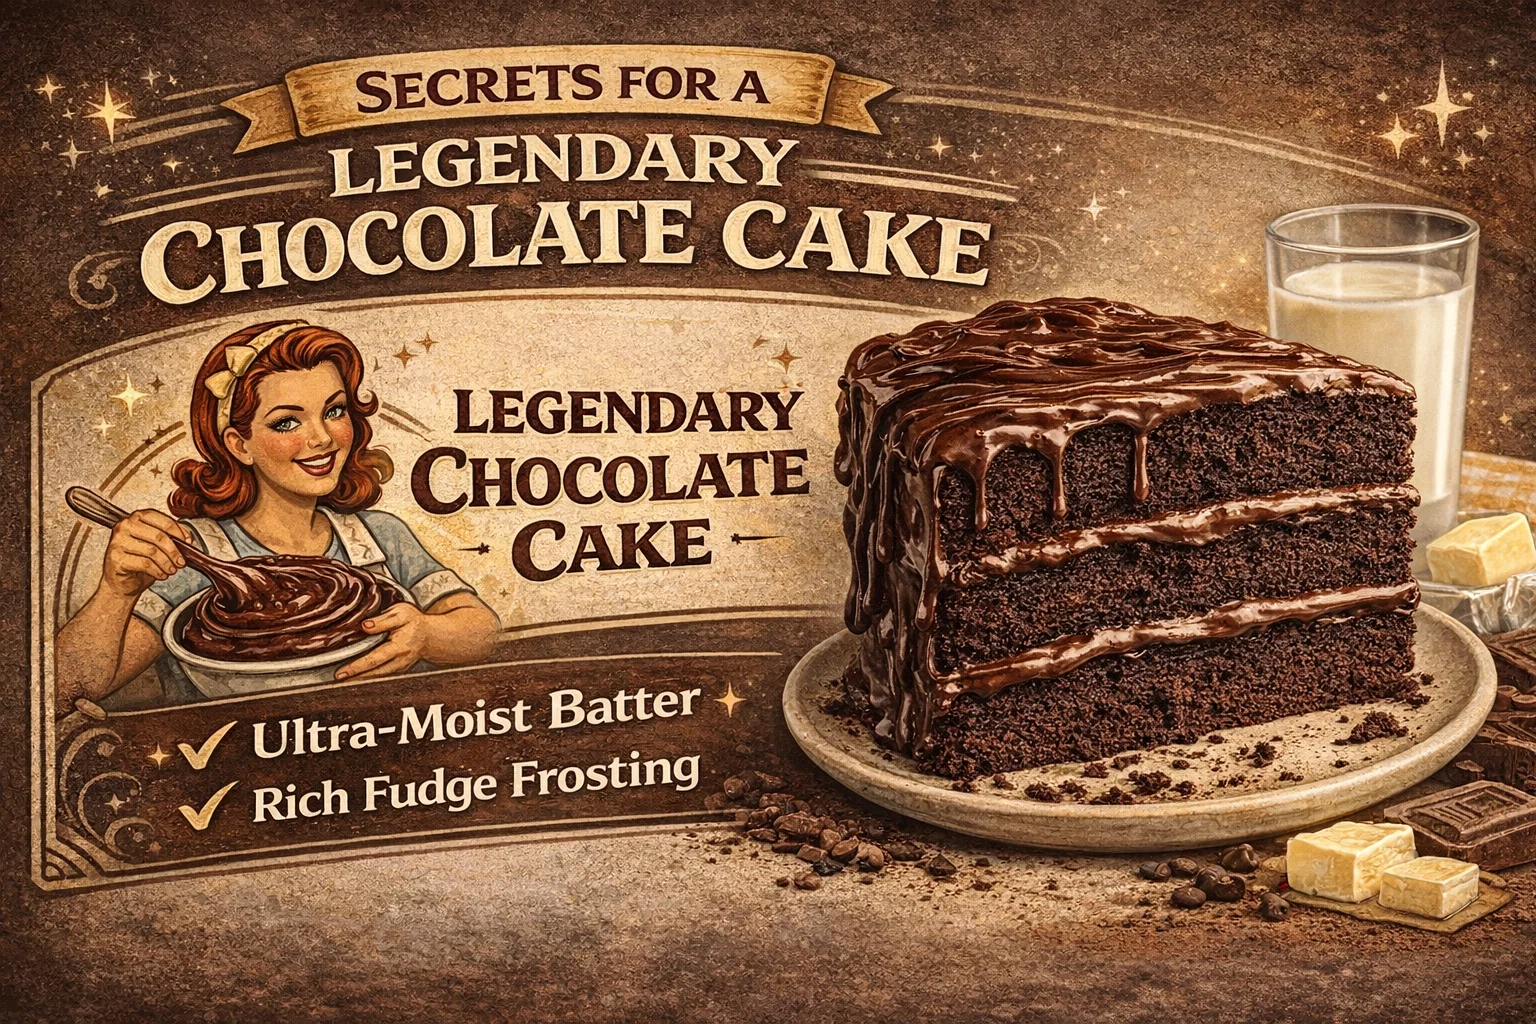
Why This Nostalgic Chocolate Cake is Truly Legendary
There are countless chocolate cake recipes out there, but very few achieve legendary status. What sets this specific cafeteria classic apart from the rest is its unparalleled texture and depth of flavor. A standard cake can sometimes lean towards being dry or overly crumbly, especially when packed with cocoa powder. However, this recipe is specifically engineered to retain a massive amount of moisture. Every single bite melts in your mouth, delivering a profound cocoa punch that is perfectly balanced by the sweet, glossy frosting.
The magic lies in the combination of a perfectly hydrated batter and a frosting that acts more like a soft, set fudge than a traditional fluffy buttercream. When you take a fork to a thick slice, you experience a beautiful textural contrast. The soft, tender crumb of the sponge gives way to the dense, sticky richness of the fudge topping. It is the exact type of dessert that demands a tall glass of cold milk and absolute silence while you savor every single morsel.
The Essential Ingredients for an Ultra-Moist Batter
Creating the famous ultra-moist batter requires a specific lineup of both dry and wet ingredients. While the exact science of baking can sometimes feel intimidating, understanding the role of each component makes the process incredibly straightforward and rewarding.
For your dry ingredients, you will need a high-quality cocoa powder to establish that deep chocolate foundation. Sifting your dry components is absolutely crucial here. Cocoa powder has a notorious tendency to clump, and sifting ensures a perfectly smooth, lump-free batter. The wet ingredients are where the real moisture magic happens. While many traditional cakes rely entirely on butter, this recipe utilizes vegetable oil. Oil remains liquid at room temperature, which guarantees that your cake will stay incredibly soft and tender for days after baking.
To further enhance the richness, we incorporate two large eggs to provide structure and stability to the crumb. A generous cup of sugar sweetens the deal and locks in hydration. Finally, the inclusion of high-quality dark chocolate takes the flavor profile from standard to extraordinary. Melting down about 200 grams of premium dark chocolate and folding it into the batter amplifies the chocolate intensity and contributes to that signature dense, fudgy texture.
The Secret Weapon: The Famous Matilda Fudge Topping
A cake is only as good as its frosting, and in this case, the frosting is the star of the show. We are not making a standard American buttercream packed with powdered sugar. Instead, we are crafting the famous Matilda fudge topping. This topping requires a bit of stovetop magic, but the results are absolutely worth the extra effort.
The process begins by gently melting together your base ingredients. You will stir in rich cocoa powder, a splash of evaporated milk, and granulated sugar over low heat. The evaporated milk is a brilliant old-school bakery secret. It provides a concentrated creaminess without adding excess water, resulting in a frosting that is luscious, thick, and deeply flavorful. You must stir this mixture continuously until it is completely smooth and glossy.
Once the fudge topping is prepared, it is poured generously over the cooled cake layers. As it sets, it transforms into a decadent, slightly sticky glaze that clings beautifully to the sponge. It seals in the moisture of the cake and provides a dramatic, mouth-watering finish that looks like it came straight out of a vintage bakery window.
Step-by-Step Guide to Matilda Style Assembly
Now that you understand the components, it is time to master the assembly. Baking this masterpiece requires patience and a little bit of technique, but the steps are surprisingly simple.
1. Prepare Your Pans and Oven
Begin by preheating your oven to 350 degrees Fahrenheit, which is approximately 175 degrees Celsius. Proper preparation of your cake pans is non-negotiable. Grease them thoroughly and line the bottoms with parchment paper to ensure your delicate, ultra-moist layers release flawlessly after baking.
2. Mix the Batter
In a large mixing bowl, whisk together your wet ingredients until they are perfectly combined and smooth. Gradually fold in your sifted dry ingredients. The key here is to mix only until the batter is just incorporated. Overmixing will develop the gluten in the flour and result in a tough cake, which is the exact opposite of the tender crumb we are aiming to achieve.
3. The Baking Process
Divide the batter evenly between your prepared pans. Slide them into the center of your preheated oven. You will want to bake them until a wooden skewer inserted into the center comes out with just a few moist crumbs attached. Because this is an ultra-moist recipe, the skewer should not come out completely clean, otherwise, the cake will be overbaked.
4. Frosting the Masterpiece
Allow the cake layers to cool completely on a wire rack before you even think about applying the fudge topping. If the cake is even slightly warm, the fudge will melt right off the sides. Once cooled, spread a generous layer of the famous Matilda fudge topping between the layers, and then cascade the rest over the top and sides, allowing it to swoop and swirl naturally.
Lunch Lady Approved Serving Tips
To truly honor the cafeteria classic vibe of this legendary chocolate cake, you must adhere to a few strict serving rules. These are officially lunch lady approved guidelines that guarantee the best possible eating experience.
- Extra Frosting Encouraged: Do not be stingy with the fudge topping. Every bite of cake should have a generous ratio of that sticky, sweet glaze.
- Best Served Thick-Cut: This is not a delicate, dainty dessert. When you slice into this cake, you need to commit. Cut thick, hearty wedges that stand tall on the dessert plate.
- No Skinny Slices Allowed: We firmly believe that if you are going to indulge in the ultimate chocolate cake, you must go all the way. Skinny slices simply will not do justice to the legendary status of this recipe.
The Science of the Perfect Crumb
If you are a baking enthusiast who loves to understand why recipes work, you will appreciate the subtle science behind this deep chocolate cake. Achieving the perfect crumb is a delicate balancing act of hydration, fat content, and leavening.
The combination of cocoa powder and melted dark chocolate can dry out a batter if not properly countered. Cocoa powder acts similarly to flour by absorbing liquid. By utilizing liquid vegetable oil instead of a solid fat, we coat the flour proteins, preventing them from forming strong gluten networks. This results in a cake that is incredibly tender. Furthermore, the slightly acidic nature of the cocoa powder reacts brilliantly with the leavening agents, providing a beautiful lift and creating tiny air pockets throughout the sponge. These air pockets are then immediately filled with the moisture from the oil and the richness of the sugar, creating that dense yet remarkably soft texture.
Frequently Asked Questions About This Recipe
Can I make this legendary chocolate cake ahead of time?
Absolutely. In fact, many bakers argue that the flavor and texture of this ultra-moist cake actually improve on the second day. The moisture has time to evenly distribute, and the fudge topping sets beautifully. You can bake the layers a day in advance, wrap them tightly in plastic wrap, and store them at room temperature before frosting.
How should I store the leftover cake?
To keep the cake as moist as possible, store any leftovers in an airtight container at room temperature for up to four days. Storing it in the refrigerator can actually draw out moisture and cause the crumb to dry out prematurely. If you live in a very warm climate, you may need to refrigerate it to prevent the fudge topping from melting, but always bring the slices back to room temperature before serving.
Can I freeze the baked cake layers?
Yes, freezing the layers is a fantastic way to prep ahead. Once the un-frosted layers are completely cool, wrap them tightly in a double layer of plastic wrap and a layer of aluminum foil. They can be frozen for up to three months. Thaw them overnight in the refrigerator or at room temperature before assembling with the freshly made fudge topping.
Conclusion
Baking Matilda’s legendary chocolate cake is an experience that brings absolute joy to any kitchen. From the moment you whisk together the deep, ultra-moist batter to the final pour of the famous fudge topping, you are crafting a dessert that is practically guaranteed to create lasting memories. By following these straightforward steps and embracing the lunch lady approved serving rules, you will produce a cafeteria classic that rivals any professional bakery. Gather your ingredients, prepare your pans, and get ready to enjoy the most decadent, thick-cut slice of chocolate heaven you have ever tasted. Happy baking!