DIY Better-Than-Botox Collagen Night Cream Recipe for Glowing Youthful Skin
If you have ever looked in the mirror and wished for a magic wand to erase fine lines without the hefty price tag or the needles, you are in the right place. We all want that youthful, bouncy glow, but the skincare industry often leads us toward expensive chemical treatments that feel more like medical procedures than self care. What if the secret to firm, radiant skin was actually sitting in your pantry and herbal cabinet? Enter the DIY Better Than Botox Collagen Night Cream. This homemade miracle worker is designed to nourish your skin deeply while you sleep, using the power of natural fats, soothing botanicals, and active proteins to redefine your evening ritual.
Why Choose a Homemade Collagen Night Cream?
Commercial anti aging creams often come with a long list of ingredients that are difficult to pronounce. Many of these synthetic additives serve as stabilizers or preservatives rather than active skin boosters. When you make your own night cream, you are the master of your formula. You know exactly what is going into the jar, which means no parabens, no synthetic fragrances, and no hidden fillers. This specific recipe focuses on high quality fats and moisture magnets that mimic the skin’s natural lipid barrier, making it incredibly effective for those with dry or maturing skin.
The Power of Topical Collagen
Collagen is the most abundant protein in our bodies, acting as the scaffolding that keeps our skin tight and smooth. As we age, our natural collagen production begins to slow down, leading to the sagging and wrinkles we often associate with getting older. While many argue about the molecular weight of collagen and its ability to penetrate the dermis, applying it topically in a rich, occlusive cream helps to lock in moisture and create a protective film. This gives the skin an immediate plumped appearance and supports the skin’s surface integrity, making those fine lines look significantly less noticeable by morning.
Breaking Down the Ingredients: The Oil Phase
Every great cream starts with a solid foundation. In cosmetic chemistry, we divide the process into phases. The Oil Phase consists of the heavy hitters that provide the “slip” and the deep nourishment your skin craves during its nightly repair cycle.
Shea Butter: The Ultimate Skin Softener
Shea butter is the heart of this recipe. Extracted from the nuts of the shea tree, it is packed with fatty acids and vitamins. It acts as an emollient that softens and hydrates the skin. Because it contains high concentrations of stearic and oleic acids, it creates a breathable barrier that prevents transepidermal water loss. If you struggle with dry patches or a dull complexion, shea butter is your best friend.
Coconut Oil and Sweet Almond Oil
Coconut oil is famous for its antimicrobial properties, but in this cream, it serves as a wonderful carrier that helps the other ingredients sink in. Complementing it is Sweet Almond Oil, which is rich in Vitamin A and E. Almond oil is light enough to not clog pores but heavy enough to deliver intense hydration. It helps to even out skin tone and can even reduce the appearance of scarring over time.
The Water Phase: Hydration and Soothing
While oils nourish, the Water Phase is what actually hydrates. Without water, skin becomes brittle. In this recipe, we use two of nature’s most cooling and healing liquids to ensure your face feels refreshed and calm.
Aloe Vera Gel: The Healer
Aloe vera is legendary for its ability to soothe inflammation. Whether you have spent too much time in the sun or have sensitive skin that reacts to the environment, aloe vera provides a cooling sensation that reduces redness. It also contains polysaccharides that help give the skin a “lifted” feel as the cream dries down and absorbs.
Rose Water: The Divine Toner
Rose water is more than just a beautiful scent. It is a natural astringent that helps to tighten pores and maintain the skin’s pH balance. It adds a touch of luxury to the DIY process, turning a simple craft into a high end apothecary experience. The antioxidants in rose water also help to strengthen skin cells and regenerate skin tissues.
Supercharging Your Cream with Additives
The “Botox” effect of this cream comes from the additives. These are the concentrated ingredients that target specific skin concerns like oxidative stress and cell turnover.
- Vitamin E Oil: A powerful antioxidant that neutralizes free radicals and acts as a natural preservative for the oils in your recipe.
- Glycerin: A humectant that pulls moisture from the air into your skin. It ensures that the hydration from the aloe and rose water stays put.
- Frankincense Essential Oil: Often called the king of oils, frankincense is renowned for its ability to support cellular function and reduce the appearance of sunspots.
- Lavender Essential Oil: Perfect for a night cream, lavender relaxes the mind for sleep while providing antiseptic benefits to the skin.
- Collagen Capsules: By breaking open a high quality collagen capsule into the mix, you provide the structural proteins necessary for that firm, “bouncy” skin texture.
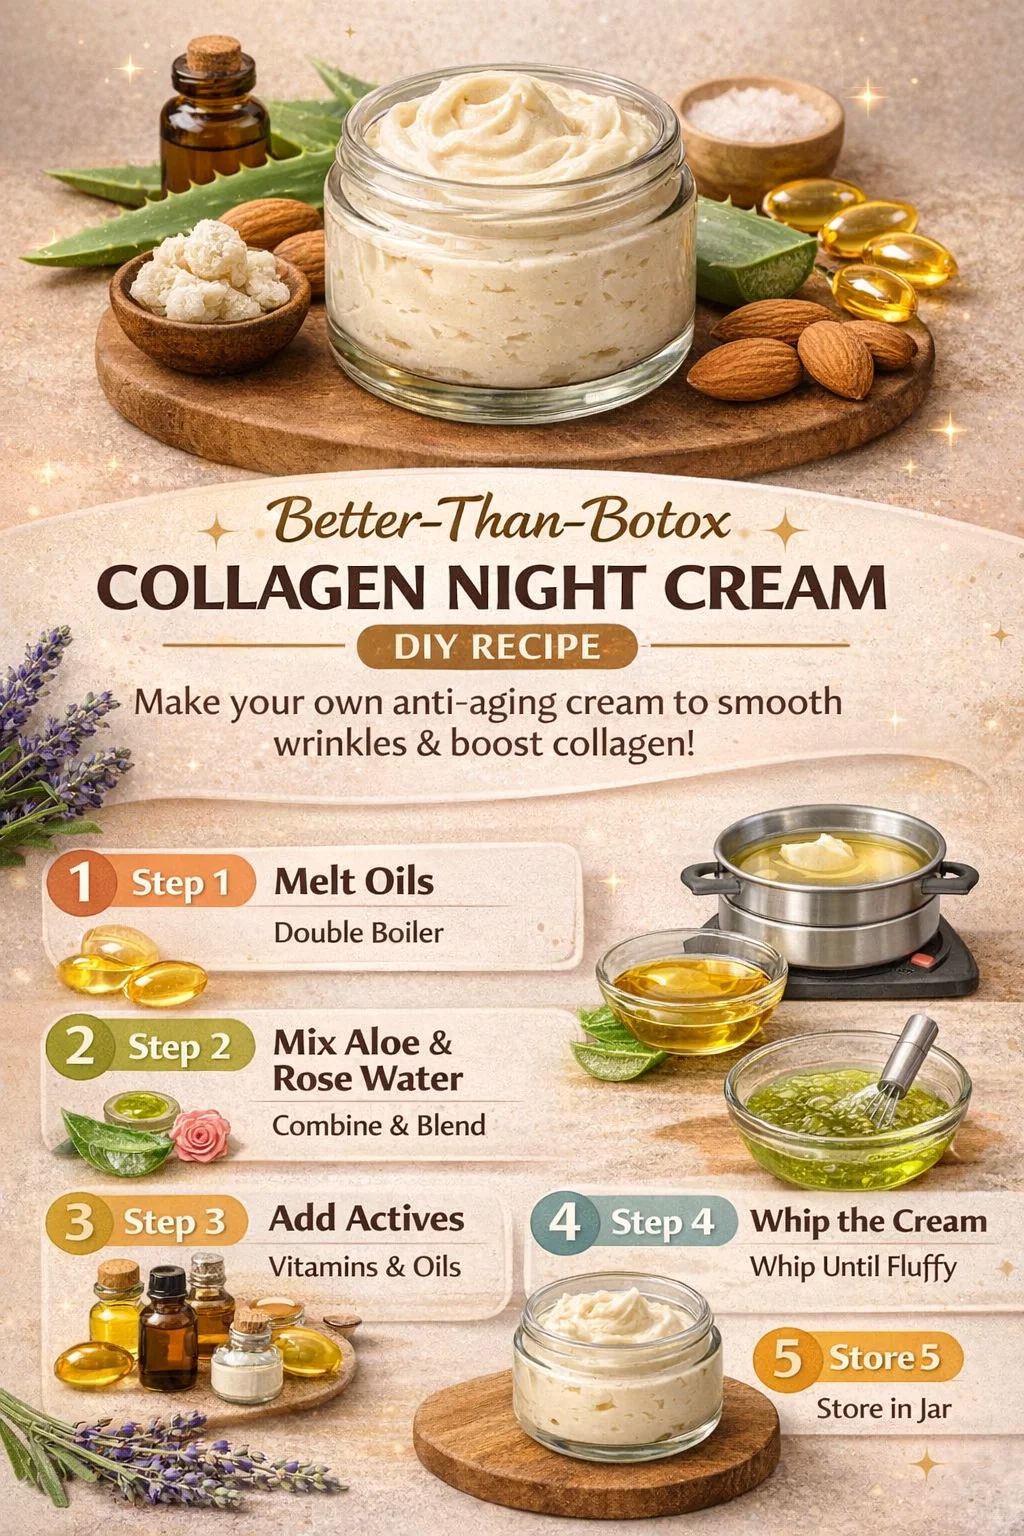
Step by Step Guide: How to Make Your Night Cream
Creating this cream is a therapeutic process. It feels like a science experiment combined with a spa day. Follow these steps carefully to ensure the perfect consistency.
Step 1: The Gentle Melt
You never want to put your oils over direct high heat as this can destroy the delicate nutrients. Instead, use a double boiler. Place your shea butter and coconut oil in the top bowl and let them melt slowly until they are a clear liquid. This ensures the fats remain stable and effective.
Step 2: Combining the Oils
Once melted, remove from heat and stir in the sweet almond oil. Let the mixture cool down slightly. You want it to be liquid but not hot to the touch before you move on to the next phase.
Step 3: The Emulsion Process
In a separate small bowl, whisk together your aloe vera gel and rose water. Slowly, and I mean very slowly, pour the water mixture into the oil mixture while whisking constantly. This is where the magic happens and the two phases begin to bond.
Step 4: Activating the Formula
Now it is time for the extras. Add your Vitamin E, glycerin, and essential oils. Carefully twist open your collagen capsule and sprinkle the powder into the bowl. Stir thoroughly to ensure there are no clumps of powder left behind.
Step 5: The Whip
To get that store bought, cloud like texture, you need to whip the cream. Use a small hand mixer or a milk frother. As the mixture cools, it will turn from a translucent yellow to an opaque, creamy white. Whip until it holds soft peaks. This aeration makes the cream feel light and luxurious rather than greasy.
Step 6: Proper Storage
Transfer your finished masterpiece into a clean, glass jar. Because this cream contains water (from the aloe and rose water) but no heavy synthetic preservatives, it is best to store it in a cool, dark place. For an extra refreshing feel, you can even keep it in the refrigerator.
How to Use Your Collagen Night Cream for Best Results
To truly see the “Better Than Botox” results, consistency is key. Nighttime is when your body goes into repair mode, and your skin is most receptive to treatments. Start by thoroughly cleansing your face to remove any makeup or pollutants from the day. While your skin is still slightly damp, take a pea sized amount of the cream and warm it between your fingertips.
Massage the cream into your face using upward, circular motions. Do not forget your neck and décolletage, as these areas often show signs of aging first. The upward motion helps to stimulate blood flow and lymphatic drainage, which further aids in reducing puffiness and toning the facial muscles. Give the cream about ten minutes to sink in before hitting the pillow.
Common Questions About DIY Skincare
Will this cream cause breakouts?
While shea butter and coconut oil are generally well tolerated, coconut oil can be comedogenic for some people with very oily or acne prone skin. If you are prone to breakouts, you can swap the coconut oil for jojoba oil, which closely mimics the skin’s natural sebum and is less likely to clog pores.
How long does the cream last?
Since this recipe uses natural ingredients and no professional grade preservatives, it is best to use it within 2 to 3 weeks. Making small batches frequently is the best way to ensure you are always using the freshest, most potent ingredients on your face.
Can I use this during the day?
This is a very rich, heavy formula designed for deep overnight repair. Using it during the day might make your skin look too shiny, and it may not sit well under makeup. Stick to the nighttime application to let the ingredients do their heavy lifting while you rest.
The Transformation: What to Expect
After the first night, you will likely notice that your skin feels significantly softer and more hydrated. After a week of consistent use, the moisture levels in your skin will stabilize, giving you a more radiant complexion. By the end of a month, the fine lines around your eyes and mouth may appear softened, and the overall elasticity of your skin should feel improved. There is a special kind of confidence that comes from knowing you achieved these results with a product you made with your own two hands.
Embracing the Natural Path to Youthful Skin
Taking care of your skin does not have to be complicated or expensive. By returning to nature and using ingredients like shea butter, aloe vera, and collagen, you are giving your body exactly what it needs to thrive. This DIY night cream is more than just a beauty product; it is a commitment to a cleaner, more intentional lifestyle. You deserve to feel beautiful in your own skin, and sometimes, the best way to get there is to skip the pharmacy aisle and head straight to the kitchen.
So, grab your whisk and your favorite essential oils. It is time to treat your skin to the nourishment it has been waiting for. Once you see the glow that comes from this collagen cream, you might never go back to store bought again. Your journey to ageless, healthy skin starts tonight. Enjoy the process, enjoy the scent, and most importantly, enjoy the beautiful results.