DIY Fresh Aloe Vera Hydrating Toner for Sensitive Dry Skin Natural Skincare Recipe
Finding the perfect balance for your skin can often feel like an expensive chemistry experiment. We scroll through endless aisles of skincare products, each promising a miracle in a bottle, only to find that many are packed with synthetic fragrances, alcohols, and preservatives that do more harm than good. If you have sensitive or dry skin, you know the struggle all too well. One wrong ingredient and your face is red, tight, or flaking. That is why turning back to nature is not just a trend; it is a necessity for many. Today, we are diving deep into a DIY solution that is as old as time but as effective as any high-end serum: the Fresh Aloe Vera Hydrating Toner.
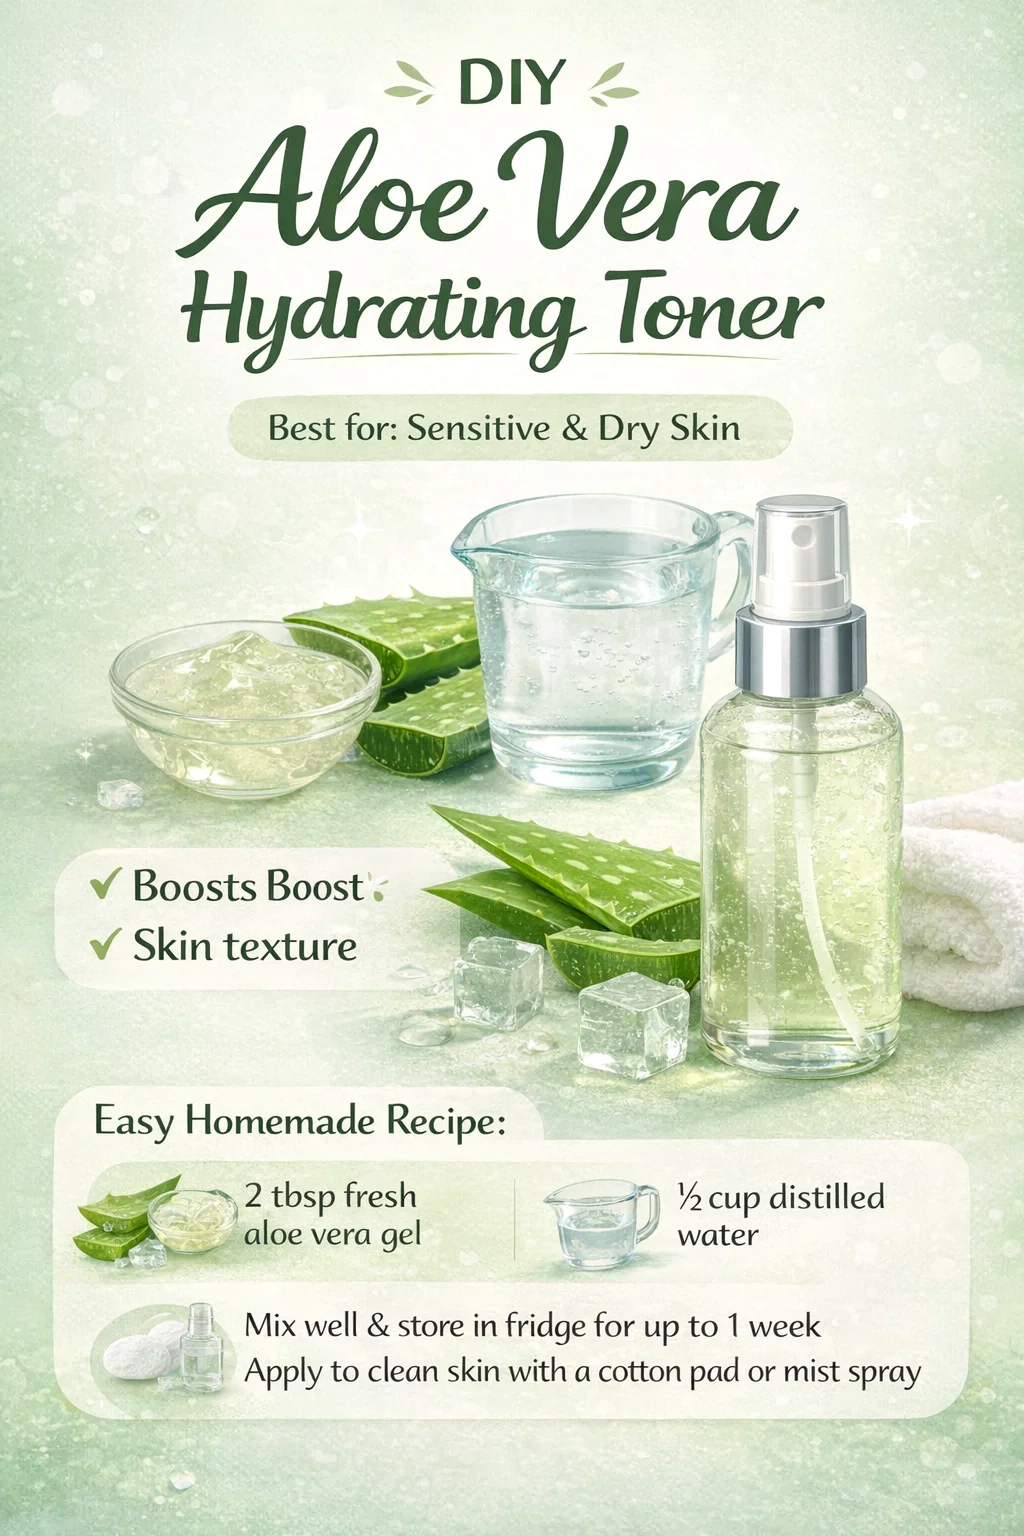
The beauty of making your own toner lies in the transparency of the process. When you look at the recipe featured in our guide, you see only two primary ingredients: fresh aloe vera gel and distilled water. There are no hidden parabens, no artificial dyes, and no mystery chemicals. This is pure, unadulterated hydration designed to soothe the skin right after cleansing. In this comprehensive guide, we will explore why these ingredients work, how to prepare the toner correctly, and the best ways to integrate it into your daily self-care ritual.
The Magic of Aloe Vera: Nature’s Ultimate Healer
To understand why this toner is such a powerhouse for sensitive skin, we have to look at the biology of the aloe vera plant. Often called the plant of immortality, aloe vera has been used for centuries across various cultures to treat everything from burns to chronic dryness. The gel inside the thick, spiky leaves is a complex mixture of vitamins, minerals, amino acids, and antioxidants.
Deep Hydration and Moisture Retention
Unlike many commercial moisturizers that sit on top of the skin, aloe vera is able to penetrate multiple layers of the dermis. It contains mucopolysaccharides, which help in binding moisture into the skin. When you apply an aloe-based toner, you are essentially creating a reservoir of hydration that helps your skin stay plump and elastic throughout the day. This is particularly beneficial for those with dry skin types who struggle with fine lines caused by dehydration.
Anti-Inflammatory and Cooling Properties
If you suffer from rosacea, eczema, or general sensitivity, inflammation is your biggest enemy. Aloe vera contains compounds like acemannan and salicylic acid, which act as natural anti-inflammatories. They work to reduce redness and calm the heat that often accompanies irritated skin. Using this toner after a long day in the sun or a harsh wind can provide immediate relief, acting as a cooling blanket for your face.
Why Distilled Water Matters in DIY Skincare
You might be tempted to just use water from the kitchen tap, but when it comes to DIY skincare, the quality of your water is paramount. Tap water often contains minerals like calcium and magnesium, known as hard water, which can actually strip the skin of its natural oils and leave behind a film that clogs pores. Even worse, tap water can contain trace amounts of chlorine or bacteria that could spoil your homemade mixture quickly.
Distilled water has been purified through evaporation and condensation, removing all impurities and minerals. Using it in your toner ensures that the pH balance remains optimal for your skin. It also provides a clean base that allows the aloe vera to stay fresh for a longer period. Since we are not using chemical preservatives, starting with a sterile base is the secret to a safe and effective product.
Step-by-Step Guide: Making Your Aloe Vera Hydrating Toner
Creating this toner is incredibly simple, but the technique matters to ensure you get the best texture and longevity. Follow these steps to create your own batch at home.
Gathering Your Supplies
Before you start, make sure you have everything ready. You will need:
- Fresh Aloe Vera Leaf: Look for a large, plump leaf at your local health food store or harvest one from your own plant.
- Distilled Water: Ensure it is room temperature or slightly chilled.
- A Blender: This is crucial for getting a smooth, sprayable consistency.
- A Fine Mesh Strainer: To remove any bits of pulp that might clog your spray bottle.
- A Glass Spray Bottle: Glass is preferred over plastic as it does not leach chemicals and keeps the product cooler.
Extracting the Gel
Start by washing the aloe leaf thoroughly. Cut off the thorny edges and peel back the flat green skin to reveal the clear, translucent gel inside. Use a spoon to gently scoop the gel out. Try to avoid the yellow sap (latex) that sits just under the skin, as this can be irritating to some skin types. You only want the clear, jelly-like substance.
The Blending Process
Add 2 tablespoons of your freshly extracted aloe gel into the blender with 1/2 cup of distilled water. Blend on high for about 30 to 60 seconds until the mixture is completely liquid and slightly frothy. If you want a more concentrated toner, you can slightly increase the aloe ratio, but 2 tablespoons is the sweet spot for a refreshing mist.
Straining and Bottling
Pour the mixture through a fine mesh strainer or a piece of cheesecloth into a clean bowl. This step ensures that no small chunks of aloe remain. Finally, pour your smooth toner into your glass spray bottle. Your DIY toner is now ready to use!
How to Use Your Toner for Maximum Results
A toner is most effective when used as a bridge between cleansing and moisturizing. Here is the best way to incorporate it into your routine.
The Post-Cleanse Refresh
After you have washed your face with a gentle cleanser, pat your skin dry with a soft towel. While your skin is still slightly damp, mist the aloe vera toner over your entire face and neck. The dampness helps the skin absorb the nutrients more effectively. Alternatively, you can spray it onto a reusable bamboo cotton pad and gently swipe it across your face to remove any lingering traces of dirt.
Layering Your Skincare
Once you have applied the toner, do not wait for it to dry completely. While your face is still dewy from the mist, apply your favorite facial oil or moisturizer. This locks in the water and aloe nutrients, creating a barrier that prevents trans-epidermal water loss. This layering technique is a secret weapon for achieving that coveted glowy skin look.
A Mid-Day Pick-Me-Up
This toner is not just for your morning and evening routine. Since it is kept in the fridge, it makes for an incredible cooling mist during the day. If you spend a lot of time in front of a computer or in an air-conditioned office, your skin can become dehydrated quite fast. A quick spritz of this chilled aloe mist can revive your complexion and provide a mental boost as well.
Storage and Safety Tips
Because this recipe is 100 percent natural and lacks synthetic preservatives, it requires a little bit of extra care to keep it safe for your skin.
The Importance of Refrigeration
You must store your aloe vera toner in the refrigerator. The cool temperature serves two purposes: it slows down the growth of bacteria and it enhances the soothing effect on your skin. A cold mist is particularly effective at depuffing the face in the morning.
Shelf Life and Freshness
This toner typically stays fresh for 5 to 7 days. Because we are using fresh plant material, it will eventually lose its potency and could spoil. If you notice any change in color, a sour smell, or any cloudiness that does not settle, it is time to discard the batch and make a fresh one. Making small, weekly batches ensures that you are always giving your skin the most active nutrients possible.
Customizing Your Toner
Once you have mastered the basic recipe, you can start to customize it based on your specific skin needs. However, always do a patch test before trying a new addition.
For Extra Soothing
Replace half of the distilled water with organic rose water. Rose water is known for its incredible scent and its ability to reduce redness, making it a perfect partner for aloe vera.
For Acne-Prone Skin
If you occasionally struggle with breakouts but still have dry skin, add one or two drops of tea tree essential oil to the mixture. Tea tree provides antibacterial properties that can help keep blemishes at bay without the harshness of commercial acne toners.
For Antioxidant Boost
You can steep a green tea bag in your distilled water and let it cool completely before mixing it with the aloe. The polyphenols in green tea provide an extra layer of protection against environmental stressors and pollution.
Conclusion: Simple Skincare, Real Results
Embracing a DIY approach to your skincare routine is a rewarding journey. This Aloe Vera Hydrating Toner proves that you do not need a long list of ingredients to achieve healthy, radiant skin. By focusing on high-quality, natural components like fresh aloe and distilled water, you are giving your skin exactly what it needs without the unnecessary fluff. It is cost-effective, sustainable, and incredibly gentle on even the most sensitive complexions.
Taking five minutes out of your week to prepare this fresh batch is an act of self-care that your future self will thank you for. As you start to see the improvements in your skin texture and hydration levels, you might find yourself wandering away from the skincare aisles more often, confident in the power of nature. Give your skin the hydration it deserves and enjoy the refreshing, cooling sensation of your very own homemade toner.