DIY Hair Growth Oil Recipe for Thicker Shiny Hair Natural Scalp Treatment
If you have been scrolling through social media lately, you have likely seen a surge in DIY beauty remedies. From rice water rinses to rosemary sprays, the world of natural hair care is exploding with ancient wisdom. There is a reason for this shift. People are tired of reading ingredient labels filled with unpronounceable chemicals and are instead looking toward their spice racks for solutions. This homemade hair growth oil is a powerhouse of botanical ingredients that works to revitalize your scalp and bring life back to dull, thinning strands. It is affordable, easy to make, and uses the synergy of nature to promote thicker, shinier hair.
The Magic Behind the Ingredients
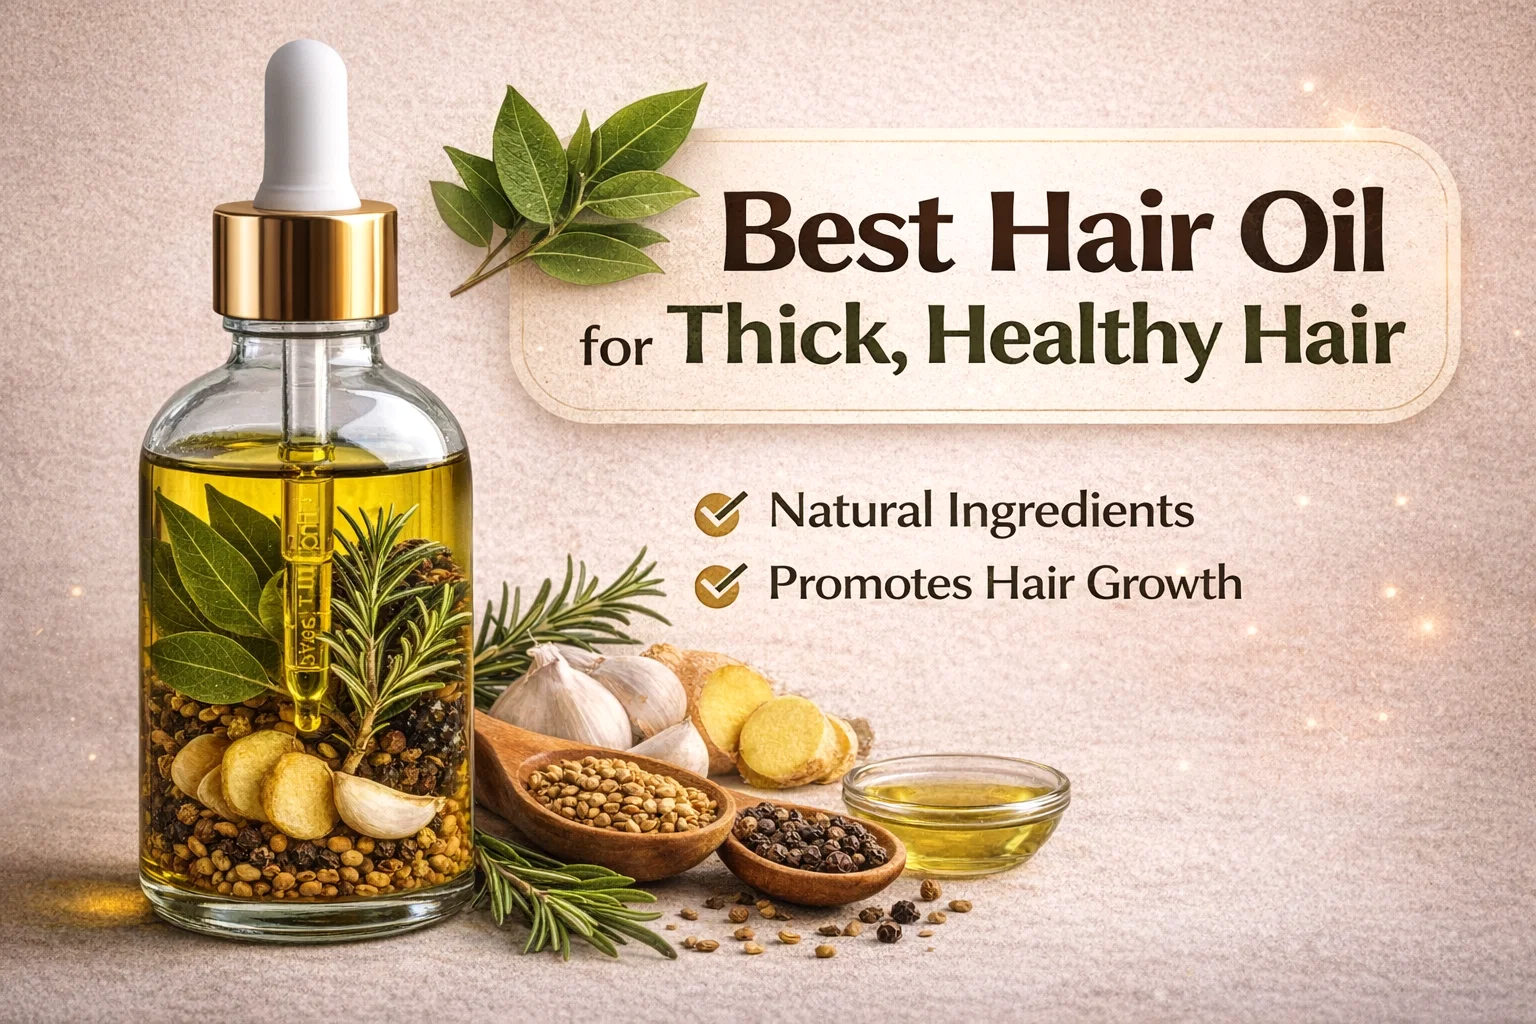
Creating a potent hair oil is not just about mixing random items from your kitchen. It is about understanding how each component interacts with your scalp and hair follicles. The recipe shown in the image is a masterclass in herbal infusion, combining warming spices with cooling leaves to create a balanced treatment.
Fresh Curry Leaves for Pigmentation and Strength
Curry leaves are a staple in traditional Ayurvedic hair care. They are rich in antioxidants and essential nutrients that help reduce hair fall. One of the standout benefits of curry leaves is their ability to prevent premature greying. By nourishing the roots with beta-carotene and proteins, they help maintain the natural pigment of your hair while strengthening the fiber to prevent breakage.
The Power of Rosemary
Rosemary is perhaps the most scientifically backed herb for hair growth in recent years. Studies have shown that rosemary essential oil can be as effective as some over the counter hair growth treatments without the harsh side effects. When you simmer fresh rosemary sprigs in a carrier oil, you release carnosic acid, which helps heal nerve damage and tissue damage in the scalp. This improves blood circulation, ensuring that your hair follicles get the oxygen they need to thrive.
Ginger and Garlic: The Scalp Stimulators
It might sound like the start of a stir-fry, but ginger and garlic are incredible for the scalp. Ginger contains circulatory agents that stimulate the flow of blood to the scalp, which can trigger new growth. Garlic, on the other hand, is high in sulfur and selenium. These minerals are essential for the structure of the hair shaft. Garlic also has antimicrobial properties that keep the scalp clean and free from dandruff or fungal issues that might be hindering growth.
Fenugreek and Black Peppercorns
Fenugreek seeds, also known as Methi, are a goldmine for hair repair. They contain lecithin, which acts as a natural emollient to moisturize and give your hair that sought after shine. Black peppercorns add a warming element to the oil. This slight warmth helps the pores of the scalp open up, allowing the other nutrients to penetrate deeper into the follicle.
Choosing Your Base: Coconut Oil vs. Olive Oil
The carrier oil you choose serves as the delivery vehicle for all these herbal benefits. The image suggests using either coconut or olive oil, and your choice should depend on your specific hair type.
Coconut Oil: This is best for those with high porosity hair or hair that is prone to protein loss. Coconut oil is one of the few oils that can actually penetrate the hair shaft rather than just sitting on top of it. It provides deep conditioning and helps prevent the hygral fatigue that happens when hair swells and shrinks from water absorption.
Olive Oil: If you have very dry, thick, or chemically processed hair, olive oil might be your best bet. It is rich in vitamins A and E, as well as antioxidants. It acts as an excellent sealant, locking in moisture and smoothing the outer cuticle for an instant glossy finish.
Step by Step Guide to Making Your Infused Hair Oil
Making this oil at home is a therapeutic process. The scent of the herbs infusing into the oil will make your kitchen feel like a high end apothecary. Follow these steps to ensure you get the most out of your ingredients.
- Preparation: Start by washing and thoroughly drying your fresh ingredients. Any water left on the curry leaves or rosemary can cause the oil to go rancid or splatter during the simmering process.
- The Infusion: Place your half cup of chosen oil into a small saucepan. Add the handful of curry leaves, two sprigs of rosemary, ginger slices, three cloves of garlic, and the half teaspoons of fenugreek and peppercorns.
- Low and Slow: This is the most important part. Set your stove to the lowest possible flame. You do not want to deep fry these ingredients. You want to gently draw out their essences. Simmer for about 5 to 10 minutes until the herbs look slightly wilted and the oil has taken on a golden or greenish hue.
- Cooling and Straining: Once the time is up, remove the pan from the heat. Let it sit until it is completely cool. Use a fine mesh strainer or a piece of cheesecloth to remove the solids.
- Storage: Pour your finished oil into a glass dropper bottle. Store it in a cool, dark place to preserve the potency of the herbs.
How to Apply for Maximum Results
Simply having the oil is not enough; the technique you use to apply it makes a massive difference in your results. For the best outcome, you should use this oil as a pre-shampoo treatment.
Warm a small amount of the oil by placing the bottle in a bowl of warm water. Never microwave the oil as this can destroy the delicate nutrients. Section your hair and apply the oil directly to your scalp using a dropper or your fingertips. Once your scalp is covered, use your fingers to massage in circular motions for at least 5 minutes. This massage, combined with the ginger and rosemary, will jumpstart your circulation.
Work the remaining oil through the lengths of your hair, focusing on the ends which are usually the oldest and driest parts. Leave the oil in for at least 30 minutes, or up to two hours for a deep treatment. When it is time to wash, you may need to shampoo twice to ensure all the oil is removed, leaving your hair light and bouncy rather than greasy.
Common Questions and Troubleshooting
Many people worry about the smell of garlic and ginger in their hair. While the scent is strong during the infusion process, most of it washes away with a good quality shampoo. If you are particularly sensitive to the smell, you can add a few drops of lavender or peppermint essential oil to the final strained mixture.
Another common concern is how often to use the treatment. For most hair types, 2 to 3 times a week is the sweet spot. Over-oiling can lead to scalp buildup, so make sure you are consistent but not excessive. If you have a very oily scalp, you might want to stick to once a week and focus primarily on the mid-lengths and ends.
The Science of Patience in Hair Care
It is important to remember that hair growth is a slow process. While you will notice immediate shine and softness after the first use, significant changes in thickness and length usually take 3 to 6 months of consistent use. Hair grows at an average rate of about half an inch per month. By using this oil, you are ensuring that the hair growing out is as healthy and strong as possible, while also preventing the breakage that often makes it seem like hair has stopped growing.
Conclusion
Embracing a natural approach to hair care is one of the best gifts you can give yourself. This DIY hair oil is more than just a beauty product; it is a blend of traditional healing and modern self-care. By taking the time to craft your own treatments, you know exactly what is going onto your skin and into your body. Whether you are looking to fix damage from heat styling, combat seasonal shedding, or simply achieve that glass hair shine, this recipe provides a holistic solution. Give it a try this weekend and start your journey toward the hair you have always dreamed of. Your strands will definitely thank you for it.