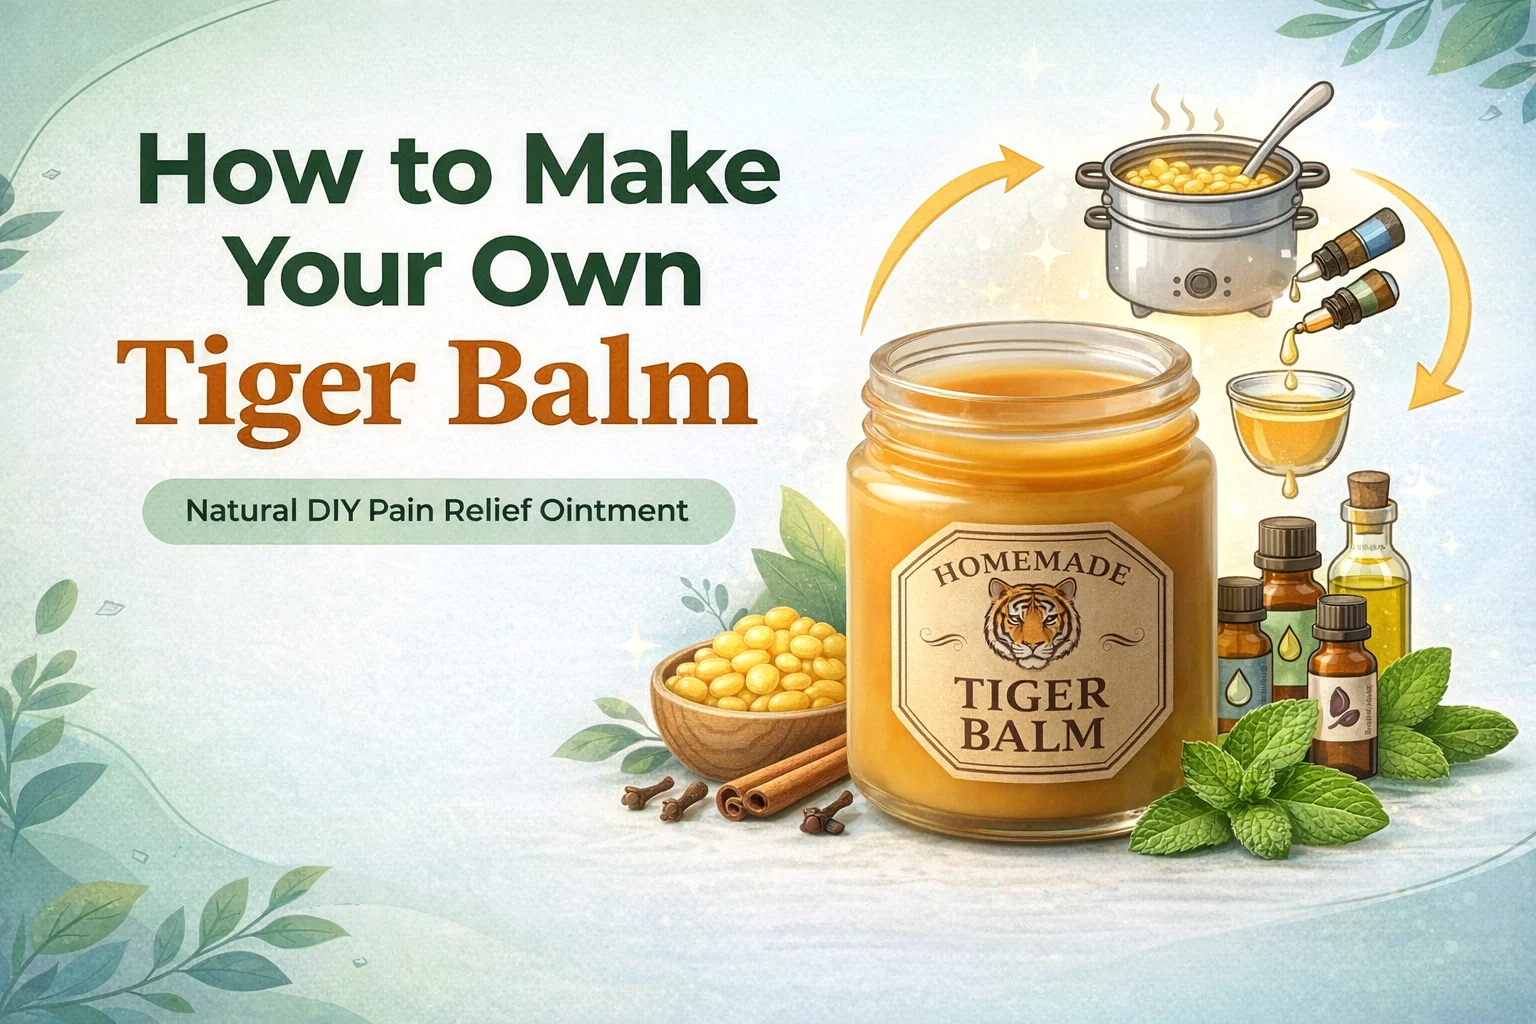
DIY Homemade Tiger Balm Recipe Easy Natural Muscle Rub for Pain Relief
Walking into a room filled with the scent of cooling peppermint and spicy cloves is an experience that immediately signals relief. For generations, the familiar little jars of Tiger Balm have been a staple in medicine cabinets across the world, offering a potent, aromatic solution for sore muscles and tension. But there is something uniquely satisfying about taking these traditional healing methods into your own hands. Creating a homemade version of this legendary salve allows you to connect with the ingredients and ensure that every drop going onto your skin is pure, natural, and specifically tailored to your needs. If you have ever wanted to master the art of the apothecary from your own kitchen, this project is the perfect place to start.
The Magic Behind the Balm: Why Homemade is Better
While store-bought versions are effective, they often contain paraffin or other petroleum-based fillers to create that specific waxy texture. When you make your own Tiger Balm, you replace those synthetic bases with golden beeswax and nourishing olive oil. This not only makes the balm safer for long-term use but also improves how the skin absorbs the active essential oils. By crafting this at home, you are choosing a holistic approach to wellness that prioritizes the quality of every single ingredient. Plus, the process of melting the wax and blending the oils is a meditative practice in itself, turning a simple task into a rewarding self-care ritual.
Understanding the Star Ingredients
The secret to a truly effective muscle rub lies in the synergy of its components. This recipe relies on a precise blend of warming and cooling oils to create that famous “hot-cold” sensation that confuses pain signals in the body. Camphor oil is the heavy lifter here, known for its ability to improve blood flow and reduce swelling. When paired with peppermint oil, which provides a crisp, cooling effect thanks to its high menthol content, you get a powerful duo that tackles inflammation from two different angles. Eucalyptus adds a refreshing respiratory boost, while clove and cinnamon oils provide the deep, penetrating warmth that relaxes tight fibers and eases stiff joints.
Step-by-Step Guide to Crafting Your Soothing Salve
Preparation is key when working with beeswax and essential oils. Before you begin, ensure your workspace is clean and that you have all your measurements ready. Because the mixture sets relatively quickly once removed from the heat, having your glass jars open and waiting is a small detail that makes a huge difference in the final texture of your balm.
Phase One: The Melting Process
Start by setting up a double boiler. If you do not have a dedicated one, a heat-safe glass bowl placed over a pot of simmering water works perfectly. Add one ounce of beeswax pastilles and a quarter cup of olive oil to the bowl. The goal here is a gentle melt. Avoid high heat as you want to preserve the integrity of the oil. Stir the mixture slowly until the beeswax has completely liquified into the olive oil, resulting in a clear, golden liquid. This base is what gives your balm its structure, providing a smooth glide when applied to the skin.
Phase Two: Infusing the Power
Once the base is clear, remove it from the heat source immediately. This is the most critical step. If the base is too hot, the volatile essential oils will evaporate, losing their therapeutic potency. Let it cool for just a minute before stirring in your oils. Add ten drops of camphor, nine drops of peppermint, and seven drops of eucalyptus. Follow this with five drops each of clove and cinnamon oil. Use a glass stir rod or a stainless steel spoon to blend everything thoroughly. You will notice the aroma becomes quite intense at this stage, which is a great sign that your batch will be effective.
Best Practices for Storage and Application
After blending, carefully pour the liquid into small, clean glass containers. Amber or cobalt glass is ideal as it protects the essential oils from light degradation, but clear jars work well if kept in a cool, dark place. Let the balm sit undisturbed at room temperature. As it cools, it will transform from a liquid into a firm, opaque salve. Resist the urge to poke it while it sets to ensure a perfectly smooth surface.
How to Use Your Homemade Tiger Balm
- For Muscle Aches: Massage a pea-sized amount into the affected area. The friction from your hands helps activate the oils.
- For Tension Headaches: Apply a very small amount to your temples or the back of your neck, being careful to stay away from your eyes.
- Before Bed: Use it on your feet after a long day of standing to promote circulation and relaxation.
- Post-Workout: Apply to joints or muscles that feel particularly taxed to help reduce delayed onset muscle soreness.
Safety and Customization Tips
Because this recipe uses high-quality essential oils, a little goes a long way. Always perform a patch test on a small area of skin to ensure you do not have a sensitivity to the cinnamon or clove oils, which can be quite warming. If you find the scent too strong, you can slightly reduce the drop count in your next batch. Conversely, if you prefer an even more intense cooling sensation, adding an extra drop or two of peppermint can customize the experience to your liking. Remember to wash your hands thoroughly after application to avoid accidental contact with sensitive areas like your eyes or nose.
A Sustainable Gift Idea
This DIY Tiger Balm makes an incredible gift for friends and family who lead active lifestyles or enjoy natural living. You can easily double or triple the recipe to create a large batch for the holidays or special occasions. Placing the balm in aesthetic jars with handwritten labels adds a personal touch that store-bought products simply cannot match. It is a gift of comfort and care that shows you have put thought into their well-being.
Final Thoughts on Natural Healing
Taking control of your health through DIY remedies is an empowering journey. This homemade Tiger Balm is more than just a topical ointment; it is a testament to the power of plants and the simplicity of traditional wisdom. By using basic ingredients like beeswax and essential oils, you have created a professional-grade product that is effective, affordable, and completely transparent in its composition. Whether you keep it in your gym bag or on your nightstand, this balm will surely become a favorite part of your daily routine. Enjoy the soothing relief and the pride that comes with knowing you made it yourself.