DIY Honey Oatmeal Melt and Pour Soap Recipe for Dry Skin Easy 4-Bar Tutorial
Creating your own skincare products at home is one of the most rewarding ways to embrace a natural lifestyle. There is something incredibly satisfying about knowing exactly what goes into the products you use on your body every day. If you have been looking for a project that is both simple and luxurious, this Honey and Oatmeal Melt and Pour Soap is the perfect place to start. Combining the humectant powers of raw honey with the soothing properties of colloidal oatmeal, these bars offer a gentle cleanse that leaves your skin feeling soft, hydrated, and calm. Whether you are a seasoned crafter or a complete beginner to the world of soap making, this recipe provides a foolproof way to create professional quality bathing bars in your own kitchen.
The Magic of Honey and Oatmeal for Your Skin
Before we dive into the process, it is important to understand why this specific combination of ingredients is a powerhouse for skin health. Honey has been used for centuries in beauty rituals across the globe. It is a natural humectant, which means it attracts moisture from the air and locks it into the skin. This makes it an exceptional ingredient for those struggling with dryness or dullness. Beyond hydration, honey contains antioxidants that help protect the skin from environmental stressors.
Colloidal oatmeal is the perfect partner for honey. Unlike the oats you eat for breakfast, colloidal oatmeal is ground into an extremely fine powder that stays suspended in liquid. It is world-renowned for its ability to soothe irritation and itchiness. If you have sensitive skin or suffer from seasonal dryness, the oatmeal in this soap acts as a protective barrier while providing a very mild, skin-softening exfoliation. Together, these two ingredients transform a basic soap base into a therapeutic treatment.
Why Choose the Melt and Pour Method?
If the idea of working with lye and complex chemical reactions feels intimidating, the melt and pour method is your best friend. This process uses a pre-made soap base that has already undergone saponification. This means the “hard work” is done for you, and you can focus entirely on the creative side of the craft, such as adding botanicals, scents, and skin-loving additives.
Safety and Simplicity
One of the biggest advantages of melt and pour soap is safety. Since you are not handling active lye, it is a fantastic project to do even if you have a busy household. You also do not have to wait weeks for the soap to cure. Once your bars have cooled and hardened, they are ready to use immediately. This instant gratification makes it an excellent choice for DIY gifts or last-minute additions to your wellness routine.
Customization and Creativity
The soap base acts as a blank canvas. While our recipe focuses on honey and oatmeal, you can choose from various bases like goat milk, shea butter, or glycerin to further tailor the texture and benefits. The melt and pour technique allows you to experiment with layers, embeds, and swirls without worrying about the soap “seizing” as it might in cold process methods.
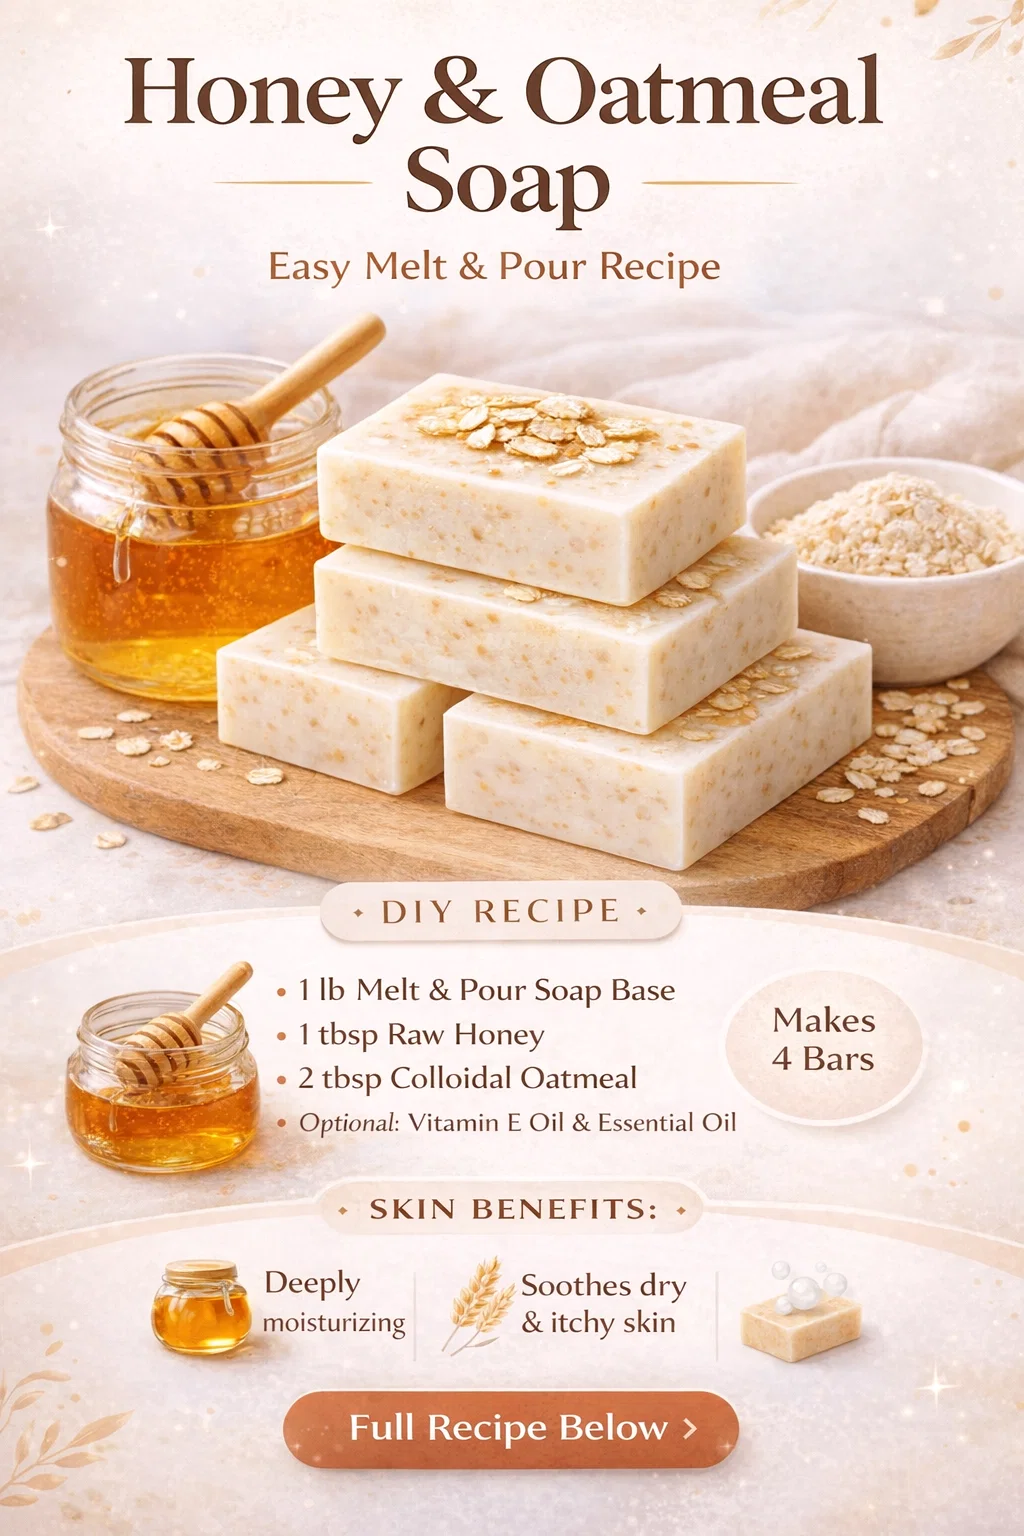
Ingredients You Will Need
To make four generous bars of this soothing soap, you will need a few key supplies. Most of these can be found at local craft stores or online through specialized soap-making suppliers.
- 1 lb Melt and Pour Soap Base: A goat milk or honey base works exceptionally well with this recipe to enhance the creamy lather.
- 1 tbsp Raw Honey: Use the best quality honey you can find for maximum skin benefits. Avoid processed honey blends that may contain corn syrup.
- 2 tbsp Colloidal Oatmeal: This provides the signature soothing texture and a beautiful, rustic aesthetic.
- 1 tsp Vitamin E Oil (Optional): This acts as a boost for skin repair and helps extend the shelf life of the natural oils in your soap.
- 10 to 15 drops Essential Oil: For a calming scent, lavender or sweet orange pairs beautifully with the natural aroma of honey.
A Step by Step Guide to Crafting Your Soap
Follow these steps closely to ensure your ingredients are well incorporated and your final bars look as good as they feel.
Step 1: Preparing the Base
Start by cutting your soap base into small, uniform cubes, roughly one inch in size. This ensures that the base melts evenly and prevents the bottom from scorching while the top is still solid. Place the cubes into a microwave-safe glass bowl or use a double boiler on the stove for more control.
Step 2: Gentle Melting
If using a microwave, heat the base in 30 second intervals, stirring in between. You want to reach a point where the liquid is smooth and free of lumps. Avoid letting the base boil, as this can create excessive bubbles and make the soap brittle. If using a double boiler, keep the heat on low and stir occasionally until fully liquefied.
Step 3: Incorporating the Honey
Once the base is melted, let it cool for just a minute. You want it to be warm but not piping hot when you add the honey. Stir in your tablespoon of raw honey until it is completely dissolved and blended into the base. If the soap is too hot, the honey might settle at the bottom of your molds later, so thorough stirring is key.
Step 4: Adding the Texture and Scent
Now it is time to add the colloidal oatmeal. Whisk it in gently to avoid clumps. This is also the stage where you add your Vitamin E oil and your chosen essential oils. The warmth of the soap will help release the fragrance, filling your workspace with a lovely aroma. Mix everything until the color and texture appear consistent throughout the bowl.
Step 5: Pouring into Molds
Slowly pour the mixture into your silicone soap molds. If you see small bubbles forming on the surface, you can lightly spray the top with a bit of rubbing alcohol to pop them instantly. This gives the back of your soap bars a professional, smooth finish. If you want a more rustic look, you can sprinkle a few whole oats on top before the soap sets.
Step 6: Setting and Unmolding
Allow the soap to sit undisturbed at room temperature for at least 2 to 4 hours. Resistance is tempting, but moving the molds while the soap is still soft can cause ripples on the surface. Once the bars are completely firm and cool to the touch, gently peel the silicone mold away and pop the bars out.
Tips for the Perfect Batch
While the process is straightforward, a few professional tips can help you achieve the best results every time. First, always use high quality silicone molds. They are flexible, which makes unmolding easy and prevents the soap from cracking or sticking. Second, be mindful of the amount of additives you use. Adding too much honey or oil can make the soap too soft or prevent it from lathering properly. Stick to the recommended ratios for a firm, long-lasting bar.
Storing Your Handmade Soap
Because melt and pour soap contains glycerin, it can sometimes “sweat” in humid environments. To prevent this, wrap your finished bars in plastic wrap or store them in an airtight container until you are ready to use them. This keeps them looking beautiful and preserves the scent of the essential oils.
The Benefits of a Daily Honey and Oatmeal Cleanse
Using this soap daily can significantly improve the texture of your skin. It is gentle enough for the face but effective enough for the entire body. Many people find that switching from commercial detergent bars to handmade soap reduces redness and irritation significantly. The natural glycerin in the base, combined with the honey, ensures that your skin’s natural moisture barrier remains intact rather than being stripped away by harsh chemicals.
A Thoughtful Gift Idea
These bars make incredible gifts for friends and family. You can wrap them in brown parchment paper, tie them with a bit of twine, and add a sprig of dried lavender for a beautiful, eco-friendly presentation. Knowing that the gift is handmade and contains skin-nourishing ingredients makes it much more meaningful than a store-bought alternative.
Conclusion: Embrace the Glow
Embracing DIY skincare does not have to be a complicated or expensive endeavor. This Honey and Oatmeal soap recipe is a testament to the fact that simple, natural ingredients often produce the best results. By taking a little time to craft these bars, you are investing in your own well-being and moving toward a more sustainable, chemical-free lifestyle. Your skin will thank you for the extra hydration and the gentle, soothing care that only nature can provide. So, clear off your counter, gather your ingredients, and enjoy the meditative process of creating something beautiful for yourself.