DIY Honey Oatmeal Melt and Pour Soap Recipe for Soothing Dry Skin
Creating your own skincare products is one of the most rewarding ways to embrace a natural lifestyle. There is something deeply satisfying about knowing exactly what goes into the bars of soap you use every single day. If you have been looking for a project that combines luxury with simplicity, this Honey and Oatmeal Melt and Pour soap is the perfect place to start. Not only does it look beautiful on a wooden soap dish, but the skin benefits are truly impressive. Whether you are dealing with the irritation of dry winter skin or you just want a gentle, daily cleanser that won’t strip away your natural oils, this recipe is a game changer. Let’s dive into how you can transform a few simple ingredients into a spa-quality bathing experience right in your own kitchen.
The Magic of Honey and Oatmeal for Skin Health
Before we get into the literal melting and pouring, it is worth exploring why these two ingredients have been staples in beauty rituals for centuries. We often think of honey as a kitchen sweetener and oatmeal as a breakfast staple, but when applied topically, they become a powerhouse duo for dermatological health.
Raw Honey: Nature’s Ultimate Humectant
Honey is a natural humectant, which is a fancy way of saying it attracts and retains moisture. When you add raw honey to a soap base, you are essentially creating a barrier that helps your skin stay hydrated long after you have stepped out of the shower. Beyond hydration, honey is packed with antioxidants and has natural antibacterial properties. This makes it excellent for those who might struggle with occasional body breakouts or minor skin irritations. It provides a deep cleanse without the harshness of synthetic chemicals.
Colloidal Oatmeal: The Great Soother
If you have ever had a persistent itch or a patch of eczema, you likely know the reputation of oatmeal. Colloidal oatmeal is simply oats that have been ground into an incredibly fine powder so they can be easily suspended in liquids or solids like soap. It contains fats, proteins, and vitamins that coat the skin and provide a protective layer. It is specifically celebrated for its ability to soothe inflammation. In this soap recipe, the oatmeal acts as a very mild exfoliant, sloughing away dead skin cells while simultaneously calming the fresh skin underneath.
Understanding the Melt and Pour Method
For many, the idea of making soap feels intimidating because of “cold process” soap making, which involves handling lye. While cold process is a wonderful craft, it requires safety gear, a long curing time, and a bit of chemistry knowledge. This is where the Melt and Pour method shines. It allows you to skip the dangerous chemical reactions because the soap base has already been saponified for you.
Using a high-quality melt and pour base means you can focus entirely on the creative and therapeutic aspects of soap making. You get to choose the additives, the scents, and the aesthetic. It is an ideal entry point for hobbyists, families, or anyone who wants a quick DIY project with professional-looking results. The bars you create using this method are ready to use as soon as they have hardened, which usually only takes a couple of hours.
Ingredients and Tools You Will Need
Preparation is the key to a smooth crafting session. Because melt and pour soap begins to set as soon as it starts to cool, you want to have everything measured and ready to go before you turn on the heat. Here is what you will need for a standard batch of four 4-ounce bars.
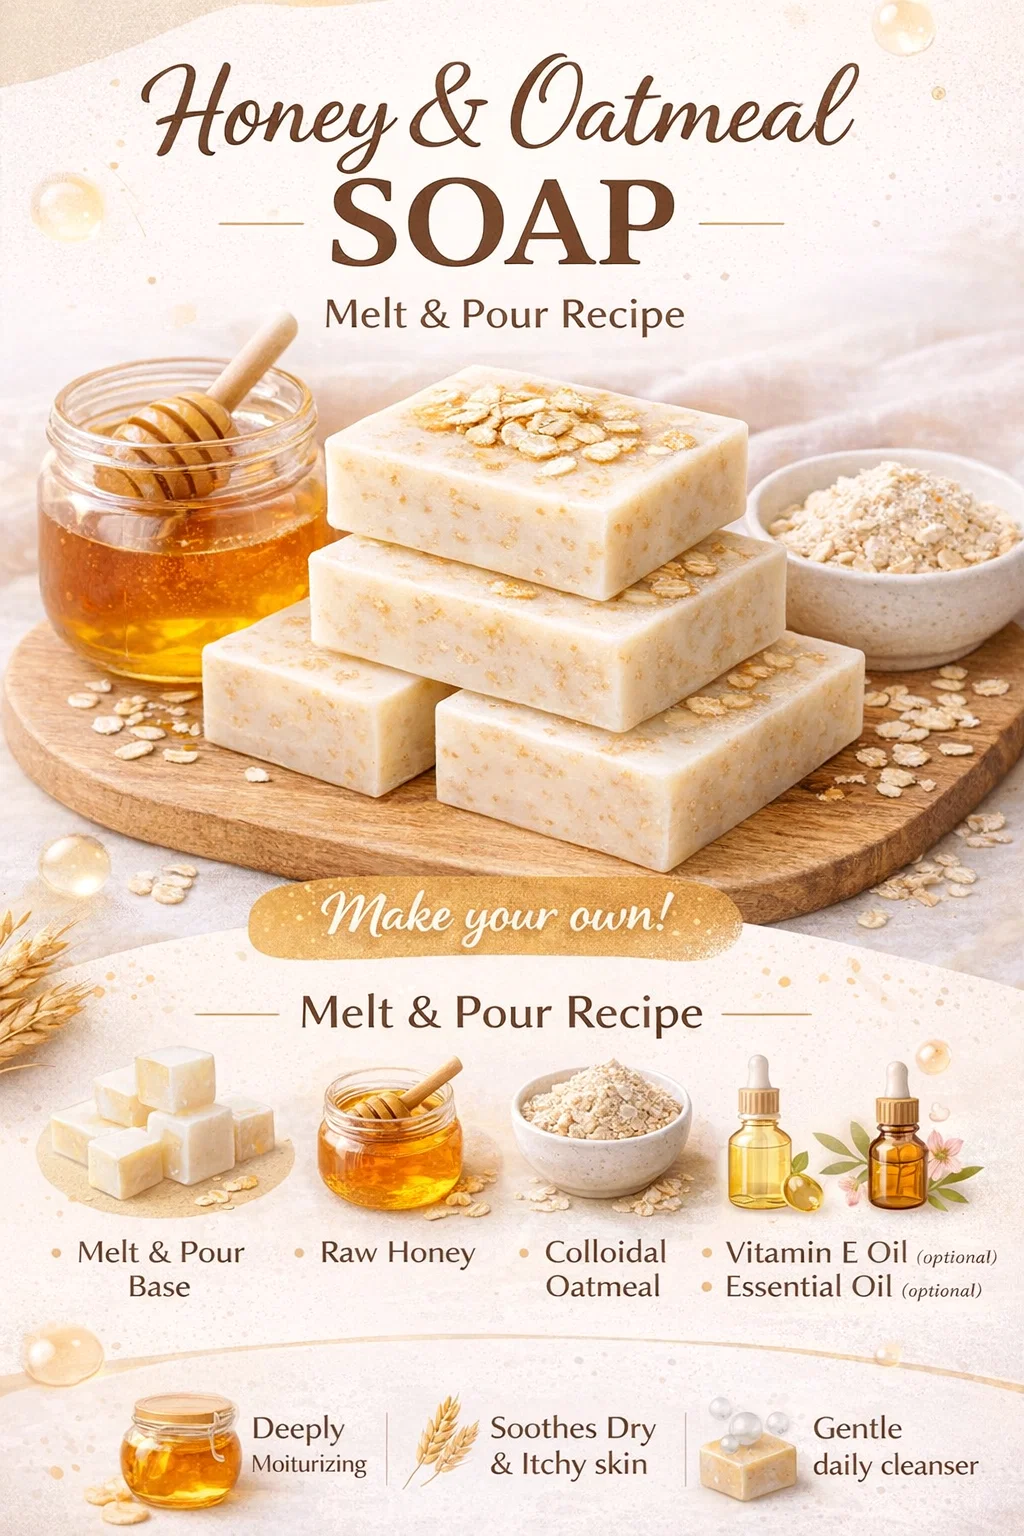
- 1 lb (16 oz) Melt and Pour Soap Base: You can choose Goat’s Milk, Shea Butter, or a Clear Glycerin base depending on the look and feel you prefer.
- 1 tbsp Raw Honey: Local honey is a great choice here to support your local ecosystem.
- 2 tbsp Colloidal Oatmeal: You can buy this pre-made or pulse traditional rolled oats in a clean coffee grinder until they are a fine dust.
- 1 tsp Vitamin E Oil (Optional): This acts as a boost for skin repair and helps prolong the shelf life of the natural oils in the soap.
- 10 to 15 drops Essential Oil (Optional): Lavender, sweet orange, or even a hint of cedarwood works beautifully with the natural scent of honey.
- Isopropyl Alcohol in a spray bottle: This is the “secret weapon” for removing bubbles from the surface of your soap.
Essential Equipment
You don’t need a professional laboratory to make this soap. Most of these items are likely already in your kitchen cupboards:
- A microwave-safe glass measuring cup (Pyrex works best).
- A silicone soap mold (standard rectangles or decorative shapes).
- A stainless steel or silicone spatula for stirring.
- A sharp knife for cutting the base into cubes.
Step by Step: Crafting Your Honey and Oatmeal Soap
Now that your station is set up, let’s walk through the process. Remember, the goal is to keep things gentle. Overheating the soap can cause it to lose moisture or even scorch the honey, so patience is your friend.
Step 1: Preparing the Base
Start by cutting your soap base into small, uniform cubes, roughly one inch in size. This ensures that the soap melts evenly. Place the cubes into your glass measuring cup. If you are using a microwave, heat in 30-second intervals, stirring in between. If you prefer the stovetop, a double boiler is the safest way to go. You want the base to be completely liquid with no solid chunks remaining.
Step 2: The Cooling Phase
This is a crucial step that many beginners skip. Once the soap is melted, let it sit for a minute or two. You want it to be warm and fluid, but not boiling hot. If the base is too hot when you add the honey, the honey might sink to the bottom of the mold rather than staying incorporated. If it is too hot when you add essential oils, the heat can actually dissipate the scent before the soap even sets.
Step 3: Incorporating the Nutrients
Slowly stir in your tablespoon of raw honey. You will notice the color of the base begin to change to a warm, golden hue. Once the honey is fully blended, add your colloidal oatmeal, Vitamin E oil, and your chosen essential oils. Stir slowly and steadily to avoid creating excess air bubbles. The oatmeal might try to clump, so use your spatula to press any lumps against the side of the glass until the mixture is smooth.
Step 4: The Pour and Finish
Carefully pour the liquid soap into your molds. If you want a rustic look, you can sprinkle a few whole rolled oats on top of the bars while they are still wet. Immediately after pouring, give the top of each bar a quick mist of isopropyl alcohol. You will see the tiny surface bubbles disappear instantly, leaving a professional, smooth finish. Now, simply leave the mold on a flat surface. Do not try to move it while it is liquid. Let it set for at least 2 to 4 hours, though overnight is even better for ensuring the bars are completely firm.
Customizing Your Recipe
Once you have mastered the basic recipe, you can start to get creative with variations. Soap making is a versatile craft, and small tweaks can lead to entirely different results.
Choosing Different Bases
A Goat’s Milk base is particularly creamy and pairs perfectly with honey for a “milk and honey” theme. It produces a rich, dense lather. On the other hand, a Clear Glycerin base will allow the golden color of the honey to shine through and can create a beautiful stained-glass effect if you use minimal oatmeal. You can even layer the two for a visual contrast.
Adding Texture and Scent
While the recipe calls for colloidal oatmeal for its skin benefits, adding a teaspoon of whole oats into the body of the soap can provide a more vigorous exfoliation. For scent, consider the season. In the summer, a lemon and honey soap feels refreshing and bright. In the winter, cinnamon and honey can feel warm and comforting. Just be sure to use skin-safe essential oils rather than fragrance oils meant for candles.
How to Store and Use Your Handmade Soap
Because melt and pour soap contains glycerin, it can sometimes “sweat” in humid environments. This is actually a sign of quality, as the glycerin is pulling moisture from the air, but it can make the bars feel sticky. To prevent this, wrap your finished bars in plastic wrap or store them in an airtight container until you are ready to use them.
When you are ready to use a bar, keep it on a draining soap dish. Natural soaps tend to last much longer if they are allowed to dry out between uses rather than sitting in a pool of water. These bars are gentle enough for both the face and the body, making them a versatile addition to your bathroom.
The Joy of Giving: Soap as a Gift
Handmade honey and oatmeal soap makes for an incredible gift. In a world of mass-produced products, receiving something crafted by hand feels special. You can wrap these bars in brown parchment paper, tie them with a piece of twine, and tuck a small sprig of dried lavender or a cinnamon stick into the knot. It is a thoughtful, eco-friendly, and practical gift for birthdays, holidays, or “just because” moments. You can even include a small note explaining the skin benefits so the recipient knows just how much care went into their gift.
Conclusion: Your Journey Into Natural Beauty
Creating this Honey and Oatmeal Bathing Soap is more than just a craft project; it is a step toward a more intentional and mindful self-care routine. By taking the time to melt, stir, and pour these bars, you are investing in your own well-being and the health of your skin. This recipe proves that you don’t need a long list of synthetic ingredients to achieve beautiful, glowing skin. Sometimes, the most effective solutions are the ones that have been right in our pantries all along. We hope you enjoy the process of making these bars as much as you enjoy using them. Happy soap making, and may your skin feel more hydrated and happy with every wash!
Would you like me to help you create a set of printable labels or a shopping list for these ingredients?