DIY Invisible Pant Hemming Tutorial Professional Sewing Machine Technique
Achieving a professional finish on your handmade or altered garments is often the difference between a project that looks DIY and one that looks like it came straight from a high-end boutique. One of the most critical skills in any sewists repertoire is the ability to create a clean, sturdy, and invisible hem on trousers. While many beginners shy away from hemming because they fear bulky seams or uneven lines, mastering the sewing machine technique for invisible pant hemming is surprisingly accessible once you understand the mechanics. In this guide, we are diving deep into the art of the hidden hem, exploring how you can use your standard sewing machine to get professional results that rival any tailor shop.
Understanding the Importance of a Professional Hem
The hem is the final touch on any pair of pants, and it carries a lot of responsibility. It determines the drape of the fabric, the silhouette of the leg, and the overall longevity of the garment. When a hem is done poorly, it can twist, pucker, or show unsightly thread lines on the exterior of the fabric. On the other hand, a perfectly executed invisible hem allows the fabric to hang naturally, keeping the focus on the design of the pants rather than the construction details.
For many years, the only way to get a truly invisible hem was through tedious hand-stitching using a blind stitch. While hand-stitching is a beautiful craft, it is time-consuming and can be difficult to keep consistent over the entire circumference of a pant leg. Modern sewing machines have changed the game by offering built-in blind hem stitches and specialized presser feet that mimic this professional hand-look in a fraction of the time.
Tools and Materials for a Flawless Finish
Before you sit down at your machine, you need to ensure you have the right tools for the job. Hemming is all about precision, so skipping the preparation phase will likely lead to frustration later on. Here is what you should have on your sewing table:
- The Blind Hem Foot: This is a specialized presser foot with a vertical guide in the center. This guide helps you keep your fabric fold perfectly aligned with the needle.
- Matching Thread: Since the goal is invisibility, choose a high-quality polyester or cotton thread that matches your fabric color perfectly. If you are between two shades, go for the slightly darker one, as it tends to blend into the shadows of the fabric better.
- Fine Pins or Clips: You will need these to hold your folds in place. Fine silk pins are best as they wont leave holes in delicate trouser fabrics.
- A Reliable Iron: You cannot achieve a crisp hem without heat. A good steam iron is your best friend during the hemming process.
- Measuring Gauge: A small sliding sewing gauge is essential for ensuring your hem is the same width all the way around the leg.
Step by Step Guide to the Invisible Machine Hem
Now that your tools are ready, let us walk through the actual process shown in the technique. The secret to an invisible hem is not actually in the stitching itself, but in how the fabric is folded before it even touches the needle.
Step 1: Measuring and Marking
First, determine the desired length of your pants. It is always best to try them on with the shoes you intend to wear most often with that specific pair. Mark the fold line with tailor’s chalk. From that line, add your hem allowance. A standard trouser hem usually has an allowance of 1 to 2 inches. Trim away any excess fabric beyond your allowance to prevent bulk.
Step 2: Preparing the Edge
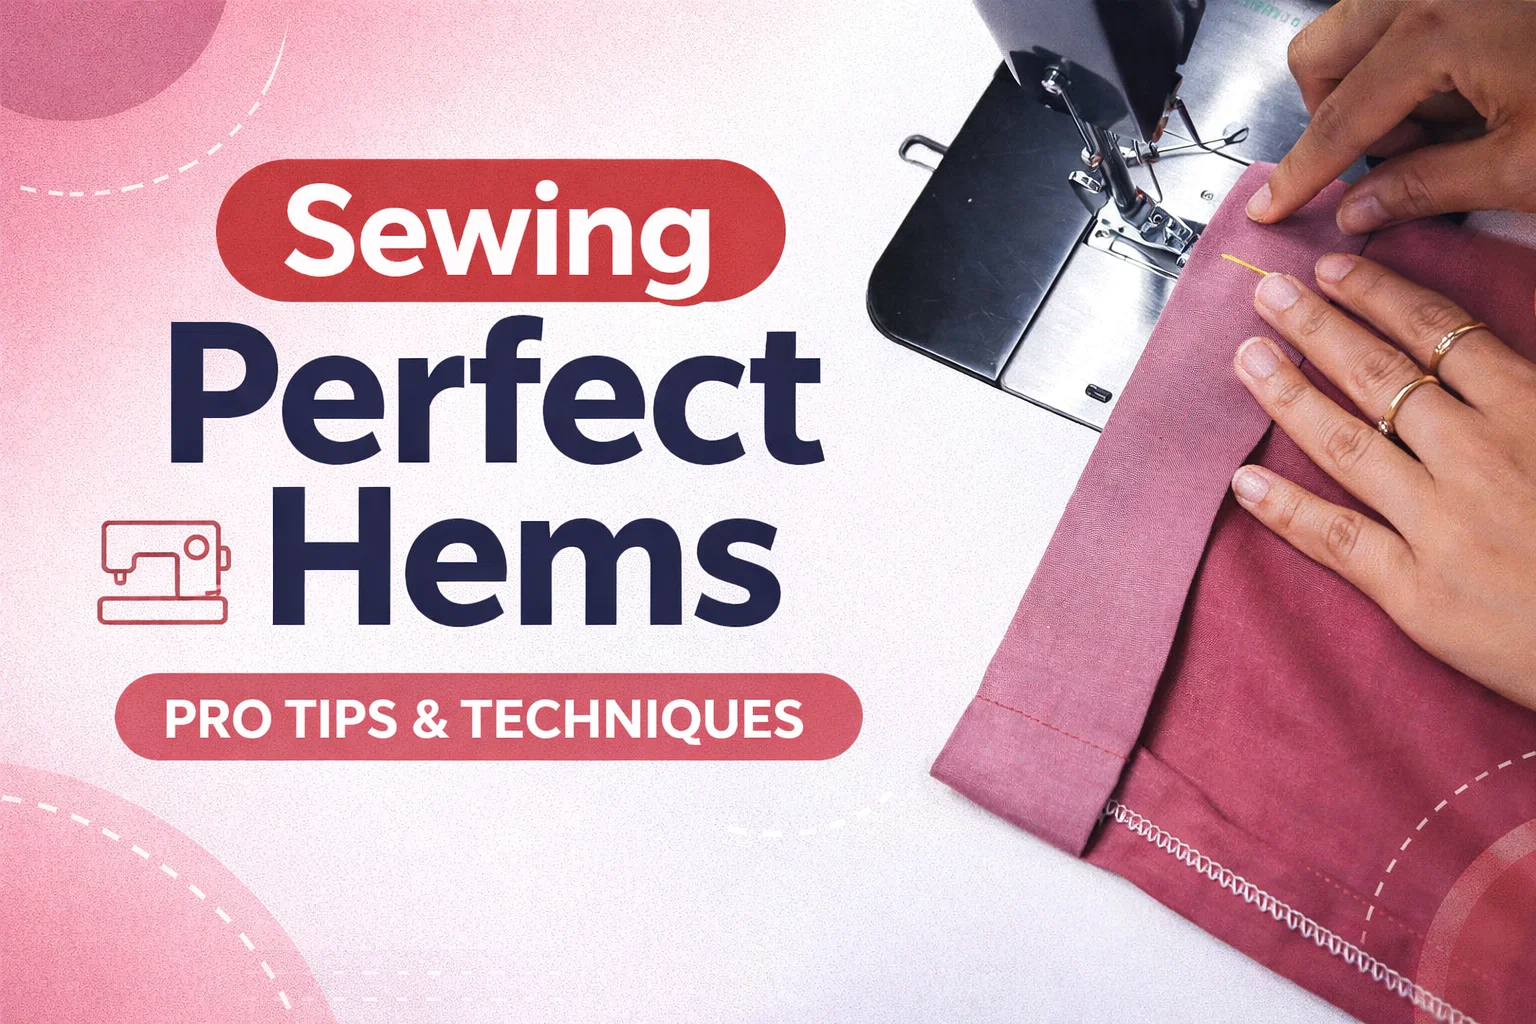
If your fabric frays easily, you should finish the raw edge before folding. You can use a serger (overlock stitch) as seen in the tutorial image, or a simple zigzag stitch on your regular machine. This ensures that the inside of your pants looks just as professional as the outside and prevents the hem from unraveling over time.
Step 3: The Magic Fold
This is the part that confuses most beginners. Fold the hem up toward the inside of the garment at your marked line and press it flat. Then, fold the hem back toward the right side of the fabric, leaving about a quarter inch of the finished edge (the serged part) sticking out to the right. This creates a small ledge for the sewing machine to grip onto.
Step 4: Setting Up the Stitch
Select the blind hem stitch on your machine. This stitch usually looks like a few straight stitches followed by one wide zigzag “jump” stitch. The goal is for the straight stitches to run along the raw edge ledge you created, while the jump stitch barely nips a single thread of the main pant fabric fold.
Step 5: Sewing with Precision
Place your fabric under the blind hem foot, aligning the fold of the pants against the vertical guide of the foot. Sew slowly. As the needle does its zigzag jump, it should just barely pierce the fold of the fabric. If it goes too far into the fold, you will see large stitches on the outside. If it misses the fold, the hem will not hold. Adjust your stitch width until it is just right.
Common Challenges and How to Solve Them
Even with a sewing machine, hemming can present some hurdles. One common issue is “tunneling,” where the fabric bunches up under the stitch. This usually happens because the tension is too high or the needle is too dull for the fabric weight. Always use a fresh needle suited to your fabric type, such as a sharp needle for woven trousers or a ballpoint needle if you are working with a knit material.
Another challenge is working with very thick fabrics like heavy wool or denim. In these cases, the “jump” stitch might struggle to penetrate the fold. You can help the machine by slightly increasing the stitch length and using a “hump jumper” tool or a piece of folded cardboard to keep the presser foot level as you sew over side seams.
Pro Tip: The Importance of Pressing
I cannot emphasize enough how important the final press is. Once you have finished sewing, unfold the hem and lay it flat on your ironing board. You will likely see small indentations where the jump stitch caught the fabric. Pressing the hem from the wrong side with plenty of steam will help those stitches settle into the fibers of the fabric, making them virtually disappear from the right side.
Why This Method Beats Hand Stitching
While hand-sewing is a meditative process, the machine blind hem offers several distinct advantages for the modern creator. First and foremost is durability. A machine stitch is locked in place, making it much less likely to snag and unravel than a hand-sewn thread. This is especially important for work trousers or kids’ clothes that see a lot of movement and friction.
Consistency is the second major benefit. Even the most experienced tailor can have slight variations in their hand-stitching tension. The sewing machine provides a perfectly even stitch across the entire diameter of the pant leg, ensuring that the hem doesn’t ripple or pull in certain spots. Plus, once you have the settings dialed in, you can hem a pair of pants in under ten minutes.
Expanding Your Skills: Beyond Basic Trousers
Once you master this invisible hemming technique, you will realize it is not just for trousers. You can use this exact same method for skirt hems, dress sleeves, and even home decor items like curtains. The ability to hide your construction marks is what elevates your sewing from a hobby to a professional craft.
For more delicate fabrics like silk or chiffon, you might want to practice on scraps first. These materials are very unforgiving and will show even the smallest needle puncture. In these instances, using a very fine 60 or 80 weight thread can help maintain the illusion of an invisible seam.
Conclusion: Elevate Your Wardrobe One Hem at a Time
Mastering the invisible pant hem is a rite of passage for every sewing enthusiast. It is a technique that combines mechanical precision with a bit of “sewing magic” to create a result that is both functional and beautiful. By taking the time to finish your edges properly, fold with care, and use the specialized tools your machine provides, you can transform the way your clothes fit and look.
The next time you find a pair of pants that are just a little too long, or you finish sewing a new pair of trousers, don’t settle for a visible topstitch. Reach for your blind hem foot, heat up your iron, and give your garment the professional finish it deserves. With a little practice, you will be hemming like a pro and building a wardrobe that fits you perfectly. Happy sewing!