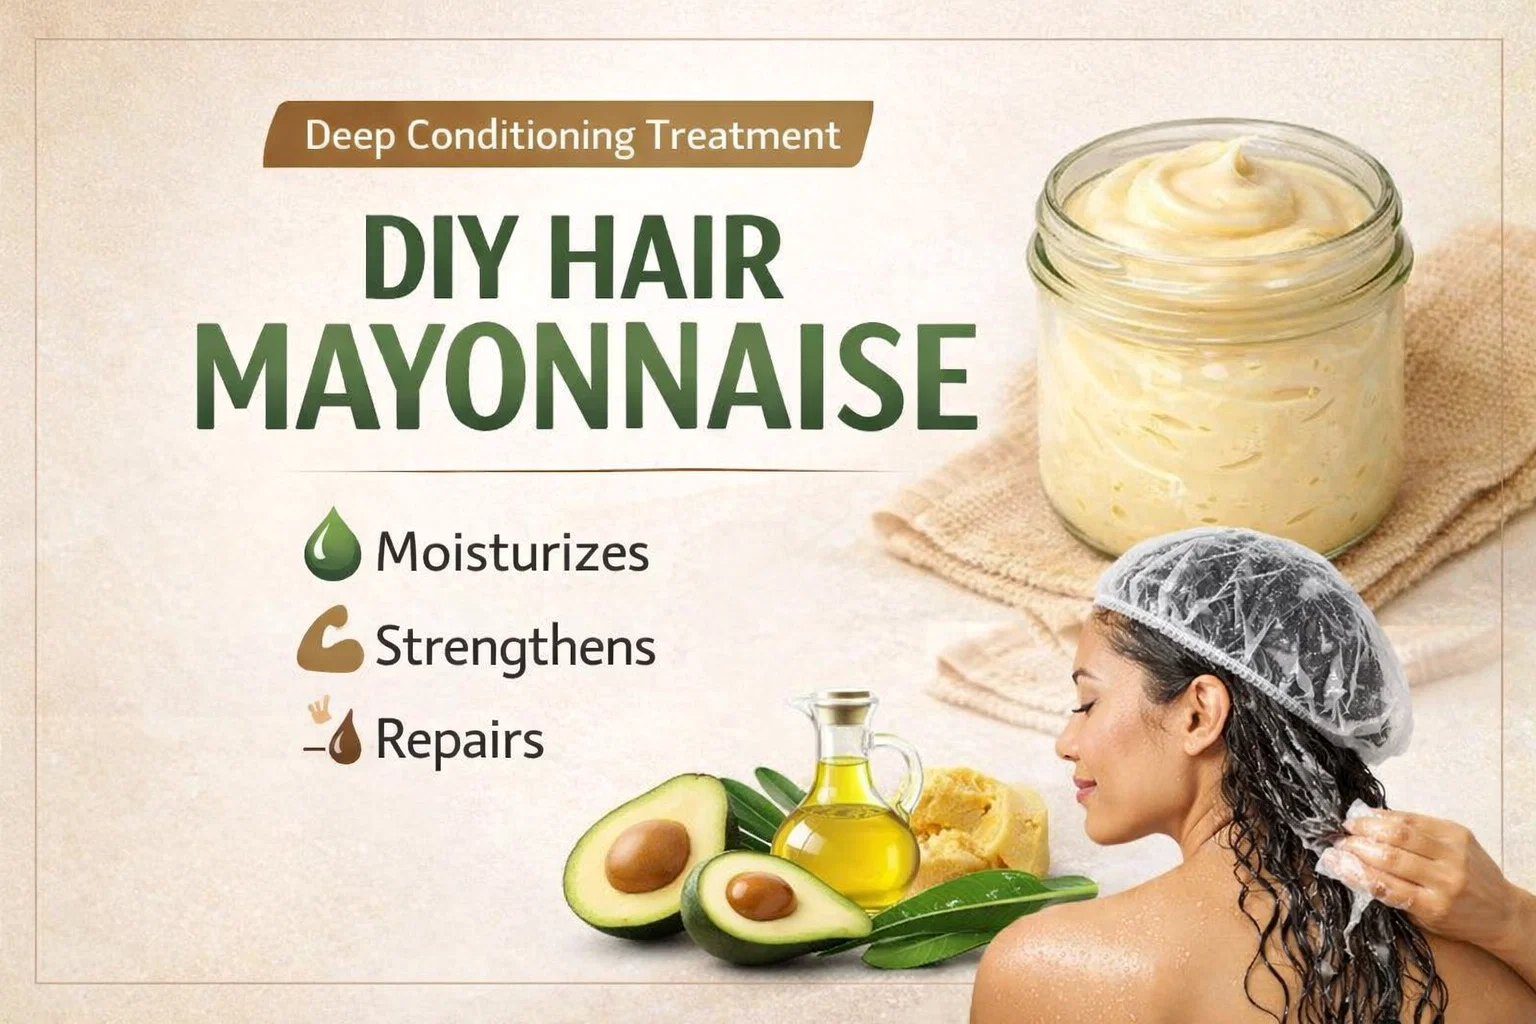
DIY Moisturizing Hair Mayonnaise Recipe for Deep Conditioning Strengthening
There is something incredibly satisfying about whipping up your own beauty treatments in the kitchen. Not only do you know exactly what is going into your hair, but you also get to skip the harsh chemicals and synthetic fillers often found in commercial products. If you have been struggling with dry, brittle, or lackluster hair, the image above outlines a gold standard for DIY hair care: the Moisturizing Hair Mayonnaise. This is not your typical kitchen mayo spread; this is a sophisticated, emulsified deep conditioner designed to penetrate the hair shaft and restore life to every strand.
The Science of Hair Mayonnaise: Why it Works
To understand why this specific recipe is so effective, we have to look at the biology of hair. Your hair is primarily made of a protein called keratin. Over time, heat styling, environmental pollutants, and chemical treatments strip away the natural oils and break down protein bonds. This leads to high porosity hair that cannot hold onto moisture. The DIY Moisturizing Hair Mayonnaise acts as a dual-action treatment. It provides a water phase for hydration and an oil phase to seal that moisture in, while the cool down phase adds the necessary proteins to bridge gaps in the hair cuticle.
By using a structured formulation approach involving Phase A, B, and C, you are creating a stable emulsion. This ensures that the water and oils do not separate, allowing for a smooth application that mimics high end salon masks. Let us dive deep into the specific ingredients that make this recipe a powerhouse for hair health.
Breaking Down the Ingredients: Phase A (The Water Phase)
The foundation of any good moisturizer is, quite literally, water. Without water, you are simply greasing your hair, not hydrating it. This recipe uses three key components in its water phase to ensure maximum absorption.
Distilled Water
Using distilled water is crucial for DIY formulations. Tap water contains minerals and chlorine that can cause buildup on your hair and, more importantly, can cause your homemade product to grow bacteria much faster. Distilled water provides a clean, neutral base for the other ingredients to shine.
Aloe Vera Juice
Aloe Vera is a miracle worker for the scalp and hair. It has a pH level that is very close to the natural pH of your hair, which helps to close the cuticle and lock in shine. It is also packed with proteolytic enzymes that repair dead skin cells on the scalp, potentially promoting faster hair growth.
Vegetable Glycerin
Glycerin is a humectant, meaning it pulls moisture from the air into your hair. For those with curly or thick hair that tends to get parched quickly, glycerin is the secret ingredient that keeps the hair feeling soft and bouncy long after the wash day is over.
The Power of Oils: Phase B (The Oil Phase)
While the water phase hydrates, the oil phase is what provides the slip, softness, and protection. This phase requires heating to ensure the solid fats and emulsifiers melt into a uniform liquid.
Emulsifying Wax
This is the magic ingredient that turns a watery mess into a creamy mayonnaise. Without an emulsifier, your water and oils would stay separate. Emulsifying wax binds them together, creating that luxurious, thick texture that stays on your hair during the conditioning process.
Avocado Oil and Olive Oil
These two oils are unique because they are among the few oils that can actually penetrate the hair shaft rather than just sitting on top of it. Avocado oil is rich in oleic acid and monounsaturated fats, making it one of the most deeply moisturizing oils available. Olive oil adds a heavy layer of protection and incredible shine, making it perfect for those with high porosity hair.
Shea Butter
Shea butter provides the “body” of the cream. It is loaded with vitamins A and E along with essential fatty acids. It acts as an emollient, filling in the rough spots on the hair cuticle to reduce frizz and prevent breakage during detangling.
The Final Touch: Phase C (The Cool Down Phase)
The cool down phase is where the most sensitive ingredients are added. Adding these while the mixture is too hot would destroy their beneficial properties. This phase focuses on repair and preservation.
Hydrolyzed Protein
This is what gives the “Mayonnaise” its name and its strengthening power. Hydrolyzed proteins are broken down into small molecules that can fit into the cracks of a damaged hair strand. This temporarily strengthens the hair, making it less prone to snapping and split ends.
Vitamin E and Preservatives
Vitamin E is a powerful antioxidant that protects the hair from oxidative stress. More importantly, since this recipe contains water and organic matter like aloe, a preservative is absolutely necessary. Without a broad spectrum preservative, your beautiful hair mask would become a breeding ground for mold and bacteria within days. Always prioritize safety in your DIY creations.
Step-by-Step Guide to Crafting Your Hair Mask
Creating this mask is like a fun science experiment. Follow these steps carefully to ensure a professional result.
- Step 1: The Heat Up. Place your Phase A ingredients in one heat safe container and Phase B in another. Use a double boiler method to bring both containers to approximately 70 to 75 degrees Celsius. This ensures the wax is fully melted and both phases are ready to bond.
- Step 2: The Emulsion. Slowly pour the Water Phase into the Oil Phase while stirring. For the best results, use a stick blender (immersion blender). The high shear will force the molecules to bond, creating a thick, white, creamy texture.
- Step 3: The Cooling. Allow the mixture to cool naturally while stirring occasionally. You will notice it getting thicker as it reaches room temperature.
- Step 4: The Actives. Once the temperature drops below 40 degrees Celsius, add your Phase C ingredients. This is also when you add your favorite essential oils like lavender or rosemary for a heavenly scent.
- Step 5: Storage. Transfer your finished hair mayonnaise into a sterilized glass jar. Label it with the date so you can keep track of its freshness.
How to Incorporate This Treatment into Your Routine
Because this treatment contains protein, you do not want to overdo it. Using it once every two weeks or once a month is usually sufficient for most hair types. To get the most out of your DIY Moisturizing Hair Mayonnaise, apply it to damp, clean hair. The dampness helps the product spread easily, and the cleanliness ensures there is no buildup blocking the ingredients from entering the hair shaft.
Covering your hair with a plastic shower cap is a game changer. The cap traps the natural heat from your scalp, which slightly lifts the hair cuticle and allows the oils and proteins to penetrate deeper. If you want a true salon experience, you can sit under a hooded dryer or wrap a warm towel around the shower cap for 20 to 30 minutes.
Rinsing and Aftercare
When the time is up, rinse your hair thoroughly with lukewarm water. You should immediately feel a difference in the “slip” of your hair, meaning your fingers or a wide tooth comb should glide through without resistance. Since this is a deep treatment, you may not need a traditional conditioner afterward. Simply follow up with a cool water rinse to seal the cuticles and then style as usual.
Conclusion: Your Path to Healthier Hair
Taking control of your hair care routine with a DIY Moisturizing Hair Mayonnaise is an empowering step toward hair health. By combining the hydrating power of aloe and glycerin with the strengthening properties of hydrolyzed protein and rich botanical oils, you are giving your hair the best possible environment to thrive. This recipe is more than just a beauty hack; it is a calculated, nutrient dense treatment that rivals expensive store bought masks.
Consistency is the key to any hair journey. As you continue to use this treatment, you will likely notice reduced breakage, more defined curls, and a natural shine that no silicone spray can replicate. So, clear off your counter, gather your ingredients, and give your hair the deep nourishment it deserves. Your future self with long, strong, and glowing hair will certainly thank you!