DIY Natural Pink Stick Blush Zero-Waste Solid Makeup Recipe Guide
Transitioning to a clean beauty routine often feels like an overwhelming mountain to climb. We are bombarded with marketing terms like natural and organic, yet the ingredient lists on the back of our favorite products remain a mystery of synthetic chemicals and microplastics. If you have ever looked at your makeup bag and wondered if there is a better, more sustainable way to glow, you are in the right place. Creating your own cosmetics is not just about saving money or reducing waste; it is about taking full control over what touches your skin every single day. Today, we are diving deep into the world of solid, zero-waste makeup, specifically focusing on how to craft a stunning natural pink stick blush that rivals any high end brand.
The Shift Toward Zero Waste Beauty
The beauty industry is one of the largest contributors to global plastic waste. From non-recyclable pumps to multi-layered compacts, most of our favorite products end up in landfills. This is where the magic of solid makeup comes into play. By removing water from the equation, we can eliminate the need for synthetic preservatives and bulky plastic packaging. Instead, we use cardboard tubes, glass jars, and compostable materials. Making your own blush at home is a powerful statement against the throwaway culture of modern cosmetics. It is a way to simplify your vanity while elevating the quality of your skincare.
Understanding the Power of Natural Pigments
When you look at the vibrant hue of a store-bought blush, that color usually comes from FD&C dyes or carmine, which is derived from crushed insects. In the world of DIY natural makeup, we turn to the earth for our palette. Ingredients like hibiscus powder and pink clay do more than just provide a beautiful flush of color. Hibiscus is packed with antioxidants and is often called the nature’s Botox plant because of its skin-firming properties. Pink clay, on the other hand, is incredible for sensitive skin, helping to draw out impurities while providing a silky texture that blends seamlessly into the pores. When you use these ingredients, your makeup actually becomes an extension of your skincare routine.
Essential Ingredients for Your DIY Stick Blush
To create a professional grade stick blush, you need a balanced blend of hard waxes, nourishing butters, and liquid oils. This combination ensures that the product is firm enough to hold its shape in a tube but soft enough to melt onto your skin upon contact. Here is a breakdown of what you will need to get started.
- Beeswax or Candelilla Wax: This provides the structure. Candelilla wax is a great vegan alternative that offers a slightly glossier finish.
- Shea Butter or Cocoa Butter: These butters give the blush its creamy consistency and provide a protective barrier for the skin.
- Carrier Oils: Jojoba oil or sweet almond oil are excellent choices because they are lightweight and non-comedogenic, meaning they won’t clog your pores.
- Natural Colorants: Hibiscus flower powder for a cool pink tone and French pink clay for a soft, matte earthiness.
- Optional Essential Oils: A single drop of rose or geranium oil adds a luxurious scent without the irritation of synthetic fragrances.
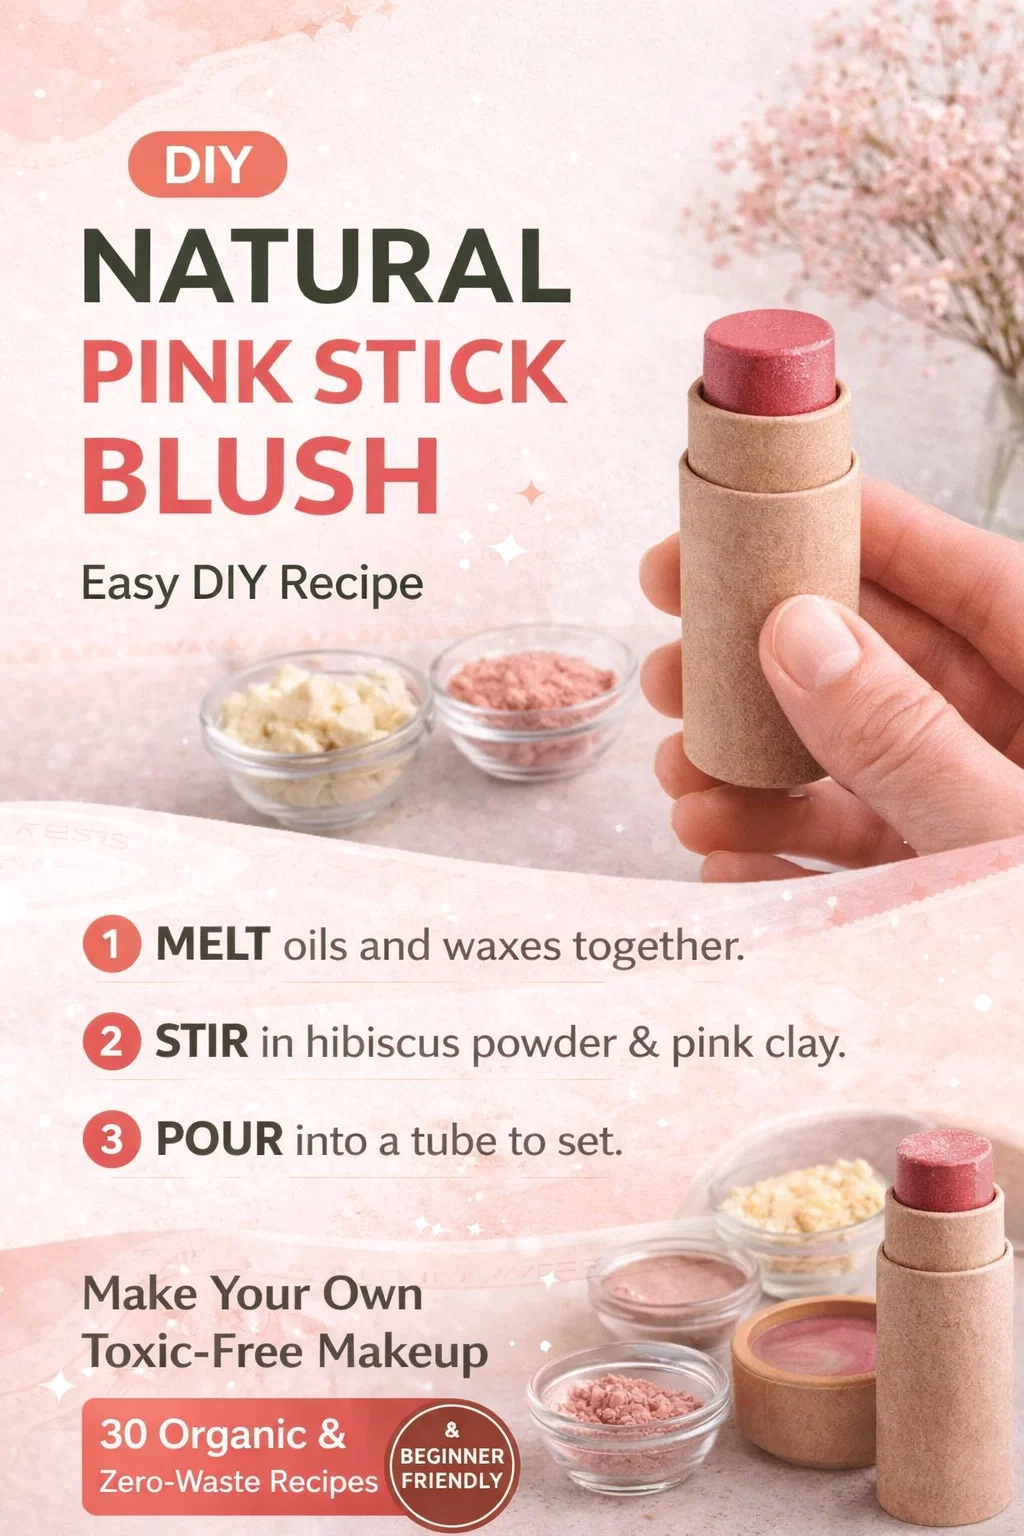
The Step by Step Process to Crafting Your Blush
The beauty of this recipe lies in its simplicity. You do not need a laboratory or expensive equipment to achieve great results. A simple bain-marie, or a heat-proof bowl over a pot of simmering water, is all it takes to melt your ingredients gently without scorching them.
Step 1: The Gentle Melt
Start by combining your wax, butter, and oil in your double boiler. The key here is patience. Use low heat to ensure that the nutrients in the shea butter and oils remain intact. Stir slowly with a wooden spatula until the mixture is a clear, uniform liquid. This base is the foundation of your solid makeup, providing the glide and staying power you need for a long-wearing blush.
Step 2: Infusing the Color
Once your base is melted, it is time to add the botanical pigments. Sift your hibiscus powder and pink clay to ensure there are no clumps. Gradually whisk them into the liquid base. You can customize the intensity by adding more powder for a bold look or less for a sheer, dewy tint. This is the moment where you become the chemist, adjusting the shades to perfectly match your unique skin tone.
Step 3: Pouring and Setting
Working quickly while the mixture is still fluid, pour the liquid into your eco-friendly paper tubes. These tubes are fantastic because as you use the product, you can simply push the bottom up or peel away the cardboard. Let the blush sit undisturbed at room temperature for several hours. As it cools, it will solidify into a perfect, portable stick that is ready for your makeup bag.
Why Homemade is Better Than Store Bought
Beyond the environmental benefits, there is a profound sense of security that comes with knowing every single ingredient in your makeup. Commercial blushes often contain talc, which can be contaminated with asbestos, or parabens that disrupt hormonal balance. When you make your own solid makeup, you eliminate these risks entirely. You are using food-grade ingredients that nourish the skin rather than just sitting on top of it. Furthermore, the cost per use is significantly lower, making luxury-quality beauty accessible to everyone.
Versatility of the Solid Stick Format
One of the best things about a pink stick blush is its multi-functional nature. This is not just for your cheeks. The creamy texture makes it an incredible lip tint or a subtle eyeshadow. Because it is a solid format, it is also the ultimate travel companion. You never have to worry about powders shattering in your suitcase or liquids leaking over your clothes. It is a compact, all-in-one solution for the minimalist who wants to look refreshed with minimal effort.
Tips for Success for Beginners
If this is your first time making DIY cosmetics, do not be afraid to experiment. If your blush feels too hard, you can melt it back down and add a teaspoon more of your carrier oil. If it is too soft, add a tiny bit more wax. The process is very forgiving. Make sure your workspace is clean and your containers are dry, as any water introduced to the mixture can shorten the shelf life of your product. Since this recipe is oil-based and contains no water, it will naturally stay fresh for six to twelve months.
Customizing Your Glow
Every face is different, and your makeup should reflect that. If you prefer a shimmer finish, you can add a pinch of ethically sourced mica powder to the mix. For those with oilier skin, adding a bit of arrowroot powder can help control shine and give the blush a more velvet-like finish. The possibilities are endless once you master the basic ratio of wax to oil.
Embracing a Toxic Free Lifestyle
Choosing to make your own makeup is a gateway into a broader toxic-free lifestyle. Once you see how easy it is to create a blush, you will likely find yourself looking at your foundation, mascara, and even your household cleaners with a new perspective. Clean beauty is a journey, not a destination. It is about making better choices one product at a time. This pink stick blush is the perfect entry point because it provides instant gratification through its beautiful color and ease of use.
Final Thoughts on Your DIY Beauty Journey
Building a sustainable, natural beauty routine is one of the most rewarding gifts you can give yourself. By following this easy DIY recipe, you are reducing your carbon footprint, protecting your skin from harsh chemicals, and reclaiming the joy of self-care. There is something deeply satisfying about applying a product that you crafted with your own hands, using ingredients sourced from nature. Whether you are looking to simplify your routine or move toward a zero-waste home, this natural pink stick blush is a beautiful step in the right direction. Grab your ingredients, set up your double boiler, and start your journey to a cleaner, more radiant you today.