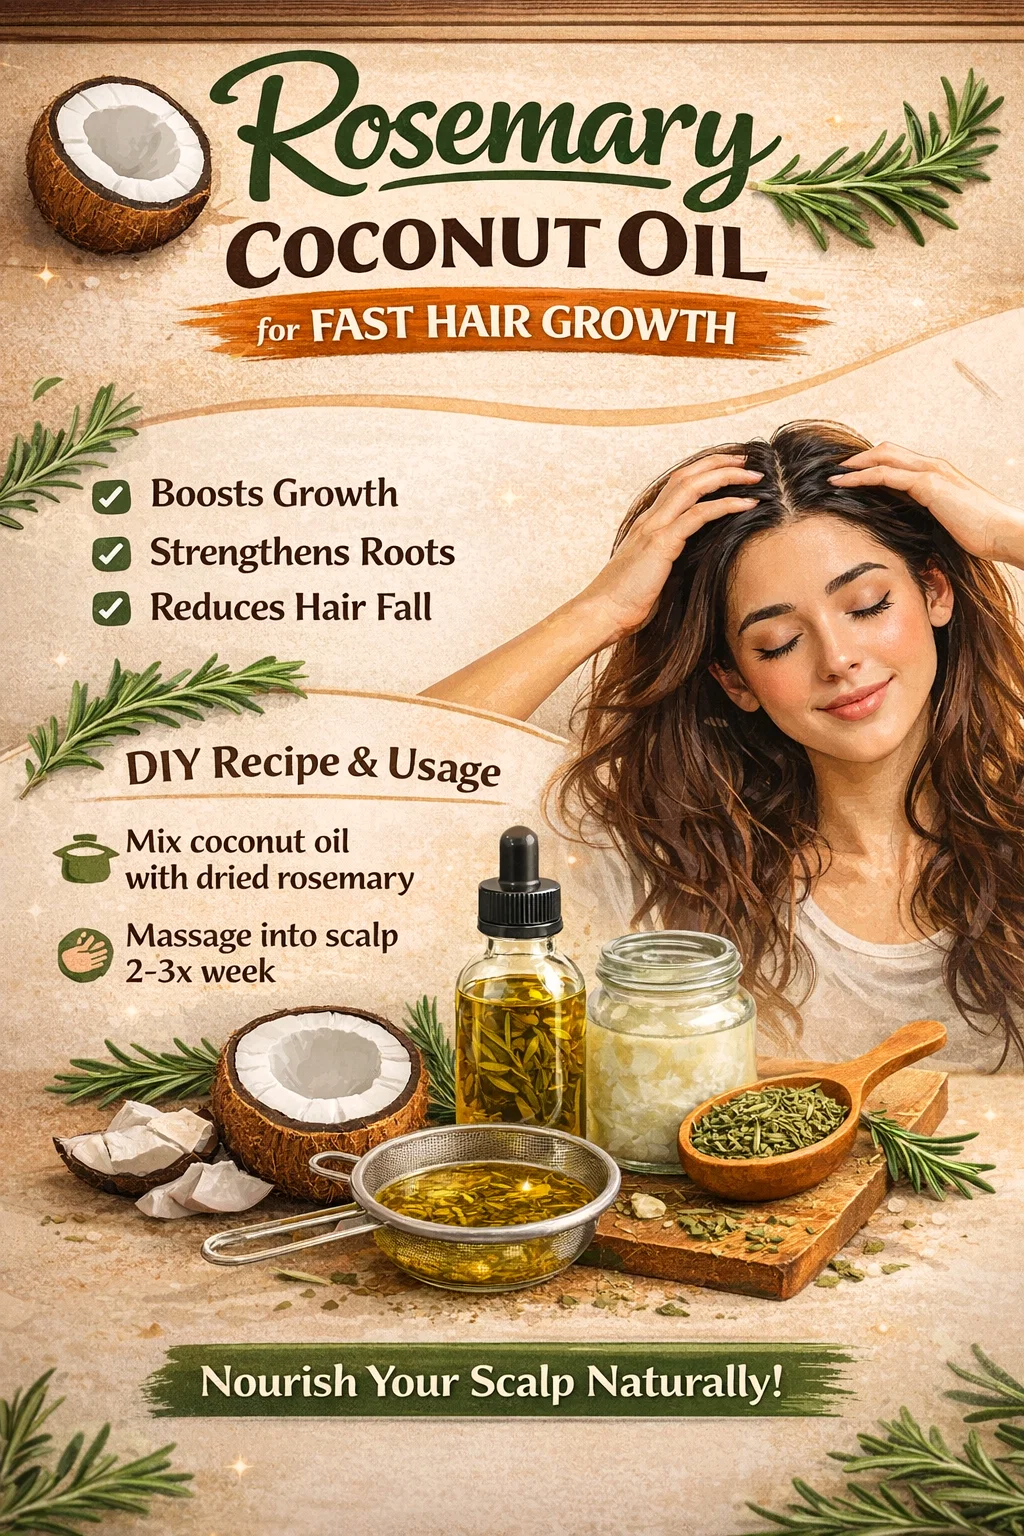
DIY Rosemary Coconut Oil for Fast Hair Growth Scalp Massage Recipe for Hair Growth Boost
Struggling with slow hair growth or thinning strands can feel like an uphill battle. We have all been there, standing in front of the mirror and wishing for a magic potion that could transform our hair overnight. While there is no such thing as an instant miracle, nature has provided us with some incredibly potent ingredients that come pretty close. If you are looking for a natural, budget friendly way to boost your hair health, you have likely come across the powerhouse combination of rosemary and coconut oil. This duo is more than just a kitchen staple; it is a scientifically backed remedy for stimulating the scalp and encouraging those stubborn follicles to wake up.
The Science Behind the Rosemary and Coconut Oil Duo
To understand why this specific DIY recipe works so well, we have to look at the individual strengths of the ingredients. Rosemary is not just a fragrant herb for your roasted potatoes. In the world of trichology, rosemary essential oil or infused oil is celebrated for its ability to improve cellular generation. Some studies have even suggested that rosemary oil performs similarly to minoxidil, a common over the counter hair growth treatment, but without the harsh chemical side effects. It works by increasing blood circulation to the scalp, ensuring that your hair follicles receive the oxygen and nutrients they need to thrive.
Then we have coconut oil, the undisputed king of carrier oils. Unlike many other oils that simply sit on top of the hair shaft, coconut oil has a unique molecular structure that allows it to penetrate deep into the hair cuticle. This means it provides moisture from the inside out, reducing protein loss and preventing breakage. When you combine the stimulating properties of rosemary with the protective shield of coconut oil, you create an environment where hair can grow faster, stronger, and much healthier.
Ingredients You Will Need for Your Growth Boost
One of the best things about this remedy is its simplicity. You do not need an expensive lab or a long list of exotic ingredients. Most of these items are likely already in your pantry or available at your local health food store. To make a standard batch that will last you several weeks, gather the following:
- 1 Cup of Organic Virgin Coconut Oil: Look for cold pressed oil to ensure the nutrients are still intact.
- 2 Tablespoons of Dried Rosemary: Dried herbs are excellent for slow infusions as they carry less risk of mold than fresh herbs.
- Alternative: 8 to 10 Drops of Rosemary Essential Oil: If you are in a hurry and do not want to strain dried herbs, high quality essential oil is a great substitute.
- A Small Glass Jar: Amber or dark glass is best for storing the finished product to protect it from light degradation.
Step by Step Method: How to Create Your Infusion
The process of making this oil is almost as therapeutic as using it. There are two main ways to do this: the stovetop method for quick results, or the solar infusion method for those who prefer a slower, heat free process. Based on the infographic provided, we will focus on the gentle heat method which is perfect for busy schedules.
Step 1: Warm the Coconut Oil
Start by placing your cup of coconut oil in a small saucepan over very low heat. Coconut oil is a solid at room temperature but melts quickly. You do not want the oil to boil or smoke; you simply want it to reach a warm, liquid state that can easily absorb the rosemary essence. Keeping the heat low is crucial for preserving the fatty acids in the oil.
Step 2: Add the Rosemary
Once the oil is liquid, stir in your two tablespoons of dried rosemary. If you are using essential oil instead of dried herbs, you should wait until the oil is off the heat and slightly cooled before adding the drops to prevent the volatile compounds from evaporating. If using the dried herbs, let them sit in the warm oil on the lowest possible heat setting for about 5 to 10 minutes. This “blooms” the herb and releases the rosmarinic acid into the carrier oil.
Step 3: Cool and Strain
After the infusion time is up, turn off the heat and let the mixture sit until it reaches room temperature. If you used dried rosemary, you will need a fine mesh strainer or a piece of cheesecloth. Carefully pour the oil through the strainer into your glass bottle. Make sure to squeeze the herbs to get every last drop of that infused goodness. If you used essential oil, you can skip the straining and go straight to bottling.
Step 4: Storage
Seal your bottle tightly and store it in a cool, dark place. Because coconut oil solidifies when it gets cold, you may need to run the bottle under warm water for a minute before each use to turn it back into a liquid massage oil.
The Art of the Scalp Massage
While the oil itself is a powerhouse, the way you apply it is equally important. A scalp massage is not just about relaxation; it is a mechanical stimulation that stretches the cells of hair follicles. This stretching, in turn, stimulates the follicles to produce thicker hair. For the best results, you should aim for a 5 to 10 minute massage at least 2 to 3 times per week.
When massaging, use the pads of your fingers, not your fingernails. Move your fingers in small, circular motions across your entire scalp. Start from the front of your hairline and work your way back to the nape of your neck. Focus extra attention on any areas where you notice thinning or slower growth. The combination of the warmth from your hands and the rosemary oil will create a tingling sensation that signals increased blood flow.
Best Practices for Maximum Results
To get the most out of your DIY hair growth journey, consistency is key. You cannot expect Rapunzel-like tresses after one application. Here are a few tips to ensure you are doing it right:
- Don’t Overdo the Oil: You do not need to soak your entire head until it is dripping. Focus the oil primarily on the scalp where the growth happens. A light coating on the ends can help with split ends, but the scalp is the priority.
- The Inversion Method: For an extra boost, try massaging your scalp while hanging your head slightly upside down over the edge of your bed. This uses gravity to further increase blood flow to the head.
- Leave it In: For a deep treatment, leave the oil in for at least 30 minutes before washing. Some people prefer to leave it overnight with a silk cap, but even a short window of time allows the coconut oil to penetrate the hair shaft.
- Wash Thoroughly: Coconut oil is heavy. You might need to shampoo twice to ensure all the residue is gone, especially if you have fine hair that weighs down easily.
Common Mistakes to Avoid
Even with natural remedies, there are a few pitfalls to watch out for. First, always perform a patch test on a small area of your skin to ensure you do not have an allergic reaction to the rosemary. Essential oils are very concentrated and can be irritating for sensitive skin if not diluted properly in the carrier oil.
Second, avoid using high heat during the infusion process. Boiling your rosemary in oil will “cook” the nutrients and potentially leave you with a scorched smell rather than a fresh, herbal aroma. Patience is your best friend when making DIY beauty products.
Finally, do not forget that hair growth is also an internal process. While this oil is fantastic for external stimulation, it works best when paired with a balanced diet rich in biotin, protein, and iron. Think of the rosemary coconut oil as the fertilizer for the soil, while your diet is the water that keeps the plant growing from within.
Conclusion: Your Journey to Healthier Hair
Natural hair care is a rewarding path that allows you to take control of what goes onto your body. By using this DIY Rosemary Coconut Oil, you are skipping the synthetic fragrances and harsh preservatives found in many commercial hair growth serums. Instead, you are using time tested ingredients that have been trusted for generations. It is a simple ritual that encourages you to slow down, practice self care, and nurture your hair from the root up. Be patient with yourself and your hair. With regular scalp massages and the nourishing power of rosemary, you will be well on your way to achieving the thick, vibrant hair you have always wanted. Why wait? Start your first infusion today and let nature do the heavy lifting.