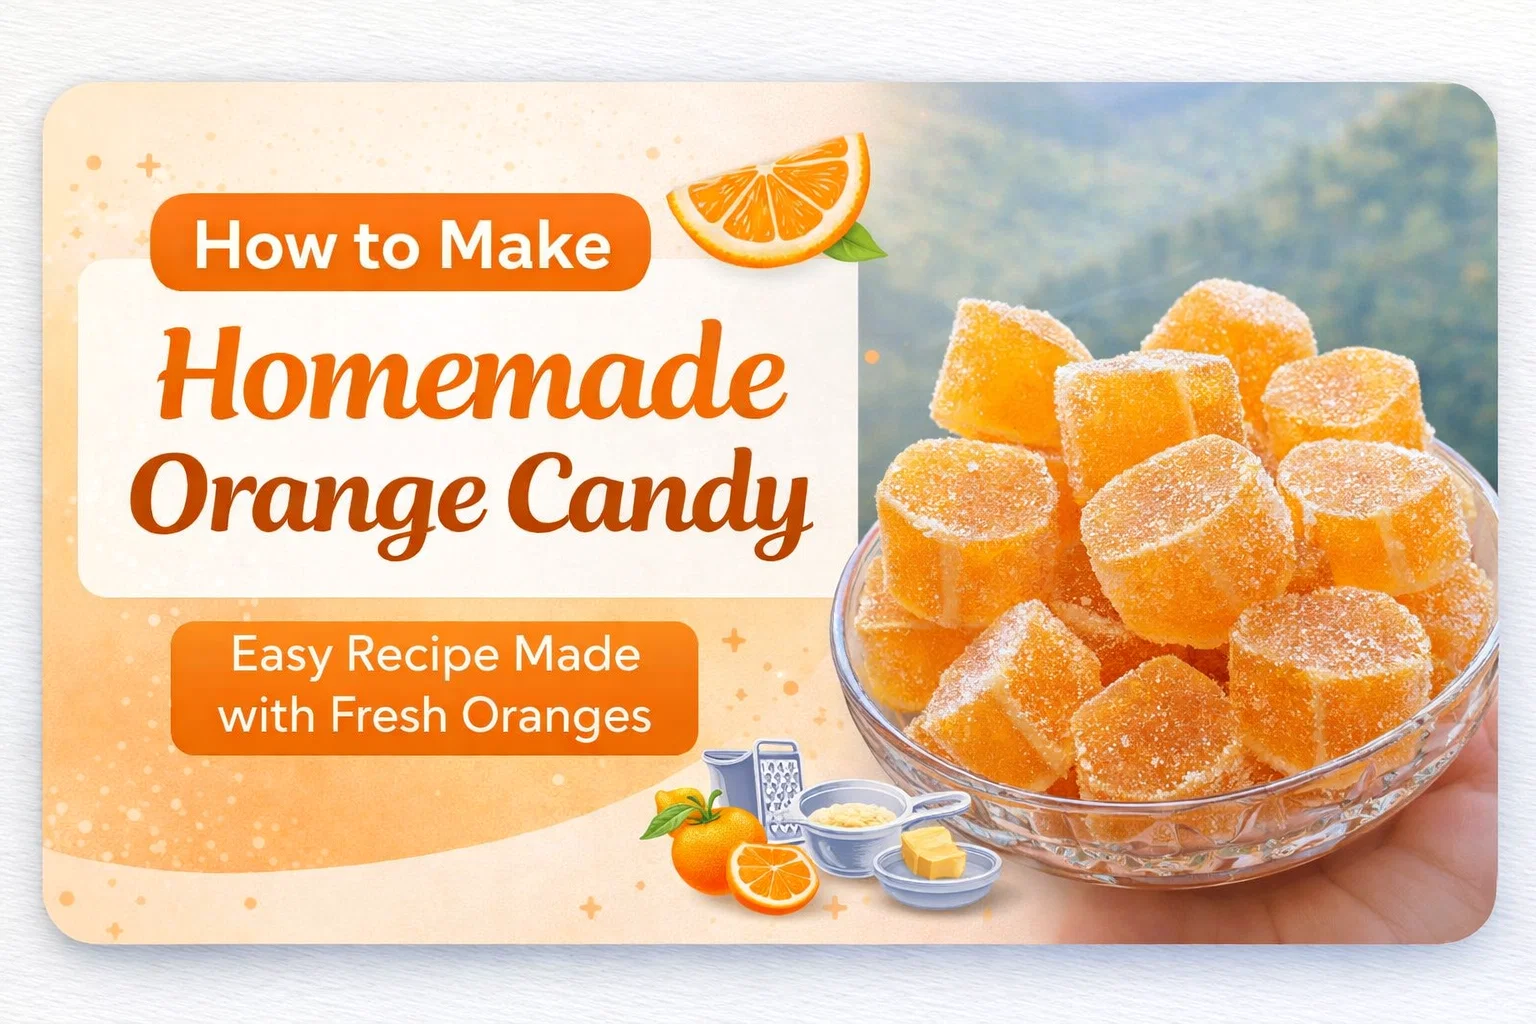
Easy Homemade Orange Candy Recipe DIY Natural Fruit Gummy Candy Tutorial
There is something deeply nostalgic about the scent of fresh citrus wafting through a warm kitchen. For many of us, the quest for the perfect sweet treat often leads to the candy aisle of a grocery store, where bags of neon-colored gummies filled with artificial dyes and synthetic flavorings await. But what if you could capture the bright, zesty essence of a sun-ripened orange in a chewy, sugar-dusted bite made right in your own home? This homemade orange candy recipe is more than just a snack. It is a celebration of simple ingredients and the joy of creating something from scratch that tastes remarkably better than any store-bought alternative.
The Magic of Homemade Citrus Confections
Making your own candy might sound like a daunting task reserved for professional chocolatiers or grandmotherly figures with copper pots and candy thermometers. However, this specific recipe for orange gummies is surprisingly approachable for the modern home cook. By using real orange juice and fresh zest, you are tapping into a depth of flavor that artificial extracts simply cannot replicate. The result is a vibrant, translucent candy that balances the natural acidity of the fruit with the comforting sweetness of a classic confection.
The beauty of this project lies in its versatility. These candies are perfect for filling up a candy jar on your counter, packing into school lunches, or even gifting to friends and family during the holidays. Because they rely on gelatin and a simple sugar syrup base, they have a satisfying chew that sits somewhere between a traditional gummy bear and a soft Turkish delight. Once you master the basic technique, you will find yourself looking at every fruit in your kitchen as a potential candidate for a homemade gummy treat.
Essential Ingredients for Success
Before you turn on the stove, it is important to understand why each ingredient matters. This recipe is a delicate balance of chemistry and flavor, and substituting key components can change the final texture of your candy.
Fresh Oranges and Zest
The star of the show is the orange. For this recipe, you generally want medium-sized oranges that feel heavy for their size, as this indicates they are full of juice. Navel oranges are excellent for sweetness, while Valencia oranges provide a great juice yield. The zest is arguably even more important than the juice because it contains the essential oils that provide that signature citrus aroma. Always zest your oranges before juicing them to make the process easier.
The Role of Gelatin
Gelatin is the magical ingredient that gives these candies their structure. It is a protein derived from collagen that, when dissolved and then cooled, forms a stable gel. To get the best results, you must bloom your gelatin. This means letting it sit in cold water for a few minutes until it absorbs the liquid and becomes a thick, applesauce-like consistency. This ensures that the gelatin dissolves evenly into your hot syrup without leaving any unappealing rubbery clumps.
Sweeteners and Texture Agents
Granulated sugar provides the primary sweetness and bulk for the candy. However, we also use a portion of corn syrup. Corn syrup is an invert sugar, which means it helps prevent the granulated sugar from recrystallizing as the candy cools. This keeps your orange bites smooth and chewy rather than gritty. A small pat of butter added at the end provides a hint of richness and helps give the candy a slightly more polished, professional mouthfeel.
Step by Step Guide to Crafting Orange Candy
The process of making these candies is relatively quick, but it does require your full attention during the simmering stages. Follow these steps carefully to ensure your candy sets up perfectly every time.
Prepping the Citrus
Start by washing your oranges thoroughly to remove any wax or debris from the peel. Use a fine microplane to zest the outer orange layer of the skin, being careful not to include the bitter white pith underneath. Once zested, slice the oranges in half and juice them until you have about three quarters of a cup of liquid. If you prefer a very smooth candy, you can strain the juice to remove any stray pulp, though leaving a little bit of pulp can add to the rustic, homemade charm.
Simmering the Syrup Base
In a heavy-bottomed saucepan, combine your fresh orange juice, water, granulated sugar, and corn syrup. Place the pan over medium heat and stir gently until the sugar has completely dissolved. Bring the mixture to a gentle simmer. You want to let this bubble away for about five minutes. This short cooking time allows some of the excess water to evaporate, concentrating the orange flavor and preparing the sugars to bond with the gelatin.
Integrating the Gelatin
While your syrup is simmering, prepare your gelatin bloom in a small bowl with a quarter cup of cold water. Once the syrup has finished its initial five-minute simmer, remove the pan from the heat. Carefully whisk in the bloomed gelatin. It will melt almost instantly into the hot liquid. It is crucial not to boil the mixture once the gelatin is added, as excessive heat can actually break down the protein bonds and prevent the candy from setting firmly.
The Final Flavor Boost
Now is the time to stir in your orange zest and that tablespoon of butter. The residual heat will melt the butter and release the oils from the zest, filling your kitchen with an incredible fragrance. Give everything a thorough stir until the mixture is uniform and glossy. The zest will stay suspended in the liquid, creating beautiful little flecks of orange throughout the finished candy.
Setting and Cutting Your Confections
Patience is perhaps the hardest part of this recipe. Once your mixture is ready, pour it into a lightly greased glass dish or a silicone mold. A square or rectangular dish works best if you plan on cutting the candy into uniform cubes. Let the dish sit on the counter until it reaches room temperature, then transfer it to the refrigerator. You will need to let it chill for at least four to six hours, though leaving it overnight is the best way to ensure the texture is completely stable.
When you are ready to serve, prepare a workspace with a generous amount of confectioners’ sugar. Turn the block of candy out onto a cutting board. If it feels a bit sticky, you can dust your knife with sugar as well. Cut the candy into small squares, rectangles, or even use small cookie cutters for fun shapes. Immediately toss each piece in the confectioners’ sugar. This dusting not only adds a final touch of sweetness but also prevents the pieces from sticking together in storage.
Why This Recipe Fits the Sustainable Lifestyle
For those interested in homesteading or sustainable living, this recipe is a fantastic addition to your repertoire. In an era where we are increasingly conscious of what goes into our bodies, being able to control every ingredient in your snacks is empowering. By choosing organic oranges and avoiding artificial dyes like Red 40 or Yellow 5, you are creating a cleaner version of a classic treat. It is a small but meaningful step toward self-sufficiency and a more mindful way of eating.
Furthermore, this recipe encourages a zero-waste approach to citrus. Many people squeeze oranges for juice and toss the peels away, but this recipe utilizes the zest, which is where the most concentrated flavor lives. If you have your own citrus trees or a local farm source, this becomes a seasonal tradition that celebrates the harvest. Making your own preserves, candies, and dried fruits is a foundational skill for anyone looking to live more closely with the seasons.
Tips for Customizing Your Candy
Once you have mastered the basic orange candy, the possibilities for customization are endless. You can easily adapt this recipe to suit different tastes or occasions.
- Sour Orange Bites: If you love a bit of pucker, mix a teaspoon of citric acid into your confectioners’ sugar dusting. This will give the candies a tart kick that perfectly complements the sweet orange center.
- Blood Orange Variety: Use blood oranges for a deep, ruby-red candy that looks stunning on a dessert platter. The flavor is slightly more floral and complex than standard oranges.
- Herbal Infusions: Try simmering a sprig of fresh rosemary or a few basil leaves in the juice before adding the sugar. Strain them out before the gelatin step for a sophisticated, botanical twist on the candy.
- Spice it Up: A pinch of cinnamon or ginger added to the syrup can transform these into a cozy, warming winter treat.
The Joy of Handmade Gifts
In a world of mass-produced goods, receiving a jar of handmade candy feels incredibly special. These orange bites make wonderful gifts for teachers, neighbors, or hosts. You can package them in small glass jars tied with a bit of twine and a dried orange slice for a beautiful, rustic aesthetic. Because they are made with fresh juice and no heavy preservatives, it is best to tell your recipients to enjoy them within a week or two, though they rarely last that long once the jar is opened!
There is a profound sense of accomplishment that comes from turning a handful of oranges and some sugar into a professional-looking confection. It reminds us that the kitchen is a place of creativity and magic. Whether you are making these with your children on a rainy afternoon or preparing a batch for a special celebration, the process is just as rewarding as the final product.
Conclusion: Your New Kitchen Staple
Homemade orange candy is a delightful reminder that the best things in life often come from the simplest ingredients. By moving away from processed snacks and embracing the art of the home confectioner, you are bringing more flavor, more health-consciousness, and more joy into your home. This recipe is reliable, delicious, and infinitely adaptable, making it a perfect candidate for your permanent recipe collection. So, the next time you see a pile of bright oranges at the market, grab a few extra. Your kitchen is just a few steps away from being transformed into a boutique candy shop. Happy cooking, and enjoy every sweet, citrusy bite!