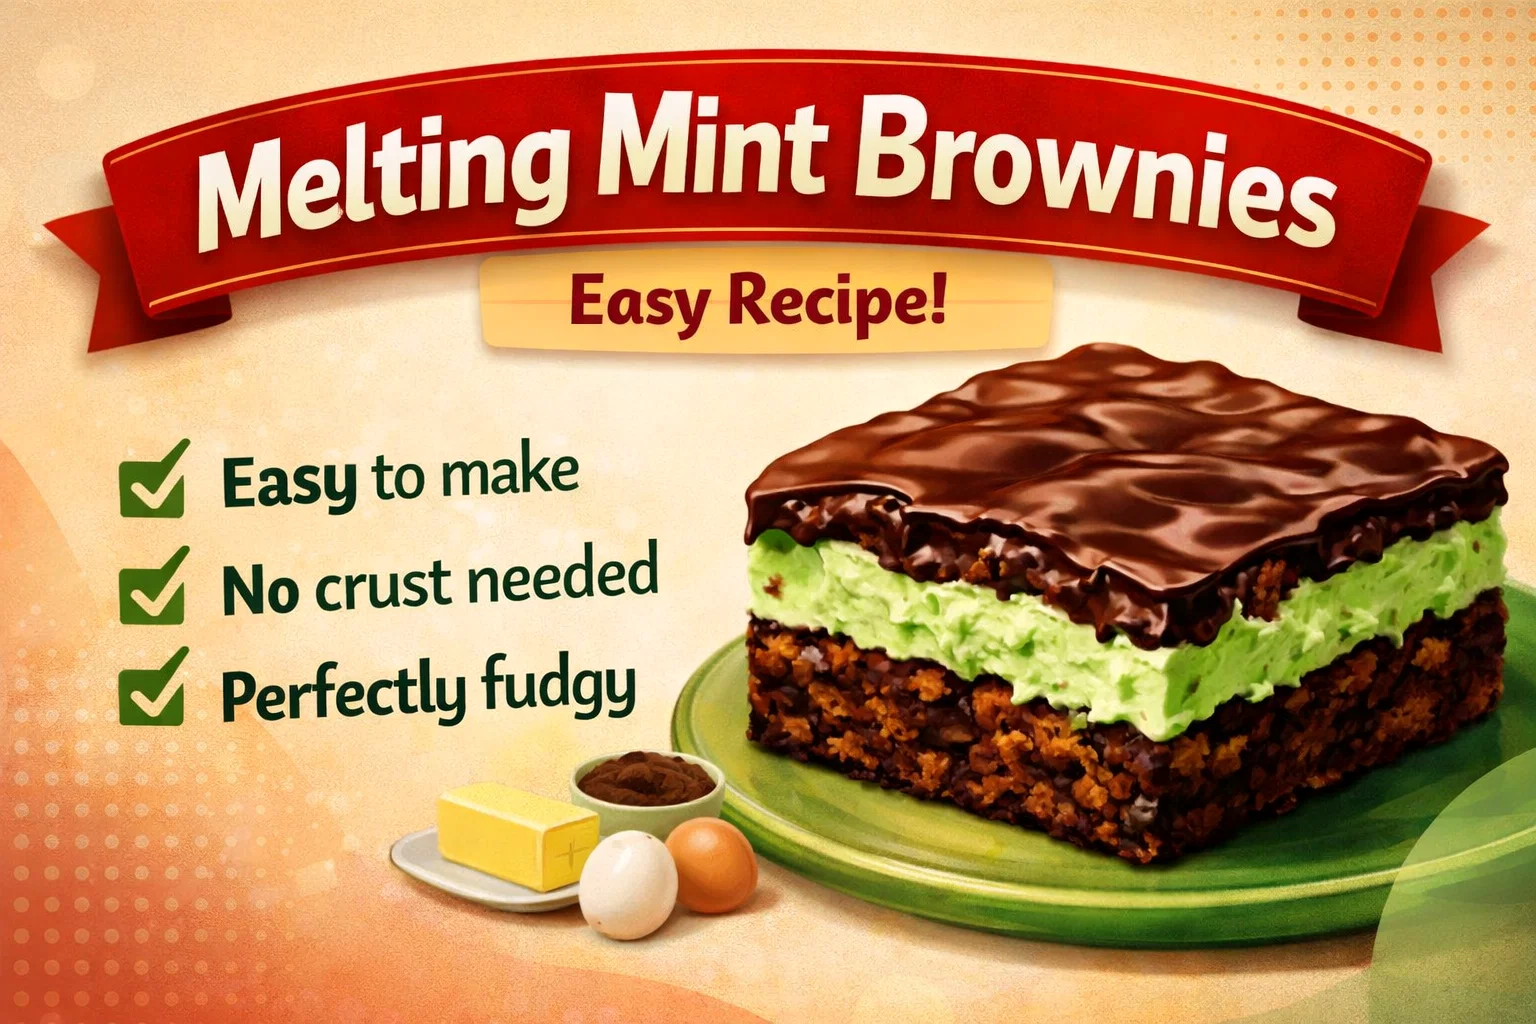
Easy Melting Mint Brownies Recipe – Best Homemade Chocolate Mint Brownie Bars
There is something truly magical about the combination of cool peppermint and rich, dark chocolate. It is a flavor profile that transcends seasons, bringing a sense of nostalgia to the holiday table and a refreshing bite to a summer potluck. Today, we are diving deep into a vintage inspired treasure: Grandma’s Melting Mint Brownies. This isn’t just another brownie recipe; it is a layered masterpiece that features a unique base that bakes its own crust, topped with a velvety mint frosting that looks as vibrant as it tastes. If you have been searching for that elusive balance between fudgy texture and crisp minty finish, you have officially found your new favorite bake.
The Magic of the Self-Baking Crust
One of the most intriguing aspects of this specific recipe is the promise that it bakes its own crust. In the world of home baking, achieving a distinct bottom layer without the extra step of a pre-baked graham cracker or shortbread base is a total win. The secret lies in the ratio of melted butter to unsweetened cocoa powder. By using a generous 2/3 cup of melted butter, the batter achieves a heavy, dense consistency that settles perfectly in the pan. As the heat hits the sugar and flour, the bottom and sides caramelize slightly, creating a firm, supportive foundation for the soft layers above. This means no crumbly mess when you go to lift a square out of the pan, just a clean, professional-looking slice every single time.
Why Melted Butter Trumps Creamed Butter
Many cookie and cake recipes call for creaming softened butter with sugar to incorporate air. However, for a truly fudgy brownie that mimics the texture of a decadent truffle, melted butter is the essential choice. It provides a heavy, moist crumb and that characteristic shiny, crackly top that we all crave. In this recipe, the melted butter blends seamlessly with the cocoa powder and sugar, ensuring that every bite is packed with deep chocolate flavor rather than being light and airy like a chocolate cake. We want density here, as it provides the perfect structural contrast to the light, whipped mint frosting that comes later.
Essential Ingredients for Success
To recreate Grandma’s signature treats, quality is key. While the ingredients are staples you likely already have in your pantry, how you handle them makes all the difference in the final result. Let’s break down the heavy hitters in this lineup:
- Unsweetened Cocoa Powder: This provides the intense chocolate backbone. Since there is no melted bar chocolate in the base, the 2/3 cup of cocoa does all the heavy lifting. Make sure your cocoa is fresh and sifted to avoid any bitter clumps.
- Unbleached All-Purpose Flour: Using unbleached flour offers a slightly denser structure and a better nutty flavor profile compared to highly processed bleached versions. It holds the moisture of the eggs and butter without becoming tough.
- Peppermint Extract: A little goes a long way. This recipe calls for 1/2 teaspoon, which is just enough to be bold without tasting like toothpaste. Always use pure extract rather than artificial flavoring for the cleanest taste.
- Green Food Coloring: While purely aesthetic, those 4 to 5 drops of green coloring are what give these brownies their iconic “grasshopper” look. It signals to the brain exactly what flavor to expect before the first bite.
Step-by-Step Guide to the Perfect Layer
Baking can sometimes feel like a science experiment, but this recipe is designed for ease. Following the directions precisely ensures that the layers stay distinct and don’t muddy together. The process is broken down into two main phases: the bake and the frost.
Mixing the Base
Start by whisking together your melted butter, sugar, and cocoa. You want this mixture to be smooth and glossy. When you add the three large eggs, beat them in one at a time. This helps emulsify the fats and liquids, creating a stable batter. When it is time for the flour and baking powder, fold them in gently. Over-mixing at this stage can develop too much gluten, leading to a bread-like texture rather than a fudgy one. Stop as soon as the last white streak of flour disappears.
The Critical Cooling Phase
The fifth step in the directions is perhaps the most important: “Cool and frost with mint layer.” Attempting to frost a warm brownie is a recipe for disaster. The butter-based mint frosting will melt on contact, turning into a sugary green soup that soaks into the brownie base. For the best results, let the pan sit on a wire rack until it is completely room temperature. If you are in a hurry, you can pop the pan into the refrigerator for twenty minutes once it is no longer steaming. A cold base creates a sharp, beautiful line between the dark chocolate and the bright green mint.
Elevating the Frosting: Tips for a Silky Finish
The mint layer is where the “melting” sensation really happens. This is essentially a rich buttercream made with 5 tablespoons of softened butter, 3 cups of confectioners’ sugar, and a splash of sour cream. The addition of 1/4 cup of sour cream is a brilliant touch often found in vintage recipes. It adds a subtle tang that cuts through the intense sweetness of the powdered sugar, while providing a creamy, spreadable consistency that mimics the center of a peppermint patty candy.
Adjusting the Consistency
If your frosting feels too stiff to spread smoothly, use that optional tablespoon of milk. Add it drop by drop. You want the frosting to be thick enough to hold its shape but soft enough that you don’t tear the surface of the brownies while spreading. If you chose to include the bag of small peppermint patties, you can either chop them up and fold them into the frosting for added texture or press them into the top of the brownies before the frosting sets for a decorative touch.
Advanced Tips for Professional Results
If you want your brownies to look like they came from a high-end bakery or a vintage cookbook illustration, there are a few extra steps you can take. These aren’t strictly necessary for flavor, but they elevate the presentation significantly.
The Parchment Paper Trick
As mentioned in the tips section of the image, always use parchment paper. Leave an inch or two of overhang on the long sides of your pan. This creates “handles” that allow you to lift the entire block of brownies out of the pan once they are chilled. Cutting brownies inside a deep baking dish often leads to the first piece being crushed or mangled. By lifting them out onto a cutting board, you can get perfect, straight edges every time.
The Hot Knife Method
For those perfectly clean, distinct layers where the green doesn’t smear into the brown, use a hot knife. Run your chef’s knife under hot tap water, wipe it completely dry, and make one long, smooth cut. Wipe the blade clean and reheat it between every single slice. It sounds tedious, but it ensures that the mint frosting stays pristine and the fudgy base doesn’t stick to the blade.
Serving and Storage Suggestions
Grandma’s Melting Mint Brownies are best served slightly chilled. The cold temperature firms up the butter in the frosting, giving it a melt-in-your-mouth quality that lives up to the name. They are quite rich, so small squares are usually sufficient for most guests.
How to Store for Freshness
Because of the sour cream and butter in the frosting, these brownies should be stored in an airtight container in the refrigerator. They will stay fresh and delicious for up to five days. If you need to stack them, place a piece of wax paper or parchment between the layers to prevent the frosting from sticking to the bottoms of the brownies above. You can also freeze these! Simply wrap individual squares in plastic wrap and store them in a freezer bag. They actually taste fantastic even when eaten straight from the freezer.
Customizing Your Mint Brownies
While the recipe provided is a classic, there is always room for a little creative flair. If you want to put a modern twist on Grandma’s favorite, consider these variations:
- The Chocolate Ganache Topping: For an extra layer of decadence, pour a thin layer of dark chocolate ganache over the mint frosting once it has set. This creates a “thin mint” cookie effect that is absolutely irresistible.
- Holiday Variations: Swap the green food coloring for red during Valentine’s Day or keep them white for a “snowy” winter theme. You can also sprinkle crushed candy canes over the top for an added crunch.
- Mocha Mint: Add a teaspoon of espresso powder to the chocolate base. Coffee naturally enhances the flavor of cocoa, making the chocolate taste even deeper and more complex without adding a strong coffee flavor.
Conclusion: A Recipe Worth Saving
In a world of complicated desserts and over-the-top baking trends, Grandma’s Melting Mint Brownies remind us that the best treats are often the simplest ones. This recipe relies on basic pantry staples and straightforward techniques to create a dessert that is visually stunning and deeply satisfying. Whether you are baking these for a school bake sale, a holiday party, or just a Tuesday night craving, they are guaranteed to be a hit. The combination of the “bake-its-own-crust” base and the creamy, refreshing mint layer is a timeless duo that never goes out of style. So, grab your cocoa powder, turn on the oven to 350 degrees, and get ready to create a new family tradition. Don’t forget to save this recipe for your next gathering, your friends and family will certainly thank you.