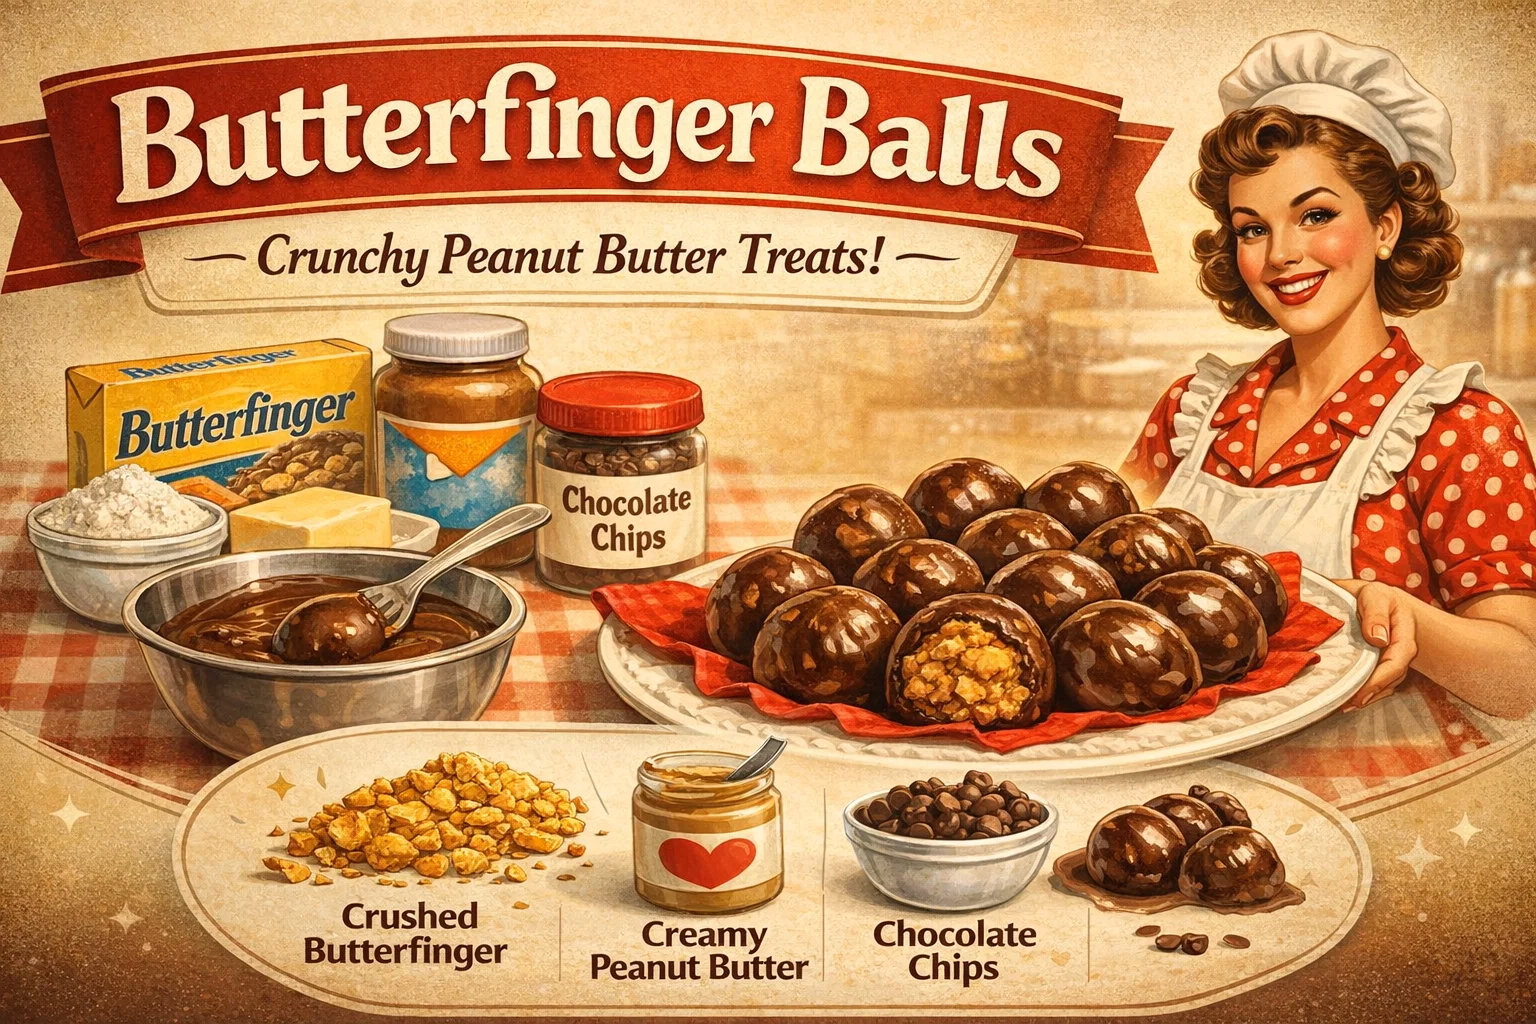
Easy No-Bake Butterfinger Balls Recipe Crunchy Peanut Butter Truffles
There is something undeniably nostalgic about the combination of peanut butter and chocolate. It is a flavor profile that transcends generations, reminding us of childhood candy bars and rainy afternoons spent in the kitchen. If you are a fan of that iconic, shattering crunch found in a Butterfinger bar, then you are in for a serious treat. Today, we are diving deep into the world of homemade confectionery with a recipe that is as simple as it is addictive: Butterfinger Balls. These bite-sized morsels of joy are the ultimate no-bake dessert, combining the salty richness of peanut butter with the unmistakable texture of crushed candy bars, all wrapped in a smooth chocolate shell.
Creating homemade candy can often feel intimidating, but this recipe strips away the complexity. You do not need a candy thermometer, and you certainly do not need to spend hours over a hot stove. This is the kind of recipe that invites you to get your hands messy and enjoy the process. Whether you are preparing a spread for a holiday party, looking for the perfect edible gift, or simply craving a sweet snack to keep in the fridge, these crunchy peanut butter treats are the answer. Let us explore why these little truffles have become a viral sensation and how you can master them in your own kitchen.
The Magic of the No-Bake Dessert
In the modern kitchen, the no-bake dessert is a true hero. We all have those days where the oven feels like too much work, or perhaps the summer heat makes the idea of baking unbearable. That is where recipes like Butterfinger Balls shine. By utilizing existing ingredients like prepared candy bars and creamy peanut butter, you are essentially assembling a masterpiece rather than engineering one from scratch. This approach allows for a consistency in flavor that is hard to beat.
The beauty of a no-bake treat lies in its accessibility. Even if you consider yourself a novice in the kitchen, it is nearly impossible to mess these up. The process is tactile and rewarding. You get to feel the mixture come together, roll the perfect spheres, and watch the chocolate transform from a liquid pool into a crisp, professional-looking coating. It is a culinary win that provides instant gratification with every bite.
Essential Ingredients for the Perfect Crunch
To achieve that signature texture, you need a few key players. The star of the show, of course, is the Butterfinger bar. When crushed, these bars provide a honeycomb-like crunch that stays crispy even when mixed with other moist ingredients. Using two full cups of crushed bars ensures that every single bite is packed with that golden, peanut-flaked goodness. It is the backbone of the entire recipe.
Pairing those crumbs with a full cup of creamy peanut butter acts as the glue. While some people prefer chunky peanut butter for extra texture, the creamy variety provides a much smoother mouthfeel that contrasts beautifully with the candy shards. To give the center its structure and sweetness, powdered sugar is folded in. Unlike granulated sugar, powdered sugar dissolves seamlessly into the fats of the peanut butter, creating a truffle-like consistency that is firm enough to hold its shape but soft enough to melt on your tongue.
Step by Step Guide to Butterfinger Perfection
Following a clear process is the secret to getting that bakery-quality finish. Start by crushing your candy bars. You can do this by placing them in a heavy-duty freezer bag and using a rolling pin to smash them into small bits. You want a mix of fine dust and small, pea-sized chunks. This variety in size creates a more interesting texture in the finished ball. Once crushed, combine them in a large mixing bowl with your peanut butter and powdered sugar.
The addition of softened butter is a small but vital step. It adds a layer of richness and helps the mixture set firmly once chilled. Use a sturdy spatula or even your hands to blend everything until a cohesive dough forms. If the mixture feels too sticky, you can add a tablespoon more of powdered sugar. If it feels too dry, a tiny bit more peanut butter will do the trick. Once you have the right consistency, it is time to shape them.
Rolling and Chilling Your Treats
Aim for bite-sized balls about one inch in diameter. This size is ideal because these treats are incredibly rich; a small portion goes a long way. As you roll them between your palms, try to keep them as uniform as possible. This not only looks better but ensures that they take the same amount of chocolate coating later on. Place each ball on a tray lined with wax paper or parchment paper.
Chilling is the most underrated step in candy making. You must let these balls rest in the refrigerator for at least thirty minutes. Chilling firms up the fats and sugars, making the balls sturdy enough to be dipped into warm chocolate without falling apart or losing their shape. It also helps the chocolate set faster once applied. Patience here pays off in the form of a perfectly round, professional-looking candy.
The Art of the Chocolate Dip
Melting chocolate can be finicky, but using a double boiler method is the safest way to go. By placing a heat-proof bowl over a pot of simmering water, you ensure that the chocolate melts evenly without scorching. For this recipe, semi-sweet or milk chocolate chips work best. If you find your chocolate is too thick for dipping, you can add a teaspoon of coconut oil or shortening to thin it out and give it a beautiful glossy sheen.
To dip like a pro, use a fork or a specialized dipping tool. Drop a chilled peanut butter ball into the melted chocolate, roll it to coat, and lift it out. Tap the fork gently against the side of the bowl to let the excess chocolate drip off. This prevents a large pool of chocolate from forming at the base of your candy. Carefully slide the coated ball back onto your wax paper. If you want to get fancy, you can sprinkle a few leftover Butterfinger crumbs on top before the chocolate sets.
Variations and Customizations
While the classic recipe is a winner, there is plenty of room for creativity. If you are a fan of dark chocolate, swapping out the milk chocolate coating can provide a sophisticated, slightly bitter edge that balances the sweet interior. For those who love a salty-sweet combo, a tiny pinch of sea salt on top of the wet chocolate can elevate the entire flavor profile. You could even try using different candy bars as a base, though the Butterfinger remains the undisputed king of the crunch.
For a festive twist, you can change the coating based on the season. Use white chocolate with orange food coloring for Halloween treats, or drizzle red and green candy melts over them for Christmas. These Butterfinger Balls are incredibly versatile, making them a go-to recipe for any occasion throughout the year. They are also naturally easy to make gluten-free, as long as you verify that your candy bars and peanut butter are certified gluten-free.
Storage and Serving Suggestions
Because these treats contain butter and peanut butter, they are best kept in an airtight container in the refrigerator. They will stay fresh and delicious for up to two weeks, making them an excellent make-ahead dessert. If you prefer a softer texture, you can take them out of the fridge about ten minutes before serving. However, many people enjoy the snappy, cold texture of a chilled chocolate shell.
If you are planning to gift these, they look stunning in small paper cupcake liners placed inside a decorative tin. They are sturdy enough to be transported, though you should keep them out of direct sunlight to prevent the chocolate from blooming or melting. Whether they are served at a fancy party or enjoyed as a midnight snack straight from the fridge, these Butterfinger Balls are guaranteed to disappear quickly.
Why Homemade Beats Store Bought
There is a unique satisfaction that comes from making your own candy. While you can certainly buy chocolate-covered peanut butter treats at the store, they often contain preservatives and artificial flavors that dull the experience. When you make them at home, you control the quality of the ingredients. You are using real butter, high-quality chocolate, and fresh peanut butter. The result is a cleaner, more vibrant flavor that simply cannot be replicated by a machine in a factory.
Furthermore, the texture of a homemade Butterfinger Ball is superior. The crunch is fresher, and the chocolate coating is thicker and more decadent. Plus, there is the emotional element. Sharing a plate of handmade treats with friends and family carries a level of care and effort that people truly appreciate. It turns a simple dessert into a memorable moment.
Final Thoughts on This Sweet Success
Butterfinger Balls represent the best of home kitchen creativity. They take familiar, beloved ingredients and transform them into something spectacular with very little effort. This recipe proves that you do not need to be a professional pastry chef to create something that looks and tastes like it belongs in a high-end candy shop. It is about the joy of the process and the delight of that first crunchy, chocolatey bite.
As you embark on your candy-making journey, remember that the most important ingredient is fun. Do not worry if your balls are not perfectly spherical or if the chocolate dipping gets a little messy. Those imperfections are the hallmarks of a truly homemade gift. So, grab a bag of Butterfingers, clear off your counter, and get ready to create a dessert that will have everyone asking for the recipe. Once you try these homemade peanut butter treats, the store-bought version will never quite hit the spot the same way again. Happy dipping!