How to Draw Messy Bun Hair Step-by-Step Aesthetic Digital Art Tutorial Reference Guide
Capturing the effortless beauty of a messy bun in digital art is often more challenging than it looks. While the hairstyle itself is meant to appear casual and spontaneous, translating that texture and volume onto a digital canvas requires a deep understanding of hair physics, layering, and lighting. When you look at the comparison between a real-life photograph and a professional digital illustration, the secret lies in how the artist simplifies complex shapes into readable forms. This guide will walk you through the entire process of mastering this aesthetic art style, ensuring your characters always look stylishly put-together, even when their hair is technically a mess.
The Anatomy of a Messy Bun: Why It Is a Favorite for Artists
The messy bun is a staple in character design, especially for slice-of-life illustrations, webtoons, and modern fantasy. It conveys a sense of personality and relatability that a perfectly slicked-back ponytail simply cannot. From an artistic perspective, it provides an excellent opportunity to practice dynamic hair flow. Instead of drawing a solid mass, you are forced to think about how different sections of hair wrap around a central point, how gravity affects the loose strands, and how the light catches the various loops and curves.
Observing Real Life vs. Digital Translation
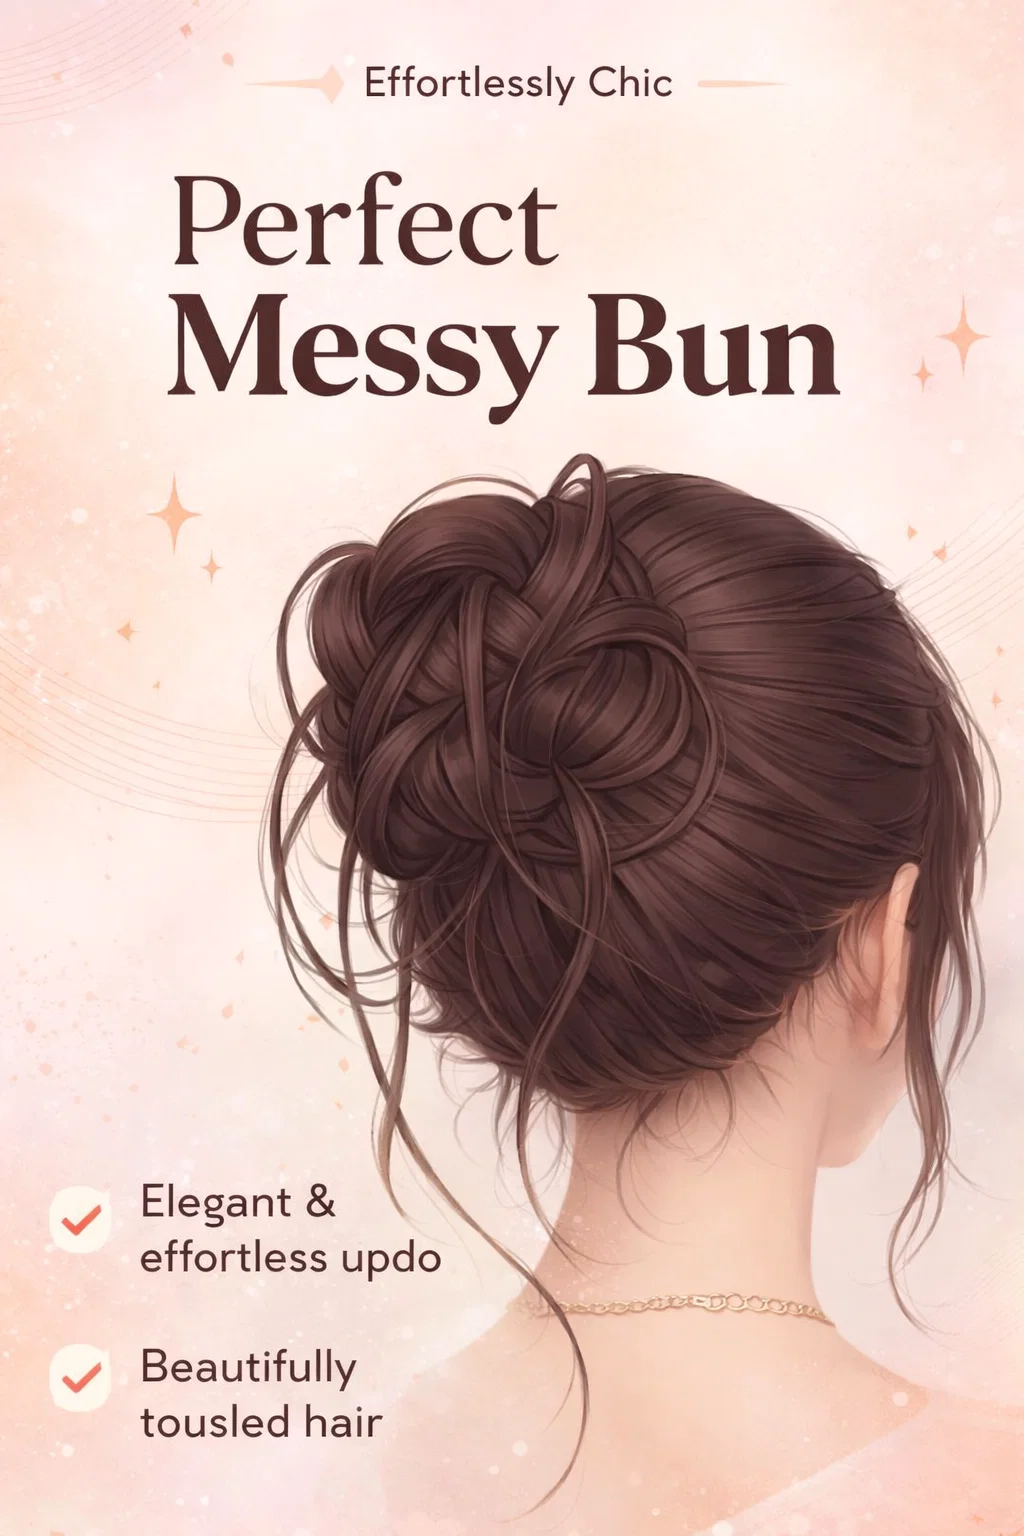
To draw hair effectively, you must first observe how it behaves in reality. In the photographic reference, you can see that the hair is not one uniform color; it has highlights where the light hits the top of the curves and deep shadows where the hair tucks underneath itself. The digital illustration simplifies these details into “ribbons.” By breaking the hair down into distinct sections or ribbons, the artist creates a sense of depth without having to draw every individual strand. This is the core principle of digital hair rendering: simplify the mass, then detail the flow.
Step 1: Establishing the Foundation and Volume
Before you even touch your brush to the canvas to draw individual strands, you must establish the “under-structure.” Imagine the head as a sphere and the bun as a smaller sphere or a donut shape attached to it. The most common mistake beginners make is drawing the bun too small or too flat against the head. In reality, a bun has significant volume because the hair is folded over itself.
Start by sketching the basic silhouette. Determine the “root point” where the hair is being pulled toward. For a high messy bun, this is usually at the crown of the head. All your initial lines should radiate from the hairline toward this central gathering point. This creates a sense of tension and direction, making the hairstyle look believable.
Step 2: The Art of Layering Hair Ribbons
Once you have your basic shape, it is time to add the “messy” elements. Think of the hair in three distinct layers:
- The Base Layer: This is the hair pulled tight against the scalp. It should show the direction of the pull.
- The Mid Layer: This is the main body of the bun. Instead of a smooth circle, use overlapping “U” and “S” shapes to represent loops of hair that have been tucked into the elastic.
- The Detail Layer: These are the flyaways and loose strands. These are crucial for the “messy” aesthetic. Add a few strands that escape the bun entirely and frame the neck or ears.
Creating Natural Hair Flow
Hair does not move in straight lines. Even when pulled back, it has a slight “poof” or “loft” near the elastic. When drawing the digital version, ensure your lines have a slight curve. Use your wrist to create flicking motions with your stylus. This mimics the organic nature of hair and prevents the drawing from looking stiff or plastic-like.
Step 3: Shading for Depth and Dimension
Shading is where your illustration truly comes to life. If you look at the digital reference, you will notice that the artist uses a darker tone at the base of the bun and where the hair overlaps. This creates occlusion shadows, which tell the viewer’s eye that one piece of hair is physically sitting on top of another.
Highlighting the “Sweet Spots”
Digital art allows for beautiful lighting effects. To make the hair look healthy and shiny, add highlights to the highest points of the hair loops. Use a lighter version of your base color and apply it in small, horizontal strokes across the “ribbons” of hair. This mimics the way light reflects off the smooth surface of the hair shaft. For an extra pop, you can use a “Color Dodge” or “Add” layer mode in your software to make the highlights glow slightly.
The Importance of Flyaways and Stray Strands
What separates a “bun” from a “messy bun” are the imperfections. In the digital illustration, notice the thin, wispy lines that break the silhouette. These are intentional. If the silhouette is too clean, the hair looks like a solid helmet. By breaking the outline with a few stray hairs, you introduce a sense of atmosphere and realism. These strands should be thinner than your main line art to suggest they are individual hairs caught in the light.
Common Mistakes to Avoid in Hair Illustration
Even experienced artists can fall into certain traps when drawing complex updos. Here are a few things to keep in mind:
- Over-detailing: Do not try to draw every single hair. This often results in a “hairy” look that is distracting. Focus on the large shapes first.
- Symmetry: Real hair is never perfectly symmetrical. Make one side of the bun slightly larger or more loose than the other to add character.
- Flatness: Ensure the bun sits on the head, not just behind it. Use shadows on the scalp area to show that the bun is casting a shadow on the rest of the hair.
Tools and Brushes for Digital Hair
While you can draw hair with a basic round brush, many digital artists prefer “hair brushes” that have multiple pressure points. These brushes create several thin lines with a single stroke, which is perfect for adding texture. However, for the main structure, a tapered pen brush is usually best. It allows you to control the thickness of your lines, which is essential for creating the varied “ribbons” seen in the reference image.
Software Tips for Better Results
If you are using software like Procreate, Clip Studio Paint, or Photoshop, take advantage of layers. Keep your base color on one layer, your shadows on another, and your highlights on a third. This makes it much easier to adjust the intensity of your shading without ruining your line art. Using a “Clipping Mask” for your shading layers is a lifesaver, as it ensures your shadows stay perfectly within the lines of the hair.
Developing Your Own Artistic Style
The comparison image shows a very specific “webtoon” or “manhwa” style of art. It features clean line art and soft, cell-shaded gradients. However, you can apply these same principles to any style. If you prefer a more painterly look, you might skip the line art entirely and use blocks of color to build the volume. If you like anime styles, you might use sharper, more aggressive highlights. The core lesson remains the same: understand the structure, then add the flair.
Conclusion: Practice Makes Perfect
Mastering the messy bun is a rite of passage for many digital illustrators. It teaches you about volume, light, and the beauty of imperfection. By using photographic references alongside digital guides, you can bridge the gap between reality and art. Remember to start with big shapes, focus on the direction of the hair flow, and do not be afraid to add those messy, stray strands that give the style its name. Every character you draw will benefit from the extra life and personality that a well-rendered hairstyle provides.
Keep experimenting with different colors, lighting setups, and “messiness” levels. The more you draw, the more intuitive the hair flow will become. Before you know it, you will be able to sketch a perfect, aesthetic updo in just a few minutes. Happy drawing, and may your digital canvases always be filled with inspiration!
Would you like me to create a specific color palette for this hairstyle or perhaps a guide on how to draw different hair textures like curly or wavy hair?