How to Fix Loose or Pulling Threads on Clothing Hem
We have all been there. You are getting ready for a big day, pulling on your favorite chocolate brown leggings or that perfectly fitted knit top, when you see it: a long, stark white thread looping out from the hem. Your first instinct might be to grab a pair of scissors and snip it off, or worse, give it a quick tug. Before you do anything, stop. That tiny loop of thread is often the only thing holding your garment together, and one wrong move could turn a minor aesthetic annoyance into a massive hole that ruins your favorite piece of clothing. Understanding how to handle these delicate wardrobe malfunctions is the difference between a long lasting closet and a pile of rags.
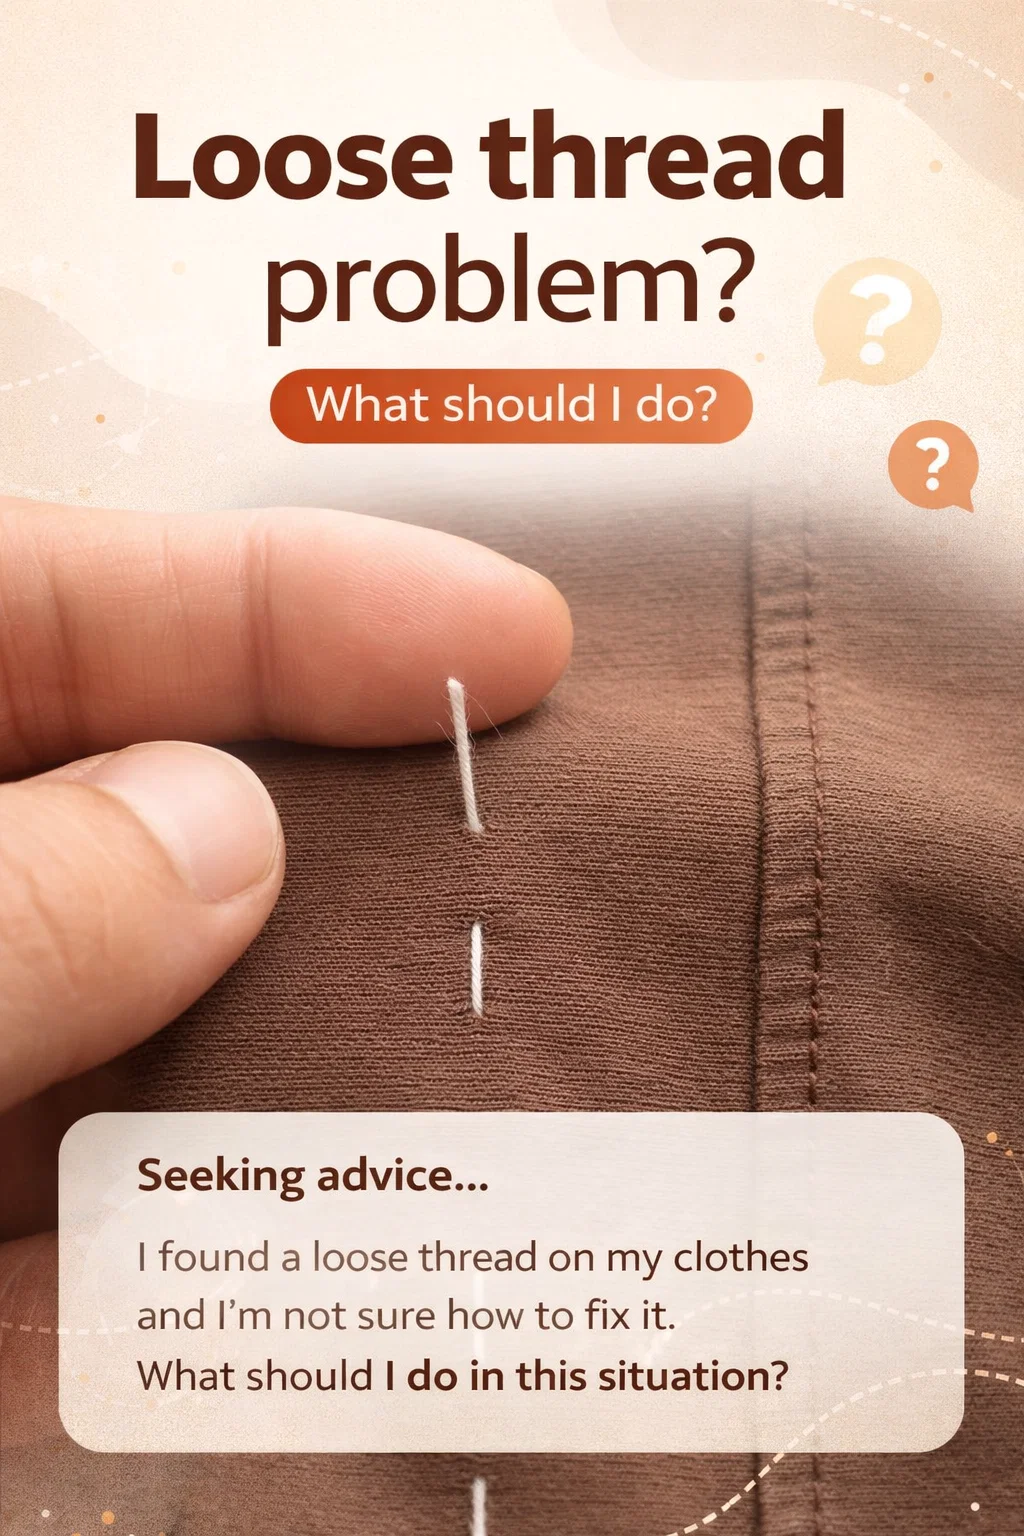
The Anatomy of a Loose Thread
To fix the problem, you first have to understand why it is happening. Most modern clothing is constructed using a chain stitch or a lockstitch. In the image provided, we see a high contrast white thread pulling away from a brown synthetic or cotton blend fabric. This is usually a sign of a tension issue during the manufacturing process or a snag that occurred while the garment was in use.
When a thread pulls like this, it is usually still connected to the structural integrity of the seam. If you pull that thread, you are essentially unzipping the seam. Think of it like a row of dominoes; once the first one falls (or the first loop is pulled), the rest of the stitching will follow suit. This is especially true for athletic wear and stretch fabrics, which rely on the flexibility of the thread to move with your body.
Why You Should Never Just Cut the Thread
It is the most common mistake in home garment care. You see a stray string, you grab the kitchen scissors, and you snip it flush with the fabric. While this makes the item look better for about five minutes, you have actually just created two raw ends of thread that are no longer secured. As you move, walk, or wash the item, those ends will begin to unthread themselves.
By cutting the thread, you lose the “tail” that a tailor would use to tie a knot or weave back into the fabric. Without that extra length, there is nothing to grab onto, and the seam will inevitably open up. Instead of reaching for the blades, you should be reaching for tools that help you redirect that thread to where it can do no more harm.
Essential Tools for Quick Clothing Repairs
You do not need a professional sewing studio to fix a snag like the one in the photo. In fact, most of these tools can fit into a small mint tin that you keep in your purse or desk drawer.
- A Snag Nab-it Tool: This is a specialized needle with a rough, knurled end instead of an eye. It is designed to grab loose threads and pull them through to the back of the fabric.
- Hand Sewing Needles: A standard set of sharps will work for most fabrics.
- Clear Nail Polish or Fray Check: These liquids act as a clear glue to seal the ends of threads so they cannot unravel further.
- Fine Point Tweezers: These are perfect for grabbing tiny loops without damaging the surrounding fibers.
- Thread in Matching Colors: While the thread in the image is white, you will usually want a thread that matches your garment to hide any repair work.
Step-by-Step Guide to Fixing a Pulling Hem
If you are looking at a situation exactly like the one in the image, follow these steps to save your clothes.
Step 1: Assess the Damage
Gently stretch the fabric around the loose thread. Does the seam open up? If the seam stays closed, the thread might just be an “extra” from the factory. However, if you see the fabric separating, you are dealing with a structural failure. In the case of the image, the white thread is clearly part of the internal construction, meaning it needs to be secured, not removed.
Step 2: Pull the Thread to the Inside
Never leave a loose thread on the “right” side (the outside) of the fabric. Use a needle or a snag tool to bring that loop to the “wrong” side (the inside). If you are using a regular needle, thread the loose end through the eye and push the needle through the same hole the thread is coming out of. This hides the blemish instantly.
Step 3: Secure the Thread
Once the thread is on the inside, you have a few options. If the thread is long enough, you can tie a small, tight knot as close to the fabric as possible. If it is too short to tie, use a tiny drop of Fray Check or clear nail polish on the base of the thread. This bonds the thread to the fabric and prevents it from sliding back through the hole.
Step 4: Reinforce the Seam
If the thread was part of a major seam, like a side seam or a hem, you might want to add a few manual stitches. Using a matching thread, use a simple backstitch over the area where the original thread pulled out. This provides a “safety net” for the seam so that even if the original thread loosens further, your repair will hold the garment together.
How to Prevent Snags and Loose Threads
Prevention is always better than a cure. While some loose threads are just a result of poor manufacturing, many are caused by how we treat our clothes.
Mind the Wash Cycle
High agitation in washing machines is the number one cause of pulled threads. Zippers, bra hooks, and Velcro from other items in the load can catch on the delicate stitching of your shirts and leggings. To prevent this, always wash delicate items or pieces with visible stitching in a mesh laundry bag. This creates a physical barrier between your clothes and the hardware of other garments.
Turn Clothes Inside Out
Before tossing your clothes into the hamper, turn them inside out. This ensures that if a snag does occur during the wash, it happens on the inside of the garment where it won’t be visible to the world. It also protects the “face” of the fabric from pilling and fading.
Check Your Jewelry
Rings with high settings, bracelets with charms, and even rough fingernails are common culprits for creating snags. Be mindful when pulling on tight clothing, especially knits and athletic wear. If you feel a snag happen, stop immediately. Do not keep pulling the garment on, as this will only lengthen the pull.
The Spiritual Side of Mending: Why We Should Repair More
In a world of fast fashion, it is easy to view a loose thread as a sign that it is time to throw an item away and buy something new. However, there is a deep satisfaction in mending. When you take the ten minutes required to fix a hem, you are pushing back against the culture of disposability. You are showing respect for the resources that went into making the garment and the people who constructed it.
Many cultures have long traditions of visible mending, such as the Japanese art of Sashiko. While the fix for a loose thread is usually meant to be invisible, the act of repair is a powerful statement of mindfulness. It encourages us to slow down and care for what we already own.
When to Take It to a Professional
Not every loose thread can be fixed at home with a bottle of nail polish. If you have a pull in a high end silk suit, a delicate lace wedding dress, or a heavy leather jacket, it is best to see a tailor. Professionals have specialized machines, like sergers and coverstitch machines, that can recreate the factory finish perfectly. A simple hem repair usually costs very little and can extend the life of an expensive investment piece by years.
The Magic of the “Snag Nab-it”
If you only buy one tool after reading this, make it the Snag Nab-it. This little tool looks like a needle but has a textured end that acts like a tiny hook. You simply push it through the fabric from the front to the back, and it catches the loose thread and pulls it through effortlessly. It is a literal lifesaver for sweaters and woven fabrics where threads tend to loop out frequently.
Final Thoughts on Wardrobe Maintenance
Seeing a white thread popping out of your brown leggings is not a fashion disaster; it is just a small call to action. By taking a breath, putting down the scissors, and following the proper steps to secure the thread, you can keep your wardrobe in top shape for years to come.
Whether you are an aspiring minimalist looking to reduce waste or someone who just really loves their current wardrobe, learning the basics of garment care is an essential life skill. Next time you see a loose loop, remember: don’t pull, don’t snip, just flip and secure. Your clothes and your wallet will thank you.
Wrapping Up Your Repair Journey
Maintaining your clothes is an act of self care and environmental responsibility. It might seem like a small thing, but the way we treat our belongings reflects how we treat our time and resources. By mastering the art of the quick fix, you ensure that you always step out the door looking polished and put together.
Keep a small sewing kit handy, stay calm when snags happen, and always look for ways to extend the life of your favorite pieces. With a little bit of patience and the right technique, that “situation” in the image becomes nothing more than a five minute fix.
Would you like me to generate a list of the best portable sewing kits for your next blog post?