How to Make Ghee at Home Easy 5-Step DIY Clarified Butter Recipe
Unlock the golden secret of ancient wellness and culinary excellence right in your own kitchen. If you have ever stepped into an Indian grocery store or browsed the health food aisle of a high end supermarket, you have likely seen jars of a shimmering, translucent yellow substance labeled as Ghee. While it might look like ordinary butter at first glance, ghee is actually a deeply flavorful, clarified version of butter that has been a cornerstone of Ayurvedic medicine and South Asian cooking for thousands of years. The good news is that you do not need to buy expensive pre-made jars. Making ghee at home is a meditative, aromatic process that transforms a simple block of butter into a nutrient-dense liquid gold.
What Exactly is Ghee?
Ghee is a form of highly clarified butter. Unlike standard butter, which contains water and milk solids, ghee is pure fat. The process of making it involves simmering butter until the water evaporates and the milk solids separate, sink to the bottom, and caramelize. This caramelization is what gives ghee its distinct nutty flavor and toasted aroma. Because the milk solids (lactose and casein) are removed, ghee has a much higher smoke point than regular butter, making it ideal for high heat cooking like sautéing, searing, and frying.
The Ayurvedic Connection
In the tradition of Ayurveda, ghee is considered one of the most sattvic foods. Sattvic foods are those that promote clarity, compassion, and harmony within the body and mind. It is often used as a carrier for herbal medicines because it is believed to help the body absorb nutrients more effectively. Beyond the kitchen, ghee is used in traditional massage and even as a base for skin salves, proving its versatility as a holistic wellness staple.
The Essential Ingredients and Tools
One of the best things about making ghee is the minimal list of requirements. You only need one ingredient: butter. However, the quality of that butter will directly dictate the quality of your final product. For the best results, look for high quality, unsalted grass-fed butter. Grass-fed butter contains higher levels of Omega-3 fatty acids and Conjugated Linoleic Acid (CLA) compared to grain-fed varieties, and it results in a much more vibrant yellow color.
For tools, you will need a heavy bottomed stainless steel pot. Avoid non-stick pans as they can interfere with the heat distribution needed for the milk solids to toast properly. You will also need a fine mesh strainer, a piece of cheesecloth or a clean cotton cloth, and a sterilized glass jar for storage. A slotted spoon or a skimmer is also helpful for removing the foam that rises to the top during the process.
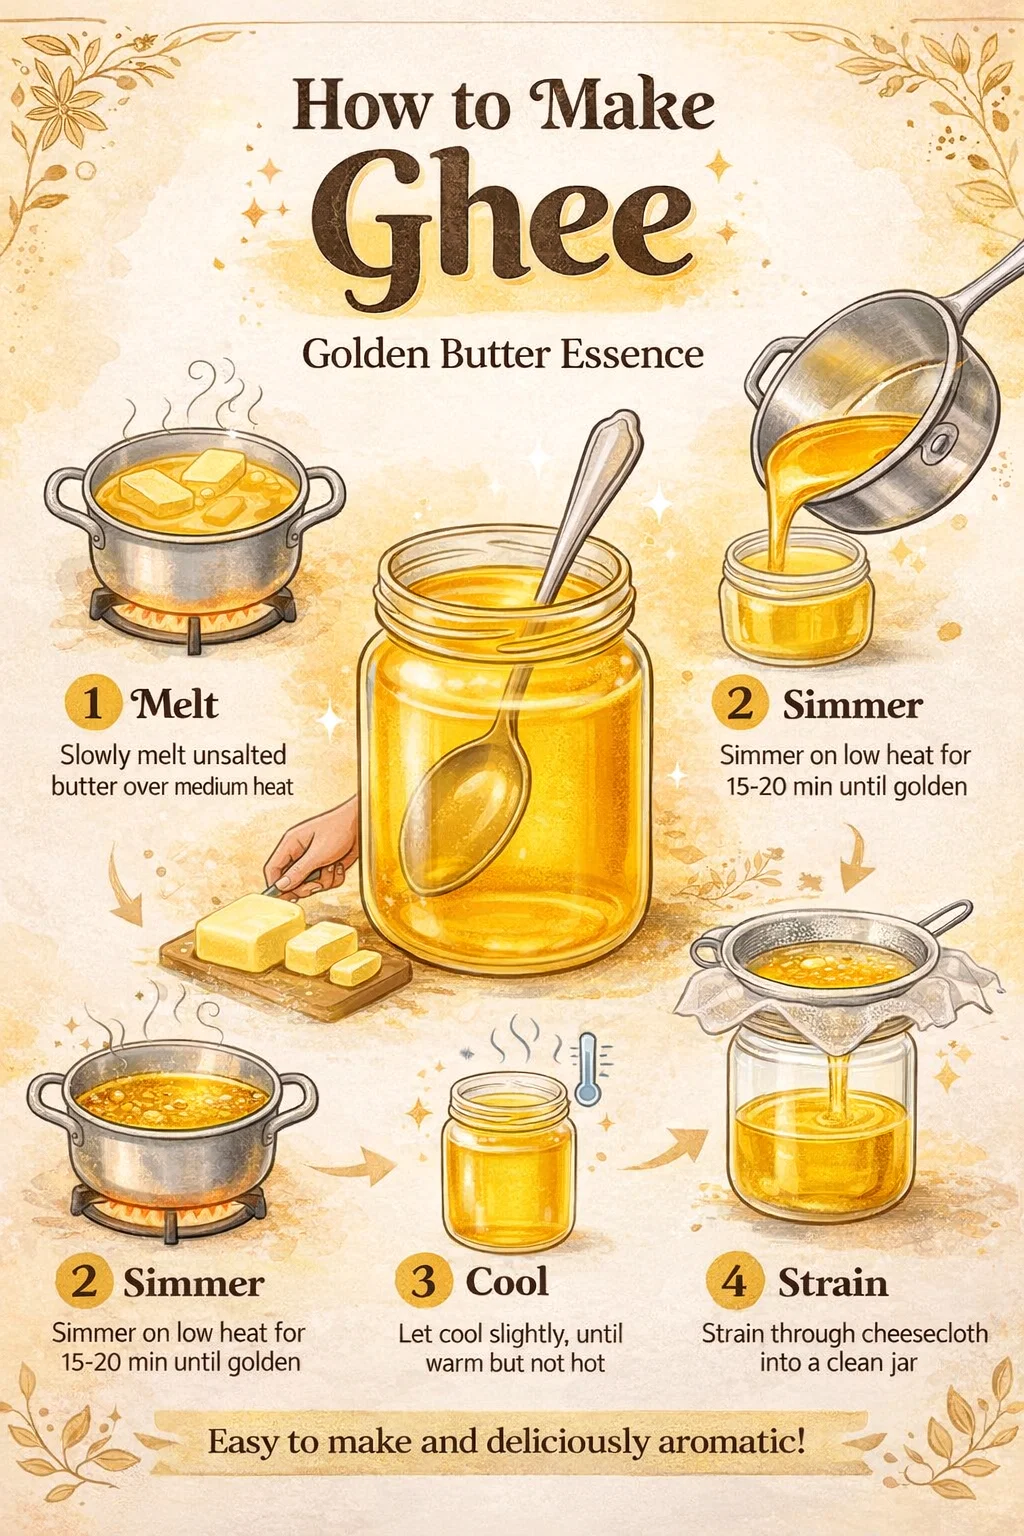
Step 1: Melting the Butter
Start by placing 500 grams (or about two cups) of unsalted butter into your pot. Set the heat to medium and let the butter melt slowly. It is important not to rush this stage. You want the butter to melt evenly without browning too quickly. Once the butter has completely liquefied, turn the heat down to the lowest possible setting. At this stage, do not cover the pot with a lid and do not stir it. You want the layers to separate naturally through the gentle application of heat.
Step 2: The Clarification Process
As the butter simmers on low heat, you will notice a white foam beginning to rise to the surface. This foam consists of the water content evaporating and the lighter proteins separating. Use your skimmer or a spoon to gently remove this foam from the top and discard it. You will hear a soft crackling or sizzling sound, which is the sound of the water boiling off. This is a sign that the clarification is working. Keep a close eye on the pot, but resist the urge to stir, as you want the heavier milk solids to settle undisturbed at the bottom of the pan.
Step 3: The Toasting Phase (Die Röstung)
After about 15 to 30 minutes of gentle simmering, the crackling sound will begin to quiet down. This indicates that most of the water has evaporated. The liquid in the pot will turn from a cloudy yellow to a clear, transparent gold. Look closely at the bottom of the pot. You will see small particles that have turned a light golden brown. This is the most critical moment of the process. As soon as you smell a rich, caramel-like or popcorn-like aroma and see those golden flecks, remove the pot from the heat immediately. If you wait too long, the solids will burn and ruin the flavor of the entire batch.
Step 4: Filtering for Purity
Once the pot is off the stove, let it sit for a minute or two to cool slightly. Prepare your glass storage jar by placing a metal sieve over the opening, lined with a layer of cheesecloth or a clean cotton cloth. Carefully pour the hot liquid through the filter. The cloth will catch the toasted milk solids, leaving you with nothing but pure, golden ghee in the jar. This filtration step is vital because even a small amount of leftover milk solids can cause the ghee to spoil over time.
Step 5: Cooling and Storage
Leave the jar open and let the ghee cool at room temperature. Do not put the lid on while it is still hot, as this can create condensation inside the jar. Moisture is the enemy of shelf-stable ghee and can lead to mold growth. Once the ghee has reached room temperature, it will solidify into a creamy, spreadable consistency. Seal the jar tightly. Because the perishable milk solids have been removed, ghee can be stored in a cool, dark cupboard for several months without going bad. While refrigeration is not strictly necessary, it can extend the shelf life even further.
Health Benefits of Homemade Ghee
- Lactose-Free: Since the milk solids are removed, most people with lactose or casein sensitivities can enjoy ghee without digestive distress.
- High Smoke Point: With a smoke point of around 485 degrees Fahrenheit, it is much safer for high heat cooking than butter or many vegetable oils.
- Rich in Vitamins: Ghee is a great source of fat-soluble vitamins like A, D, E, and K.
- Butyric Acid: It contains butyrate, a short chain fatty acid that supports gut health and reduces inflammation in the digestive tract.
How to Use Your Liquid Gold
The culinary applications for ghee are endless. You can use it anywhere you would use butter or oil. Try it as a base for tempering spices (tadka) for dals and curries, or brush it over fresh naan or sourdough bread. It adds a wonderful depth to roasted vegetables like carrots and sweet potatoes. Because of its nutty profile, it is also a fantastic addition to baked goods, providing a richer flavor than standard butter. Some people even stir a teaspoon of ghee into their morning coffee or tea for a sustained energy boost and a velvety texture.
Common Mistakes to Avoid
While the process is simple, a few common pitfalls can occur. The most frequent mistake is using high heat to speed up the process, which usually results in burnt butter. Patience is your best friend when making ghee. Another mistake is stirring the pot, which prevents the solids from settling and makes the filtration process much more difficult. Lastly, always ensure your storage jars are completely dry before pouring in the ghee, as even a drop of water can ruin the batch.
Conclusion
Making your own ghee is a rewarding kitchen ritual that connects you with centuries of culinary tradition. It is a process that rewards patience and mindfulness, resulting in a product that is far superior to anything you can find on a grocery store shelf. By following these five simple steps, you have created a versatile, healthy, and delicious ingredient that will elevate your cooking and support your well being. Whether you are using it to sear a steak or to add a touch of luxury to your morning toast, your homemade ghee is sure to become a permanent fixture in your pantry. Happy cooking!