How to Make Natural Lip Balm Easy Homemade Organic DIY Recipe with Beeswax Shea Butter
There is something incredibly satisfying about creating your own skincare products from scratch. Not only do you get to control every single ingredient that touches your skin, but you also tap into a tradition of natural healing that has existed for centuries. If you have ever looked at the back of a standard lip balm tube and felt confused by a long list of synthetic waxes, petroleum derivatives, and artificial fragrances, then this guide is for you. Making your own natural lip balm is one of the easiest entry points into the world of DIY beauty, and the results are often far superior to anything you can buy at a local drugstore.
The Magic of Raw, Organic Ingredients
The secret to a truly effective lip balm lies in the quality of the raw materials. When we use organic, unrefined ingredients, we are keeping the vitamins and fatty acids intact, allowing them to nourish the delicate skin on our lips more effectively. In the recipe we are exploring today, we focus on a balanced ratio of hard waxes, creamy butters, and liquid oils to create a texture that is firm enough to stay in a tin but soft enough to glide on smoothly.
The Protective Power of Beeswax
Beeswax is the backbone of any solid lip balm. It acts as a natural emulsifier and provides the structural integrity needed to keep the balm from melting in your pocket. Beyond its functional role, beeswax is a humectant, meaning it attracts moisture to the skin. It also forms a light, breathable barrier that protects your lips from harsh winds, cold air, and environmental pollutants without clogging pores. For those looking for a vegan alternative, candelilla wax can be used, though it is slightly harder and requires a minor adjustment in measurements.
Shea Butter: The Ultimate Skin Softener
Shea butter is widely celebrated in the beauty world for a reason. Extracted from the nuts of the shea tree, it is rich in vitamins A and E. In this recipe, shea butter provides the creamy, “buttery” feel that makes the balm feel luxurious. It is particularly effective for healing cracked or chapped lips because it contains anti-inflammatory properties that soothe irritation on contact.
Coconut Oil and Sweet Almond Oil
While the wax and butter provide the structure, the oils provide the slip and deep penetration. Coconut oil is famous for its antimicrobial properties, which is a great bonus for keeping your lip balm fresh and your skin healthy. Sweet Almond Oil, on the other hand, is a lightweight “carrier” oil that is loaded with Vitamin E and helps to rejuvenate dead skin cells. This combination ensures that your lips stay hydrated for hours rather than just minutes.
Detailed Ingredients and Supplies Checklist
Before you begin the melting process, it is helpful to have all your supplies measured and ready to go. This prevents the mixture from cooling too quickly while you are searching for a spoon or a lid. Here is what you will need for this specific organic batch:
- 2 tablespoons Beeswax pellets: Use pellets or grated wax for faster, more even melting.
- 1.5 tablespoons Shea Butter: Ensure it is room temperature for easier scooping.
- 1.5 tablespoons Coconut Oil: Use the solid-at-room-temperature variety for better consistency.
- 2 tablespoons Sweet Almond Oil: This adds the perfect amount of shine and smoothness.
- 1 tablespoon Vitamin E Oil: This acts as a natural antioxidant to extend the shelf life of your oils.
- Double Boiler: Or a heat-safe glass bowl placed over a pot of simmering water.
- Small Tins or Tubes: Metal tins are eco-friendly and easy to fill.
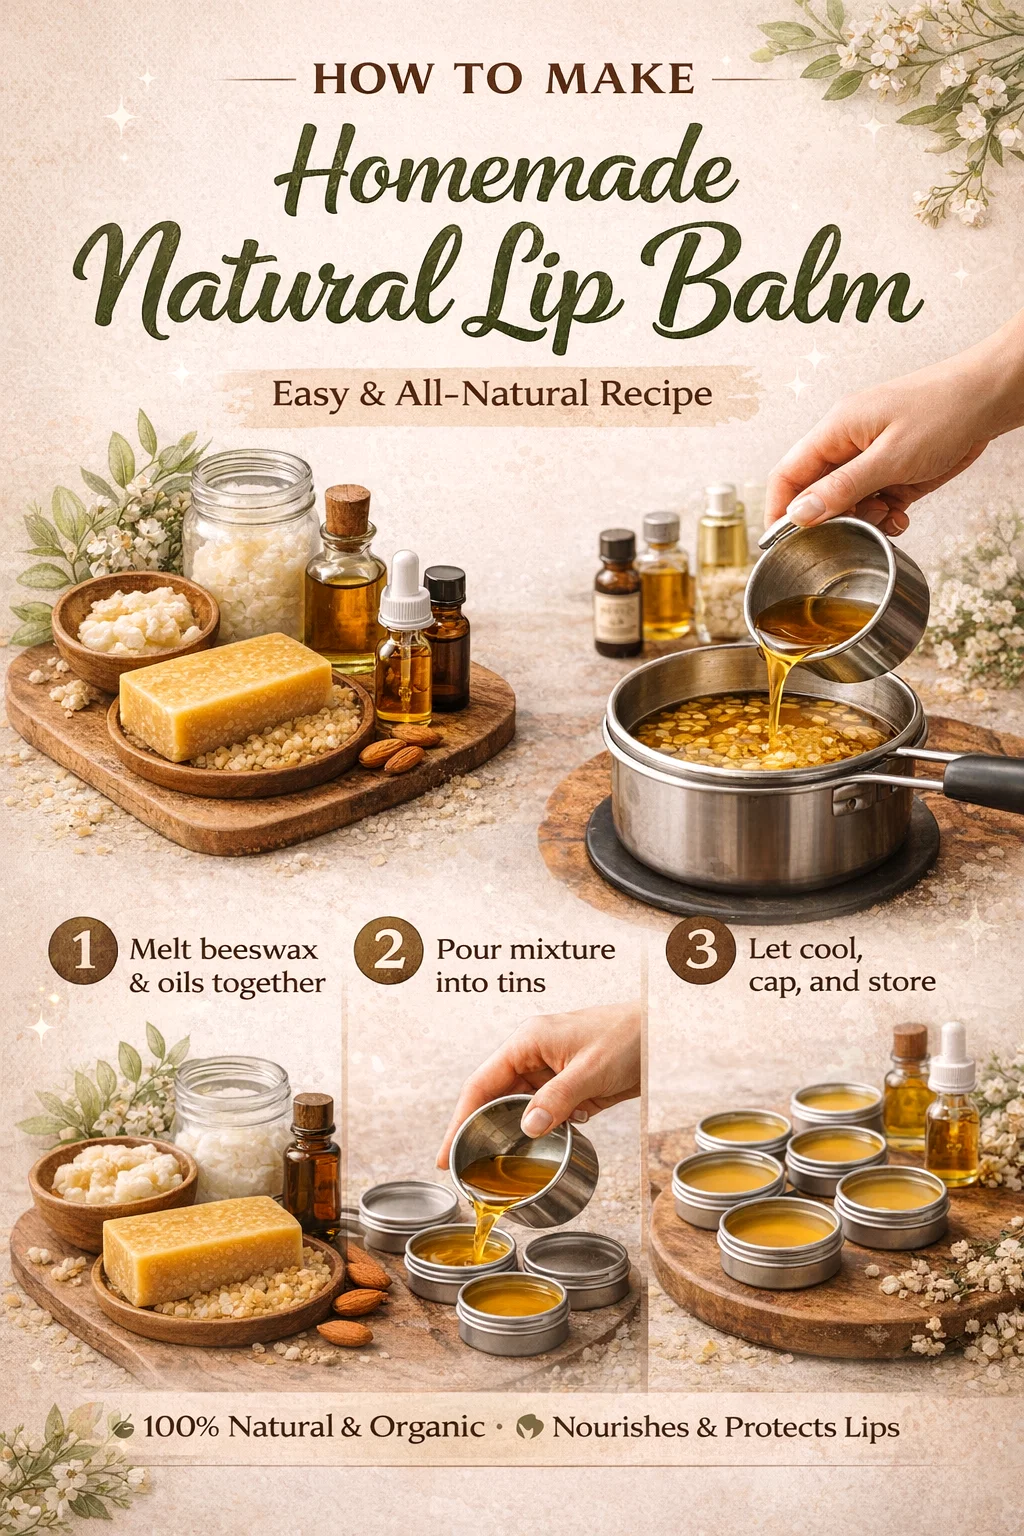
Step-by-Step Instructions for the Perfect Batch
Creating your balm is a quick process, but it requires a gentle touch. High heat can sometimes degrade the beneficial properties of organic oils, so we always recommend the double boiler method over a microwave.
Phase One: Melting the Base
Start by filling a small pot with about two inches of water and bringing it to a gentle simmer. Place your heat-safe bowl on top, ensuring the bottom of the bowl does not directly touch the water. Add your beeswax pellets first, as they have the highest melting point. Once the wax starts to turn translucent, add your shea butter and coconut oil. Stir slowly with a glass rod or a stainless steel spoon until the mixture is a clear, golden liquid.
Phase Two: Adding the Nutrients
Once the base is completely melted, remove the bowl from the heat source. This is the crucial moment to add your Sweet Almond Oil and your Vitamin E. Adding these toward the end prevents them from being over-processed by the heat. If you wish to add essential oils for scent, such as peppermint, lavender, or sweet orange, now is the time to stir them in. Use about 5 to 10 drops total for a batch this size to ensure it remains safe for the sensitive skin on the lips.
Phase Three: The Pour
Precision is key during the pouring phase. Carefully pour the liquid gold into your clean, dry tins. If you find the mixture starts to solidify in the bowl before you finish, simply pop it back onto the double boiler for a few seconds. Do not move the tins once they are filled. If you move them while they are still liquid, you might end up with an uneven surface or “sinkholes” in the center of your balm.
Customizing Your DIY Lip Balm
One of the best parts about this recipe is how adaptable it is. Once you master the basic ratio, you can start experimenting with different additives to suit your specific needs or aesthetic preferences.
Adding Natural Color and Tints
If you want a tinted lip balm that replaces your lipstick, you can stir in a tiny amount of beetroot powder or cosmetic-grade mica powder during the cooling phase. For a more traditional approach, a small piece of your favorite natural lipstick can be melted right into the batch to give it a sheer, beautiful wash of color.
Seasonal Scent Profiles
You can change the vibe of your lip balm depending on the season. For winter, a blend of peppermint and vanilla creates a “candy cane” feel that is incredibly refreshing. For summer, consider lime and grapefruit essential oils for a citrusy, energizing zing. Just remember to always use high-quality, therapeutic-grade essential oils and avoid phototoxic oils if you plan on spending a lot of time in direct sunlight.
Tips for Storage and Longevity
Because this recipe is 100 percent natural and contains no synthetic preservatives, you should treat it a bit differently than commercial products. The Vitamin E oil helps prevent the carrier oils from going rancid, but it is still wise to store your extra tins in a cool, dark place. Under normal conditions, a tin of this homemade balm will stay fresh and effective for six to twelve months. If you notice a change in the scent or texture, it is time to whip up a fresh batch.
Sustainable Packaging Choices
To keep your beauty routine as eco-friendly as possible, look for packaging that can be reused or recycled. Aluminum tins are fantastic because they are lightweight, durable, and can be washed and refilled infinitely. If you prefer tubes, there are now many biodegradable cardboard push-up tubes available that work perfectly with this firmer beeswax recipe.
Conclusion: The Joy of Clean Beauty
Making your own natural lip balm is more than just a craft project; it is a small but meaningful step toward a more conscious and sustainable lifestyle. By choosing organic ingredients and reusable packaging, you are reducing your environmental footprint while treating your body to the very best that nature has to offer. The next time your lips feel the bite of the winter wind or the dryness of the summer sun, you can reach for a tin knowing exactly what is inside: pure, nourishing goodness. Whether you keep them all for yourself or share them as thoughtful, handmade gifts for friends and family, this recipe is sure to become a staple in your home apothecary. Happy making!