How to Make Pine Resin Infused Oil DIY Slow-Heat Herbal Infusion Guide
There is something undeniably grounding about the scent of a pine forest. That crisp, resinous aroma doesn’t just smell like nature; it smells like healing. For centuries, traditional herbalists and forest dwellers have turned to pine resin—often called “forest gold”—for its incredible topical properties. If you have ever stumbled upon a sticky glob of amber-colored sap on a pine trunk, you have found a powerhouse of natural wellness. Transforming that raw, sticky resin into a smooth, usable infused oil is the first step in creating your own apothecary of salves, balms, and skincare treatments.
The beauty of making a pine resin infused oil lies in the slow-heat method. While some herbal infusions can be done over several weeks in a sunny window, resin requires a bit more coaxing to fully release its beneficial compounds into a carrier oil. By using a controlled, gentle heat source like a water bath, you can ensure that the resin melts and integrates perfectly without ever reaching a temperature that would degrade its aromatic and therapeutic qualities. This guide will walk you through the entire process, from the clever trick of freezing your resin to the final, golden result.
Why Pine Resin belongs in Your Natural First Aid Kit
Before we dive into the “how,” it is important to understand the “why.” Pine resin is produced by the tree as a defense mechanism to seal wounds and protect against pests and pathogens. When we harvest it sustainably, we are tapping into those same protective qualities. It is naturally antimicrobial and is celebrated in holistic wellness for its ability to support skin recovery and soothe tired muscles. When infused into a high-quality carrier oil, these benefits become easily accessible for daily use.
Pine resin oil is a staple for those who enjoy making their own topical formulations. It acts as a “drawing” agent in traditional salves, often used to help pull out splinters or impurities from the skin. Additionally, the warming nature of the resin makes it a fantastic addition to massage oils designed for sore joints or chest rubs during the colder months when you need a bit of respiratory support from that clearing pine scent.
Gathering Your Ingredients and Equipment
Preparation is the key to a mess-free experience, especially when dealing with a substance as notoriously tacky as pine resin. Having everything ready before you start will prevent you from getting “stuck” mid-process. Here is what you will need to create a professional-grade infusion at home.
The Star Ingredients
- 200g Pine Resin: You want this to be frozen before you begin. Freezing the resin is a total game changer because it turns a sticky, unmanageable glob into a brittle solid that can be easily crushed or blended.
- Grapeseed Oil: This is a preferred carrier oil for several reasons. It is exceptionally lightweight, meaning it won’t leave your skin feeling heavy or greasy. It also has a high “slip” and penetrates deeply, carrying the pine resin properties into the skin more effectively than heavier oils.
The Essential Equipment
- A Blender: Specifically for grinding the frozen resin. Don’t worry, if the resin is truly frozen, it will powder beautifully.
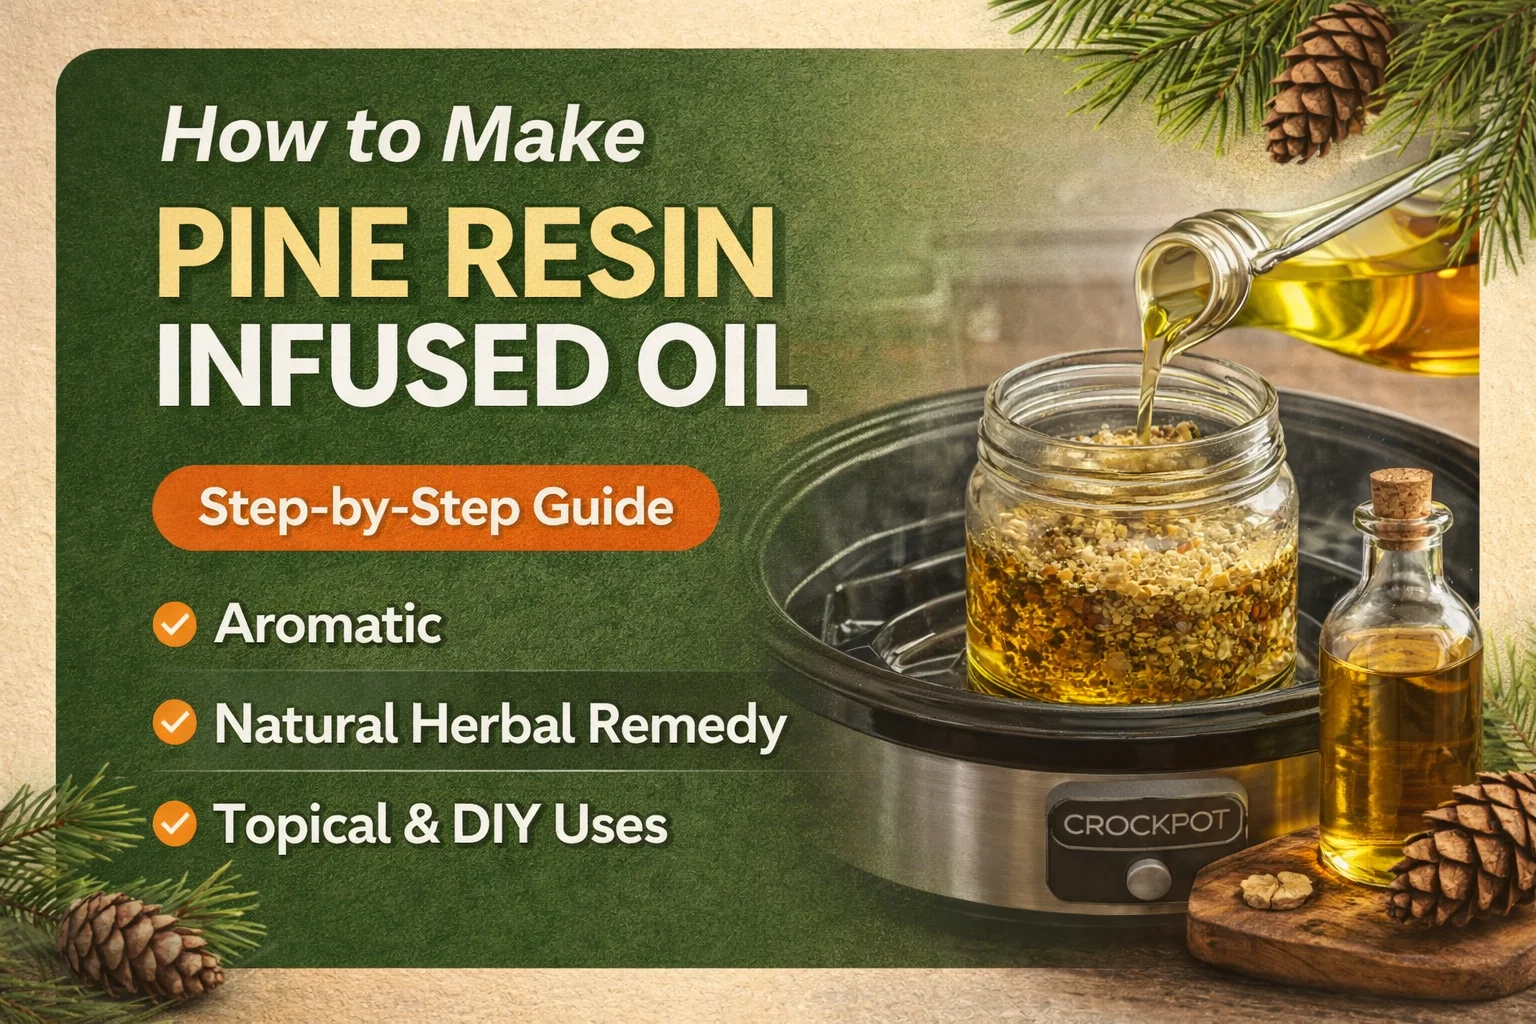
- Heat-Safe Glass Jar: A wide-mouth mason jar works best for this as it allows for easy stirring and pouring.
- Crockpot or Slow Cooker: This will serve as your controlled water bath.
- Small Rack: This is a crucial piece of equipment. Placing a small rack at the bottom of your Crockpot prevents the glass jar from making direct contact with the heating element, ensuring the oil heats evenly and gently.
- Stirring Spoon: A stainless steel or silicone spoon is best for managing the resin mixture.
Step 1: The Magic of Freezing and Grinding
If you have ever tried to work with room-temperature pine resin, you know it sticks to everything it touches. The secret to a smooth infusion starts in the freezer. By chilling your resin for at least a few hours, you change its physical state. Instead of acting like glue, it acts like glass. This allows you to break it down into a fine powder, which significantly increases the surface area exposed to the oil. The more surface area you have, the faster and more thoroughly the resin will dissolve.
Once the resin is rock hard, place it in your blender. Pulse it carefully until it resembles a fine, sandy powder. A quick tip for the wise: let the powder settle for a minute or two before you take the lid off the blender. Fine resin dust can be quite potent and you want to avoid inhaling it or getting a “resin cloud” all over your kitchen counters. Once settled, you are ready to move to the heating phase.
Step 2: Preparing the Oil and Resin Mixture
With your resin powdered, it is time to introduce the carrier oil. Start by lightly warming your grapeseed oil in a separate pan or in the microwave just until it is lukewarm. You don’t want it hot, just warm enough to encourage the resin to start integrating. Pour the warm oil into your heat-safe glass jar and then slowly add your powdered resin.
As you stir the powder into the oil, you will notice the mixture begin to cloud and thicken. This is exactly what you want to see. The grapeseed oil is already beginning to work its way around the resin particles. Choosing grapeseed oil here is a strategic move for the final texture of your product. It offers a less greasy finish compared to olive oil, making the final infusion much more pleasant for topical use on the face or body.
Step 3: Setting Up the Perfect Water Bath
This is where the “slow-heat” part of the method comes into play. We are not looking to boil the oil; we are looking to gently simmer it in a cocoon of warm water. Fill your Crockpot with enough water so that when the jar is placed inside, the water level reaches about halfway up the side of the jar. It is vital that you do not fully submerge the jar, as you don’t want any water leaking into your oil infusion.
Place your small rack at the bottom of the Crockpot and set your jar of oil and resin on top of it. Turn the Crockpot to a low setting. The rack ensures that there is a layer of water between the heat source and the glass, providing the most even heat distribution possible. This gentle environment allows the resin to melt completely into the oil over several hours, resulting in a potent and shelf-stable infusion.
The Final Result: Forest Gold in a Bottle
After several hours of gentle heating, the resin should be completely dissolved, and your oil will have transformed. You will know you are finished when the oil is aromatic, slightly thicker than the original carrier oil, and has a beautiful golden hue. The scent will be deep, woody, and incredibly refreshing. This isn’t just an oil anymore; it is a concentrated botanical extract ready for your DIY projects.
The final texture of pine resin infused oil is unique. It has a slight “tack” to it that makes it stay on the skin better than plain oil, which is why it is so highly valued for topical formulations. Once cooled, you can store it in a cool, dark place in a glass bottle. It serves as a perfect base for salves, but it can also be used as a stand-alone treatment for dry, cracked skin or as a natural chest rub during cold season.
Conclusion: Embrace the Art of Herbal Infusion
Making your own pine resin infused oil is a rewarding way to connect with the natural world and take control of the ingredients in your wellness routine. By using the slow-heat water bath method and the freezing technique, you turn a challenging raw material into a versatile and professional-grade herbal tool. Whether you are planning to gift homemade salves to friends or you simply want to keep a jar of “forest gold” in your own medicine cabinet, this process ensures you get the best possible results every time.
The next time you are out for a walk in the woods and catch that unmistakable scent of pine, remember that you have the skills to bottle that essence. Happy crafting and enjoy the incredible benefits of your handmade pine resin oil. It is truly a gift from the trees that keeps on giving.
Would you like to learn how to turn this oil into a finished drawing salve? Let me know in the comments!