How to Paint DIY Floral Pattern Glass Bottles Easy Aesthetic Room Decor
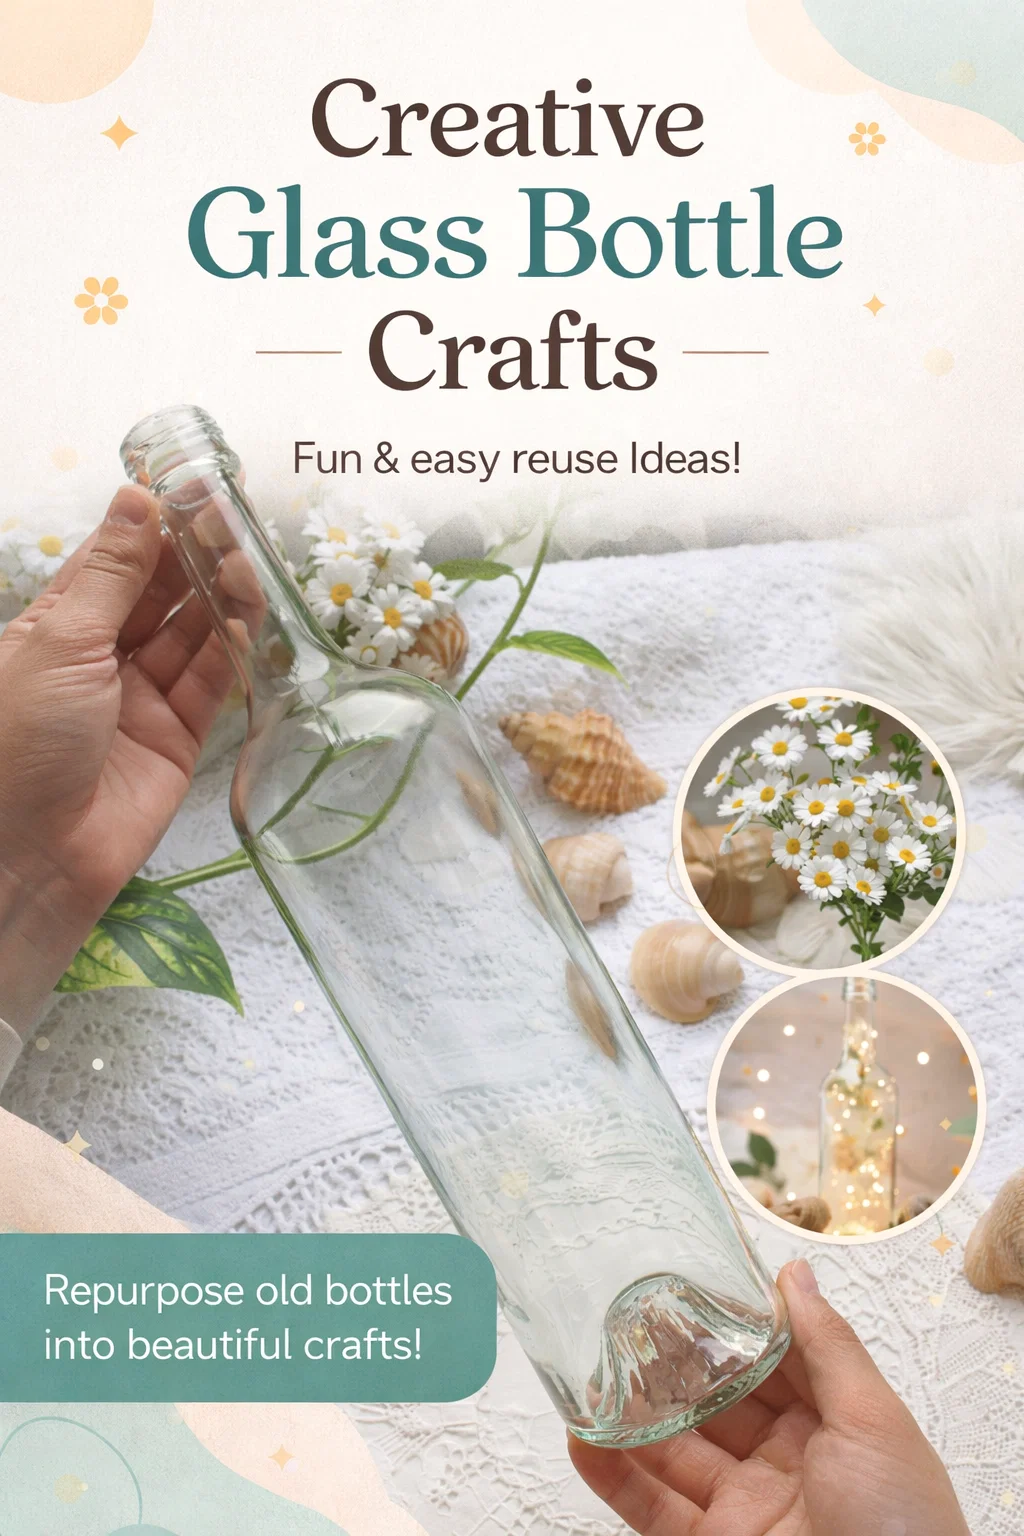
Walking through a home decor store, it is easy to get swept away by those beautifully crafted, artisanal glass bottles that look like they belong in a high-end coastal boutique. They have that perfect blend of rustic charm and delicate elegance. But then you look at the price tag and realize that a single painted jar can cost more than a full dinner. What if I told you that the secret to achieving that high-end aesthetic is likely sitting in your recycling bin right now? The image of a simple, clear glass bottle held against a backdrop of lace, seashells, and daisies is more than just a pretty picture; it is an invitation to slow down and embrace the world of functional art. Upcycling glass is one of the most rewarding DIY projects you can undertake because it turns a mass-produced object into a one-of-a-kind treasure that tells a story.
The Magic of Glass Upcycling: Why We Love Clear Canvas
There is something inherently satisfying about the transparency of glass. It catches the light, reflects its surroundings, and offers a clean slate for any design you can imagine. When we look at a plain bottle, like the one in our inspiration photo, we aren’t just looking at a container for liquids. We are looking at a sculptural element. In a world dominated by plastic and disposable goods, glass feels intentional and permanent. By choosing to paint or decorate these items, you are participating in a sustainable lifestyle that values creativity over consumption. Plus, the sheer variety of glass shapes available—from slender vinegar bottles to stout apothecary jars—means your home decor will never look like a carbon copy of a catalog.
Aesthetic Versatility for Every Room
One of the best things about a DIY floral pattern bottle is its versatility. In a sun-drenched kitchen, these bottles can hold olive oil or homemade herb-infused syrups, adding a pop of personality to your countertops. In a bathroom, they become elegant dispensers for bath salts or floral-scented mouthwash. If you move into the bedroom or living area, they function as delicate bud vases for single stems of jasmine or dried eucalyptus. The design we are exploring today leans heavily into the cottagecore and coastal chic movements, utilizing soft whites, botanical motifs, and natural textures to create a sense of calm and serenity.
Essential Materials to Get Started
Before you dive into the painting process, you need to gather the right tools. Because glass is a non-porous surface, not every paint will stick, and nothing ruins a project faster than paint that peels off the moment you touch it. To replicate the airy, delicate look of the floral patterns seen in our inspiration, you will want to focus on quality over quantity.
- Clear Glass Bottles: Look for interesting shapes. Wine bottles, kombucha jars, and even old perfume bottles work beautifully.
- Multi-Surface Acrylic or Enamel Paint: Ensure the label specifically mentions glass. Enamel paints are particularly durable and often provide a glossy, professional finish.
- Fine-Liner Brushes: Since we are going for intricate floral patterns, you will need brushes with very small, pointed tips.
- Rubbing Alcohol: This is the secret step. Cleaning the glass with alcohol removes oils from your fingers and ensures the paint bonds perfectly to the surface.
- Painter’s Tape: Helpful if you want to create clean borders or stripes alongside your freehand flowers.
- Sealant (Optional): A clear spray or brush-on sealer can protect your artwork from moisture, especially if the bottle will be used in a kitchen or bathroom.
Preparing Your Glass for Success
The longevity of your DIY project depends almost entirely on the preparation phase. If there is even a tiny bit of residue from a label or a fingerprint, the paint will eventually bubble or flake. Start by soaking your bottles in warm, soapy water to remove any labels. If the adhesive is stubborn, a mixture of baking soda and vegetable oil works wonders to scrub away the gunk without scratching the glass.
Once the bottle is clean and dry, take a cotton pad soaked in rubbing alcohol and wipe down the entire exterior. From this point on, try to handle the bottle by the neck or from the inside to avoid getting skin oils back onto the painting surface. Now you have a pristine, clinical-grade surface ready for your artistic touch.
Designing Your Floral Patterns: Inspiration and Technique
The beauty of a floral pattern is that it does not have to be perfect. In fact, the slight irregularities in hand-painted flowers are what give the piece its “boutique” feel. For the style shown in the image, we are aiming for something light and ethereal. Think of lace patterns, tiny daisies, and swirling vines.
The “Daisies and Dots” Method
If you are a beginner, the easiest way to start is with the daisy. Use the back of a paintbrush or a specialized dotting tool to create a center point in a soft yellow or gold. Then, using a fine-liner brush, pull five or six small white teardrop shapes outward from the center. Space these randomly around the bottle, leaving plenty of “negative space” so the glass can still shine through. This creates a breezy, meadow-like effect that feels very fresh and modern.
Incorporating Lace-Inspired Elements
To match the intricate lace tablecloth in our inspiration photo, you can add “mehndi” or lace-style details. This involves using very thin lines to create scallops, grids, and tiny leaf shapes. You can create a “collar” of lace around the neck of the bottle or a decorative band around the base. This adds a level of sophistication that makes the bottle look like an expensive vintage find rather than a weekend craft project.
Advanced Techniques: Adding Texture and Depth
Once you are comfortable with basic painting, you might want to experiment with texture. Some artists like to mix a bit of baking soda into their acrylic paint to give it a ceramic, stone-like feel. While this obscures the transparency of the glass, it creates a stunning matte finish that looks incredible with minimalist floral designs. Alternatively, you can use glass liners or “outliners” to create raised, 3D patterns that mimic the texture of leaded glass or embossed porcelain.
The Layering Secret
To give your florals depth, try layering your colors. Start with a darker green for the stems and base leaves. Let that dry completely before adding your lighter petals on top. Finally, add tiny highlights of pure white or a shimmering metallic on the very tips of the petals. This small detail catches the light as you move the bottle, giving it a dynamic, professional quality.
Curing Your Artwork for Durability
If you want your bottle to be more than just a shelf decoration, you need to cure the paint. Most glass-specific enamel paints offer two curing methods: air drying or baking. Air drying usually takes about 21 days for the paint to fully molecularly bond with the glass. If you are impatient (like most of us!), you can often bake the bottle in a standard home oven. Place the bottle in a cool oven, set it to the temperature recommended on your paint bottle (usually around 300 degrees Fahrenheit), and let it “cook” for 30 minutes. Let the oven cool down completely before removing the bottle to prevent the glass from cracking due to thermal shock.
Styling Your DIY Floral Bottles in Your Home
Now that your masterpiece is finished and cured, it is time for the fun part: styling! A single bottle looks lovely, but a collection of three bottles in varying heights creates a much more impactful visual statement. Use the “rule of threes” to group your bottles on a tray, perhaps adding some natural elements like the seashells and greenery seen in our inspiration image.
Creating a Coastal Centerpiece
Mimic the photo by placing your floral bottles on a white lace runner. Surround them with bleached starfish, smooth river stones, or sea glass. This setup is perfect for a summer dinner party or a beach-house-themed sunroom. The white-on-white palette keeps the look clean and sophisticated rather than cluttered.
The Perfect Gift Idea
Hand-painted bottles make incredible personalized gifts. You can paint the recipient’s favorite flower or even incorporate their initials into the lace pattern. Fill the bottle with homemade bath oil, a bouquet of wildflowers, or even just a heartfelt note rolled up like a message in a bottle. It is a thoughtful, low-cost gift that shows you put real time and effort into something special.
Conclusion: The Joy of Creating
In a world that often feels fast-paced and digital, taking an hour or two to sit down with a glass bottle and a paintbrush is a form of meditation. It allows you to focus on the curve of a petal and the flow of a line, resulting in something beautiful that you can use every day. Whether you are a seasoned artist or someone who hasn’t picked up a brush since grade school, the “DIY floral pattern bottle” is a project that meets you where you are. It turns the mundane into the extraordinary and proves that beauty really is all around us, often hiding in the simplest objects. So, the next time you finish a bottle of sparkling water or olive oil, don’t toss it in the bin. Save it, clean it, and get ready to create your next favorite piece of home decor.