10 Easy Steps to a Clean Kitchen Simple Kitchen Cleaning Checklist
A clean kitchen can make your entire home feel fresher, calmer, and more inviting. But when dishes pile up, countertops become cluttered, and crumbs collect on the floor, cleaning can quickly feel like an overwhelming chore. The good news is that you do not need to spend your entire day scrubbing to enjoy a sparkling kitchen. With a simple plan and the right supplies, you can transform your space in 10 easy steps.
This practical kitchen cleaning checklist takes you from gathering your cleaning supplies to adding the finishing touches that make everything feel fresh. Whether you are preparing for a busy week, refreshing your kitchen after cooking, or tackling a long-overdue cleanup, these straightforward steps will help you clean more efficiently and maintain an organized home.
Key Takeaways
- Gather your cleaning supplies before starting to save time and avoid unnecessary interruptions.
- Clear countertops and handle dirty dishes first to create a more manageable workspace.
- Clean appliances, sinks, cabinets, and stovetops with suitable products and materials.
- Sweep and mop the floors after cleaning higher surfaces to remove fallen crumbs and dust.
- Finish by taking out the trash, replacing towels, and returning essential items to their proper places.
- Maintain your kitchen with short daily cleaning sessions instead of waiting for messes to accumulate.
Why Follow a Kitchen Cleaning Checklist?
Cleaning the kitchen becomes much easier when you know exactly what to do next. Instead of moving randomly between tasks, a checklist gives you a clear starting point and a natural order to follow. It also helps you notice overlooked areas, such as cabinet handles, appliance buttons, and the space around the sink.
A consistent kitchen cleaning routine offers several practical benefits. It reduces clutter, makes everyday cooking more pleasant, and helps prevent grease, food residue, and spills from building up. A clean kitchen also makes it easier to identify items that need restocking and keep frequently used supplies organized.
You do not have to complete every deep-cleaning task daily. The goal is to establish a repeatable routine that works with your schedule and keeps the most frequently used surfaces under control.
Step 1: Gather Your Kitchen Cleaning Supplies
Before you begin, collect everything you need in one convenient place. Searching for a sponge, cloth, or cleaning spray halfway through the job interrupts your momentum and makes the process feel longer than necessary.
What Should You Keep Handy?
- Microfiber cloths for wiping surfaces and removing fingerprints.
- A soft sponge and a suitable dishwashing brush.
- Dish soap for washing dishes and cleaning appropriate surfaces.
- A non-abrasive kitchen cleaner for compatible countertops and appliances.
- A broom, dustpan, and mop for cleaning the floor.
- Clean kitchen towels and fresh trash bags.
- A small cleaning caddy or basket to keep supplies organized.
Choose products according to the materials in your kitchen. Natural stone, stainless steel, glass, and painted cabinets can require different cleaning methods, so always check the manufacturer’s care instructions.
Pro Tip: Keep a small cleaning caddy stocked with your most-used supplies. Having everything together makes it easier to complete quick kitchen resets whenever spills or clutter appear.
Step 2: Clear the Countertops
Cluttered countertops can make even a relatively clean kitchen look messy. Start by removing everything from the surfaces, including used cups, food packaging, appliances you do not need, and decorative items that collect dust.
Sort the items into simple categories. Put away things that belong in cabinets or drawers, return food to the pantry or refrigerator, and move items that belong elsewhere to their proper locations.
Make Your Countertops Easier to Maintain
Once the counters are clear, wipe away crumbs and visible residue using a cleaner suitable for the surface. Pay attention to corners, the area around small appliances, and the spaces near the backsplash.
After cleaning, return only the items you use regularly. A coffee maker, utensil holder, or fruit bowl may deserve a permanent place, while less frequently used gadgets can stay in storage.
Keeping your countertops mostly clear creates more room for meal preparation and makes future cleaning significantly quicker.
Step 3: Wash the Dishes
Dirty dishes can quickly take over the kitchen, especially after preparing a large meal. Tackling them early clears valuable workspace and helps the room feel more organized.
If you have a dishwasher, scrape food scraps into the trash or compost where appropriate, load the dishes according to the appliance instructions, and start a cycle when the load is ready. Avoid overloading the racks because dishes need adequate space for water to circulate.
If you wash dishes by hand, use warm water and dish soap, following the product directions. Wash items in a practical order, beginning with glasses and cups, followed by cutlery, plates, and cookware. Very greasy or heavily soiled pans may need extra attention.
Deal With Stubborn Food Residue
Allow stuck-on food to soak rather than scraping aggressively, which could damage the cookware. Check manufacturer instructions before using abrasive pads or specialized cleaning products.
Once the dishes are clean, let them air-dry in a clean rack or dry them with a fresh towel when appropriate. Put away dry dishes to prevent them from becoming another source of countertop clutter.
Step 4: Clean Kitchen Appliances
Refrigerators, microwaves, and small kitchen appliances often collect fingerprints, splashes, and everyday grime. Wiping their exterior surfaces helps the kitchen look polished without requiring a complete appliance deep clean.
Use a soft microfiber cloth and a suitable cleaner to wipe the outside of the refrigerator, microwave, dishwasher, and other frequently used appliances. Pay particular attention to handles, buttons, and touch points that collect fingerprints throughout the day.
Remember Appliance Safety
Follow each appliance manufacturer’s cleaning instructions. Switch off or unplug an appliance when the instructions recommend it, and avoid spraying liquids directly into controls, vents, electrical openings, or seams.
For a microwave, clean the interior with a method approved by the manufacturer. Wipe away food splashes and dry the surfaces with a clean cloth. For a refrigerator, promptly remove spills and dispose of expired food when doing a more thorough refresh.
Regularly wiping visible surfaces prevents everyday grime from becoming a more difficult cleaning project.
Step 5: Scrub and Refresh the Sink
The kitchen sink handles food scraps, dirty dishes, and frequent handwashing, so it deserves special attention. Even when the surrounding counters look clean, water spots and residue in the sink can make the kitchen feel unfinished.
Begin by removing food particles from the basin and rinsing away loose debris. Apply a non-abrasive cleaner that is compatible with your sink material, then gently scrub the basin, edges, and faucet base with a suitable sponge or brush.
Rinse thoroughly and dry the surface with a clean microfiber cloth if the material permits. Drying helps reduce visible water spots and gives stainless steel sinks a neat appearance.
Do Not Forget the Faucet and Drain Area
Wipe around faucet handles, the base of the tap, and other frequently touched areas. Clean removable sink accessories according to their care instructions, and avoid mixing different cleaning products.
A clean sink is easier to maintain when you rinse it after food preparation and remove visible residue before it dries. A quick wipe at the end of the day can make the next morning’s kitchen routine more pleasant.
Step 6: Clean the Stovetop and Oven
Cooking can leave behind grease, splashes, and crumbs, particularly around burners and stovetop edges. Cleaning these areas regularly helps prevent residue from accumulating and keeps your cooking space looking cared for.
Make sure the stovetop is switched off and completely cool before cleaning. Remove loose crumbs, then use a cleaner designed for your particular stovetop material. Wipe away grease and spills with a soft cloth, paying attention to corners and areas around controls.
Give the Oven Some Attention
For routine maintenance, wipe accessible oven surfaces according to the manufacturer’s instructions. If food has spilled inside, use the recommended cleaning method for your oven type. Self-cleaning functions and specialized oven cleaners require particular care, so follow all safety directions.
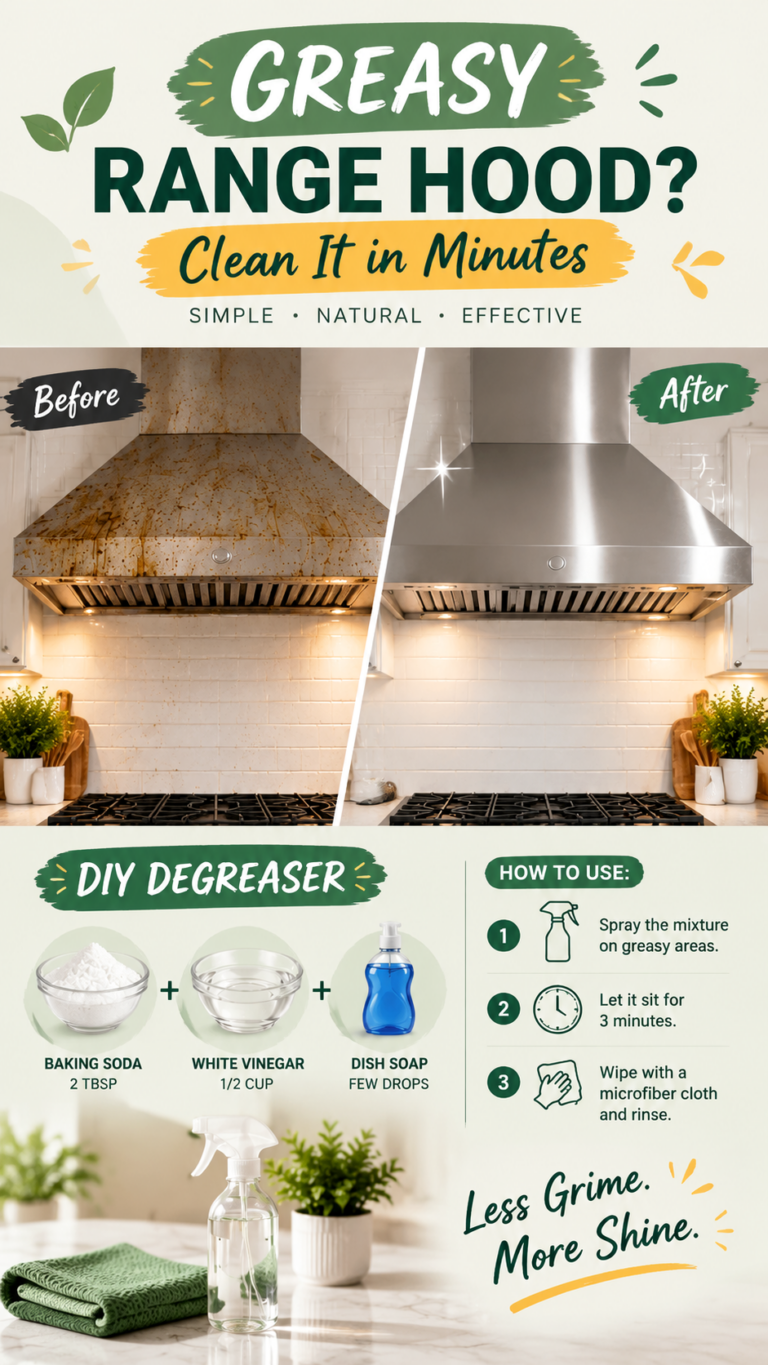
Clean removable grates and accessories only with methods approved for their materials. Avoid abrasive tools that may scratch glass, damage protective coatings, or leave permanent marks.
Remember that a quick stovetop wipe after cooking is often easier than removing several days of baked-on grease later.
Why This Matters
Cleaning in a consistent order saves effort because you avoid repeating the same work.
- Remove clutter before wiping surfaces.
- Clean higher surfaces before sweeping and mopping.
- Use products suited to each material to avoid unnecessary damage.
Step 7: Wipe Down Cabinets and Drawers
Kitchen cabinets and drawers are easy to overlook because they do not always show dirt immediately. However, fingerprints, cooking grease, and splashes can accumulate around handles and frequently used doors.
Start by removing loose dust with a soft cloth. Then use a lightly damp microfiber cloth and a gentle cleaner suitable for the cabinet finish. Wipe from top to bottom, paying special attention to handles, drawer fronts, and areas near the stove.
Protect Cabinet Finishes
Avoid soaking wooden cabinets or allowing water to collect around joints and edges. Harsh chemicals and rough scrubbers can damage painted, laminated, or sealed surfaces. Test an unfamiliar product in a discreet area before using it across the kitchen.
There is no need to empty every cabinet during a routine clean. Focus on the exterior surfaces first, then schedule a separate session for organizing shelves and drawers when necessary.
Clean cabinet fronts create a subtle but noticeable difference, especially in kitchens with light-colored finishes.
Step 8: Sweep and Mop the Kitchen Floor
After cleaning the countertops, appliances, sink, and cabinets, it is time to tackle the floor. Crumbs and dust often fall during earlier tasks, so leaving floor care until near the end prevents you from having to repeat the work.
Move lightweight chairs or other movable items out of the way. Sweep the entire floor, including corners, the edges of cabinets, and the areas beneath the table. Use a dustpan to collect debris and dispose of it properly.
Choose the Right Mopping Method
Use a mop and cleaning solution appropriate for your flooring material. Follow the product directions and avoid excessive water, particularly on hardwood, laminate, or other moisture-sensitive surfaces.
Work toward the exit or another convenient stopping point so you do not walk across freshly cleaned areas. Allow the floor to dry before returning furniture or walking over it, and keep children and pets away from wet surfaces when possible.
Important: Always clean from top to bottom. Dust and crumbs from counters and other surfaces can fall onto the floor, so sweeping and mopping near the end helps you finish the entire kitchen without repeating tasks.
Step 9: Take Out the Trash
Even a freshly cleaned kitchen can feel unpleasant if the trash bin is full. Removing household waste is a simple task that helps keep the space tidy and makes room for new rubbish generated during cooking and cleaning.
Empty the kitchen trash can before it becomes overfilled. Tie the bag securely, dispose of it according to your local waste collection rules, and replace it with a fresh liner.
Keep the Trash Area Fresh
Check the outside of the bin for splashes or fingerprints and wipe it with a suitable cleaner. If the interior needs attention, clean it according to the manufacturer’s instructions and allow it to dry before adding a new bag.
Food scraps and other waste should be handled promptly, especially when they may attract pests or produce unpleasant odors. Keep lids closed where appropriate and clean up any spills around the bin.
Making trash removal part of your regular kitchen cleaning routine prevents one small task from becoming an unpleasant cleanup later.
Step 10: Add the Finishing Touches
You have cleared the clutter, cleaned the main surfaces, refreshed the sink, and finished the floor. Now take a few moments to bring everything together. These small details can make a clean kitchen feel even more welcoming.
- Return frequently used items to their designated places.
- Replace used kitchen towels with clean, dry ones.
- Arrange everyday utensils neatly in their holder or drawer.
- Put away cleaning products and store them safely.
- Check that the countertops are dry and free from clutter.
- Return chairs and other movable items to their usual positions.
- Add a simple decorative touch, such as a fresh-looking dish towel or a small plant placed safely away from heat and food-preparation areas.
Keep decorations practical. The kitchen should still have enough open space for preparing food, and decorative items should not create extra cleaning work or interfere with cooking.
Enjoy Your Fresh Kitchen
Take a quick look around and notice the difference. Clear counters, clean appliances, an empty sink, and a fresh floor can make the whole room feel brighter and more organized.
Most importantly, enjoy the result without feeling that every part of your kitchen must be perfect. A clean, functional space is more valuable than a spotless room that requires hours of maintenance every day.
How to Keep Your Kitchen Clean Every Day
Once you have completed a full kitchen reset, a few simple habits can help you maintain the results. You do not need to repeat all 10 steps every day. Instead, focus on the small tasks that prevent clutter and grime from building up.
Create a Simple Daily Cleaning Routine
- After cooking: Wipe suitable food-preparation surfaces and clean visible stovetop spills once the area is cool.
- After meals: Load the dishwasher or wash the dishes instead of letting them accumulate.
- Before bed: Clear the sink, wipe the countertops, and put frequently used items away.
- As needed: Sweep visible crumbs and address spills promptly.
- Once a week: Give cabinet fronts, appliance exteriors, and the floor a more thorough clean.
Adjust the frequency to suit your household. A busy family kitchen may need more frequent attention than a kitchen used by one person. The most effective routine is one you can maintain comfortably.
Use the One-Minute Reset
When you notice a small mess, deal with it if you have a moment. Put away a stray cup, wipe a fresh splash, or return a spice jar to its shelf. These tiny actions can prevent minor clutter from becoming a larger project.
You can also make kitchen cleaning more enjoyable by playing your favorite music, setting a realistic time limit, or completing one task at a time. A simple routine feels much less intimidating when you focus on progress rather than perfection.
Common Kitchen Cleaning Mistakes to Avoid
Even with a good checklist, a few habits can make kitchen cleaning harder than it needs to be. Avoid these common mistakes to protect your surfaces and work more efficiently.
Using the Wrong Cleaning Products
Not every cleaner is suitable for every surface. Acidic products may damage certain natural stones, abrasive products can scratch delicate finishes, and harsh chemicals may affect protective coatings. Read product labels and surface care instructions before cleaning.
Mixing Cleaning Chemicals
Never mix cleaning products unless their labels explicitly confirm that doing so is safe. In particular, bleach must never be mixed with ammonia, vinegar, acids, or other incompatible cleaners because dangerous gases or reactions can occur. Use one product at a time, ventilate the area as directed, and keep products away from children and pets.
Cleaning in the Wrong Order
Cleaning the floor before wiping countertops can mean doing the same work twice. Similarly, trying to clean around clutter takes longer than clearing the surface first. Following a consistent sequence helps you finish efficiently without unnecessary repetition.
Trying to Do Everything at Once
A complete kitchen clean does not have to happen in one exhausting session. If time is limited, prioritize dishes, food-contact surfaces, visible spills, and trash. Save detailed cabinet organization or deep oven cleaning for another day when you have more time.
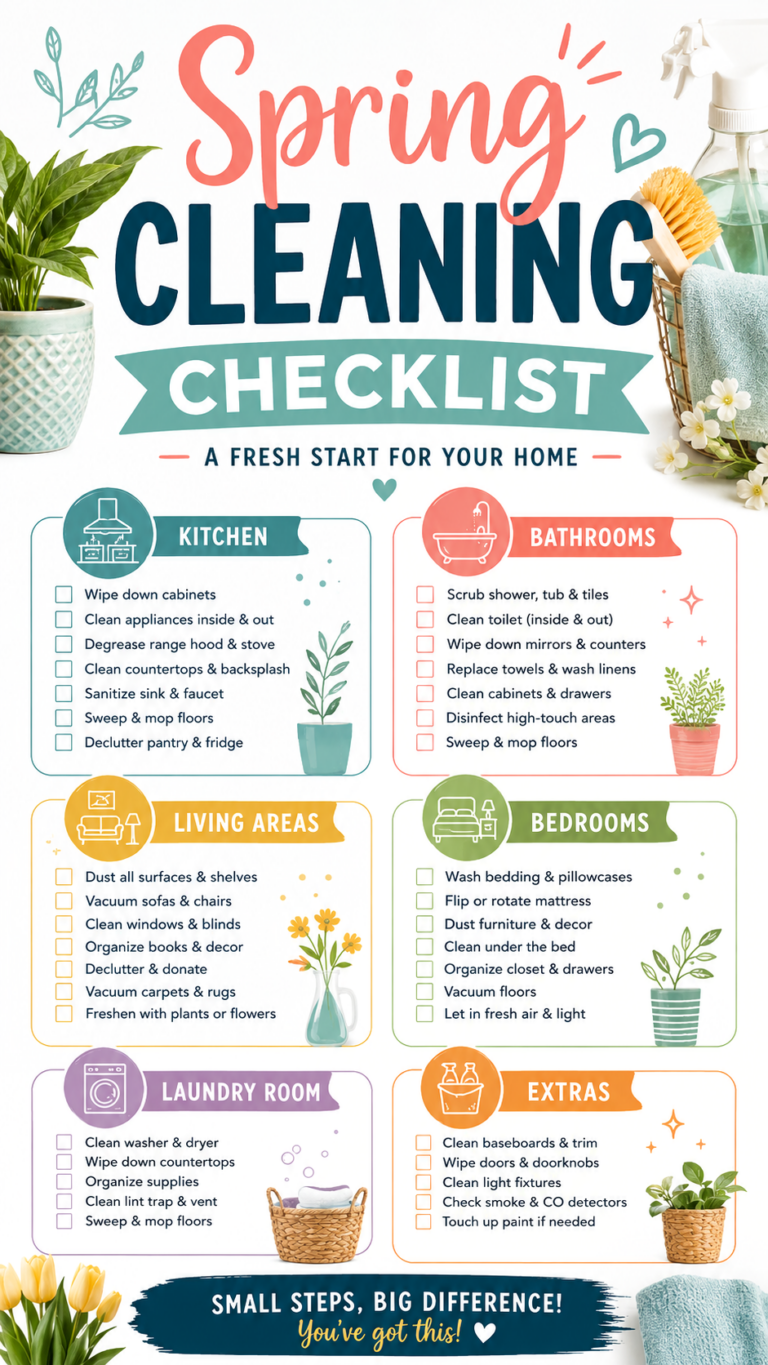
Kitchen Cleaning Checklist at a Glance
Your 10-Step Kitchen Reset
- ☐ Gather cleaning supplies and tools.
- ☐ Clear and wipe the countertops.
- ☐ Wash dishes and put away dry items.
- ☐ Wipe appliance exteriors and touch points.
- ☐ Scrub and dry the sink.
- ☐ Clean the stovetop and accessible oven surfaces.
- ☐ Wipe cabinet doors, drawers, and handles.
- ☐ Sweep and mop the floor.
- ☐ Empty the trash and replace the liner.
- ☐ Put everything away and add the finishing touches.
Conclusion: A Clean Kitchen Starts With Small Steps
A fresh, organized kitchen does not require complicated cleaning methods or an entire day of hard work. By following these 10 easy kitchen cleaning steps, you can tackle clutter, wash dishes, refresh appliances, clean the sink, wipe cabinets, and finish with spotless-looking floors.
The secret is to work in a sensible order, use the right supplies, and build small cleaning habits into your daily routine. Gather your essentials before you begin, clear the countertops first, and save the floors for the end. These simple choices make the whole process more manageable.
Remember that consistency matters more than perfection. A few minutes of daily maintenance can help prevent messes from piling up and make deeper cleaning less demanding. Start with the step that needs the most attention, work through the checklist at your own pace, and enjoy the comfort of a kitchen that feels clean and welcoming.
Ready for your next kitchen reset? Save this 10-step kitchen cleaning checklist so you can return to it whenever your space needs a little refresh. A little effort goes a long way toward creating a cleaner, happier home.
Quick Points
- Prepare your supplies before starting.
- Clear clutter before cleaning surfaces.
- Clean from top to bottom.
- Use surface-safe products and never mix incompatible chemicals.
- Maintain your results with a short daily reset.
Tags
Kitchen Cleaning
Kitchen Cleaning Checklist
Cleaning Tips
Clean Kitchen
Kitchen Organization
Home Cleaning Routine
Cleaning Hacks
Organized Home