5 Homemade Cleaner Recipes That Actually Work Natural, Safe Budget-Friendly
Want a cleaner, fresher home without spending a fortune on cleaning products? Homemade cleaners are a simple way to tackle everyday messes with affordable ingredients you may already have in your kitchen. From sparkling glass and mirrors to greasy stovetops, bathroom surfaces, and ceramic floors, the right DIY cleaning recipes can make household chores easier and more budget-friendly.
With a few basic supplies, including white vinegar, water, mild dish soap, and baking soda, you can prepare several useful cleaning solutions for different areas of your home. These homemade cleaner recipes are easy to follow, require minimal preparation, and help you build a practical cleaning routine that fits your household.
Key Takeaways
- Make five practical DIY cleaners for everyday household surfaces.
- Use diluted white vinegar for suitable glass and selected hard surfaces.
- Choose mild dish soap for greasy kitchen messes and routine cleaning.
- Label homemade solutions clearly and prepare small batches.
- Never mix vinegar with bleach or other incompatible cleaning products.
- Avoid acidic cleaners on marble, limestone, and other acid-sensitive stone.
Why Make Your Own Homemade Cleaning Products?
Homemade cleaning products appeal to people who want a simpler, more affordable approach to keeping their homes tidy. Instead of purchasing a separate spray for every room, you can use a small selection of ingredients to handle many routine cleaning jobs.
Cost is one of the biggest attractions. Water, white vinegar, and dish soap are commonly available household supplies, so making a suitable cleaner can be inexpensive. Preparing your own solutions also gives you control over the ingredients you use and allows you to avoid unnecessary fragrances if you prefer a less scented home.
Another benefit is flexibility. You can make a glass cleaner for mirrors, a soapy solution for greasy kitchen surfaces, or a diluted floor-cleaning mixture suited to your flooring manufacturer’s instructions. The key is understanding that different materials and types of dirt require different cleaning methods.
Important: Natural does not automatically mean harmless, disinfecting, or suitable for every surface. Vinegar is acidic, dish soap can leave residue if overused, and essential oils may irritate sensitive skin or pets. Choose each ingredient for the job it can safely perform.
1. Homemade All-Purpose Cleaner
An all-purpose cleaner is a useful starting point for anyone building a collection of DIY cleaning products. This simple mixture is suitable for many washable, vinegar-compatible surfaces, including selected countertops, sinks, and tiles.
Ingredients
- 1 cup white vinegar
- 1 cup water
- 10 to 15 drops of lemon or tea tree essential oil, optional
- A clean spray bottle suitable for household cleaning solutions
How to Make It
- Pour the white vinegar into the spray bottle.
- Add the water and gently swirl to combine.
- If desired, add a small amount of suitable essential oil, provided it is safe for your household and the intended surfaces.
- Label the bottle with the ingredients and preparation date.
How to Use It
Lightly spray the solution onto a suitable washable surface, then wipe with a clean microfiber cloth. For sticky spots, allow brief contact before wiping, following the surface manufacturer’s recommendations. Test an inconspicuous area first, particularly when cleaning unfamiliar finishes.
This mixture can help with some everyday mineral deposits and light household grime. However, it is not appropriate for every countertop or appliance. Do not use vinegar on marble, limestone, travertine, or other acid-sensitive stone, and avoid applying it to surfaces whose care instructions prohibit acidic cleaners.
2. DIY Glass and Mirror Cleaner
Fingerprints, water spots, and everyday dust can make glass surfaces look dull. A simple vinegar-and-water solution can help clean suitable mirrors and windows without requiring a specialized glass-cleaning spray.
Ingredients
- 1 cup distilled water
- 1 cup white vinegar
- A clean spray bottle
- A lint-free microfiber cloth
Preparation and Cleaning Steps
- Combine the distilled water and white vinegar in the spray bottle.
- Close the bottle securely and gently shake it.
- Lightly mist the glass or apply the solution to the microfiber cloth.
- Wipe the surface evenly, paying attention to fingerprints and corners.
- Buff with a clean, dry section of the cloth to minimize streaks.
Distilled water is helpful because it contains fewer dissolved minerals than many types of tap water. This can reduce the chance of mineral spots forming as the glass dries. A clean cloth also makes a noticeable difference because detergent residue, fabric softener, and accumulated dirt can leave streaks.
Tips for a Streak-Free Finish
- Clean windows when the glass is cool rather than in direct, strong sunlight.
- Use a lint-free microfiber cloth instead of a heavily textured towel.
- Apply less solution rather than soaking the glass.
- Keep acidic mixtures away from sensitive coatings, natural stone frames, and surfaces that prohibit vinegar.
For mirrors, avoid allowing liquid to collect around the edges because moisture can damage the backing of some mirrors over time. Spray the cloth instead when cleaning delicate or framed mirrors.
3. Homemade Kitchen Degreaser
Kitchen grease can accumulate around stovetops, range hoods, backsplashes, and frequently used counters. A mild dish-soap solution is often a practical way to loosen greasy residue without relying on a strong-smelling commercial degreaser.
Ingredients
- 2 cups warm water
- 1 tablespoon mild dish soap
- A soft sponge or microfiber cloth
- A clean container or spray bottle suitable for the mixture
Baking soda can also be useful for selected stubborn, greasy spots when applied as a separate cleaning paste. However, it is not necessary to add baking soda to the main spray bottle. Mixing ingredients without understanding how they interact may reduce their effectiveness or create an unnecessarily complicated solution.
How to Make and Use It
- Add the warm water to a clean container.
- Stir in the dish soap gently to minimize excessive bubbles.
- Dampen a cloth or sponge with the solution.
- Wipe the greasy area using gentle, even strokes.
- Use a clean, damp cloth to remove soap residue.
- Dry the surface with a fresh towel when appropriate.
This mixture is useful for routine cleaning of many washable kitchen surfaces, but always check the manufacturer’s instructions for countertops, appliance finishes, and painted cabinets. Avoid soaking electrical controls, vents, or seams where liquid could enter.
When Should You Use Baking Soda?
For a compatible surface that needs extra attention, sprinkle a little baking soda onto a damp cloth or prepare a small paste with water. Gently work it over the affected area, test first, and rinse thoroughly. Baking soda is mildly abrasive, so avoid using it on delicate coatings, polished finishes, easily scratched materials, or any surface whose manufacturer advises against abrasives.
Pro Tip: Let the cleaner do the work. Apply a small amount, allow a short contact time when appropriate, and wipe gently instead of scrubbing aggressively. This helps protect finishes while making everyday kitchen cleanup easier.
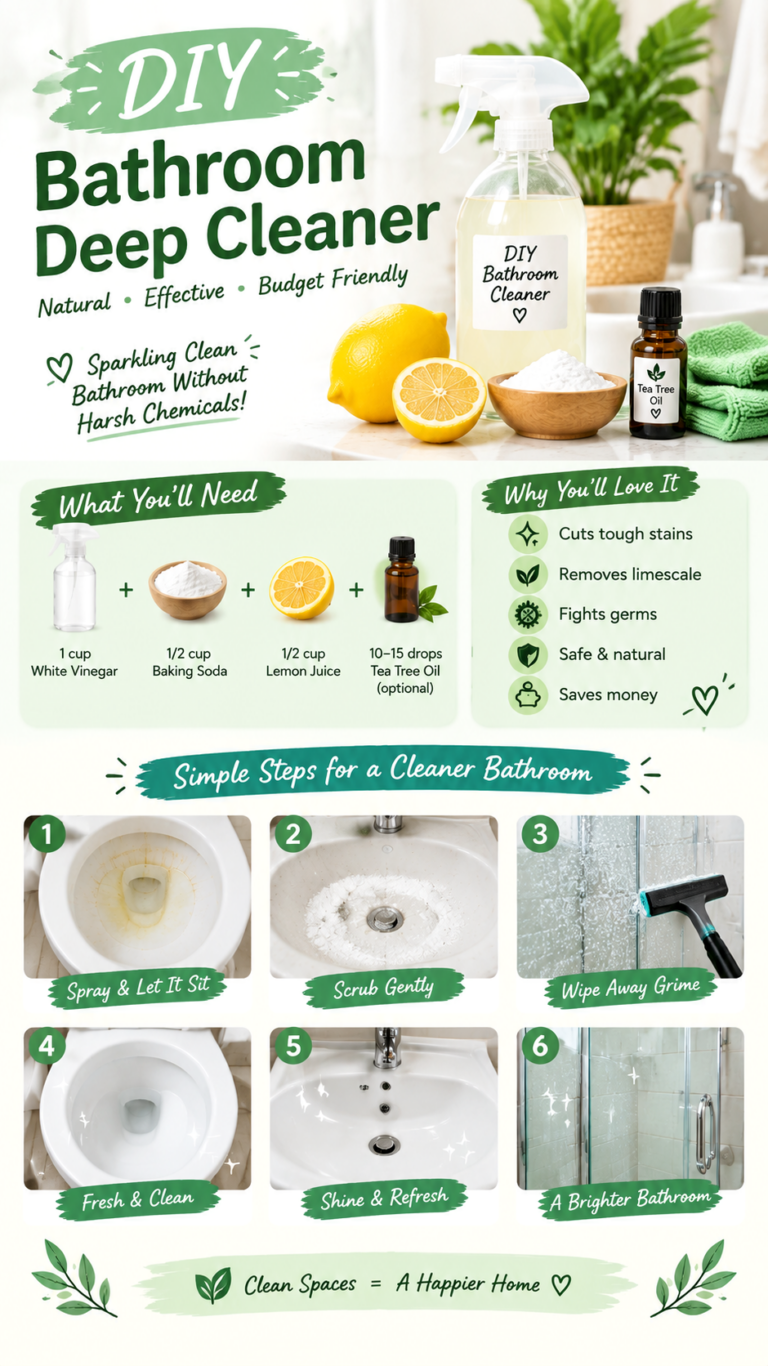
4. Simple Bathroom Cleaner
Bathrooms often collect soap residue, light grime, and mineral deposits around showers, tubs, and faucets. A homemade cleaner can help with certain routine cleaning tasks, provided the ingredients are compatible with the surface and the problem you are trying to remove.
Ingredients
- 1 cup white vinegar
- 1 tablespoon mild dish soap
- A clean spray bottle
- A non-scratch sponge or soft cleaning cloth
How to Prepare It
- Pour the white vinegar into a clean container.
- Add the dish soap and gently mix.
- Label the container clearly and keep it separate from other cleaning products.
How to Clean Bathroom Surfaces
Apply a small amount to a compatible surface, following the manufacturer’s cleaning instructions. Allow brief contact if appropriate, then gently wipe, rinse thoroughly, and dry as needed. Good ventilation can make bathroom cleaning more comfortable, especially when working with acidic solutions.
Vinegar may help loosen some mineral deposits and soap residue, but this recipe is not suitable for every shower, bathtub, tile, grout, or fixture. Avoid using it on marble, limestone, travertine, cement-based surfaces that are sensitive to acids, and finishes that prohibit acidic products. Never assume that a purple, blue, or green homemade solution is more effective simply because it looks like a commercial cleaner.
Can Homemade Bathroom Cleaner Remove Mold?
A general-purpose homemade spray should not be treated as a reliable mold-removal or disinfection product. For small areas of surface mold, follow relevant public-health guidance and the material manufacturer’s cleaning instructions. Persistent mold, recurring moisture, extensive growth, or mold affecting porous materials may require professional assessment and correction of the underlying moisture problem.
Why This Matters
Cleaning and disinfecting are different tasks. A homemade solution may help remove visible dirt, but that does not prove it kills disease-causing microorganisms. When disinfection is necessary, choose an appropriate product with clear label directions and follow its contact time, ventilation, and safety requirements.
5. Homemade Floor Cleaner
Keeping floors clean can be straightforward when you use the right amount of cleaner and choose a solution compatible with the flooring material. A mild dish-soap mixture is often sufficient for routine cleaning, while vinegar should only be considered for flooring that can safely tolerate acidic products.
Ingredients
- 4 litres of warm water
- A few drops of mild dish soap
- A clean mop and bucket
For compatible ceramic or porcelain tile floors, some households also use a small amount of white vinegar diluted in water. However, vinegar is optional and should not be used on natural stone, sensitive grout, or any floor whose manufacturer prohibits acidic cleaners. The safest choice is always the flooring manufacturer’s recommended cleaning solution.
Floor Cleaning Instructions
- Remove loose dust, hair, and debris with a broom or vacuum.
- Mix a few drops of mild dish soap into the warm water.
- Dip the mop into the solution and wring it out thoroughly.
- Clean the floor in manageable sections without flooding the surface.
- If needed, wipe away any remaining soap with a clean, lightly damp mop.
- Allow the floor to dry before walking on it normally.
Using too much dish soap can leave a sticky film that attracts dirt and makes floors appear dull. Start with a very small quantity and adjust only when necessary. On wood, laminate, and other moisture-sensitive floors, use the cleaning method approved by the manufacturer and avoid excess water.
Choose the Right Cleaner for Your Floor
- Ceramic and porcelain tile: Use a compatible mild cleaner and avoid excessive soap that can leave residue.
- Marble and natural stone: Use a pH-neutral cleaner specifically suitable for the stone. Avoid vinegar and other acidic ingredients.
- Hardwood: Follow the flooring manufacturer’s instructions and avoid soaking the wood.
- Laminate: Use a laminate-approved cleaner and a well-wrung mop to prevent moisture damage.
- Vinyl: Choose a cleaner compatible with the specific flooring finish and avoid harsh or abrasive methods.
Essential Safety Rules for Homemade Cleaners
Simple recipes are most useful when they are prepared and used responsibly. Household ingredients can react with other products, irritate the skin or eyes, or damage materials when used incorrectly. A few basic precautions help reduce those risks.
Never Mix Vinegar and Bleach
Critical safety warning: Never mix vinegar with chlorine bleach. This combination can release toxic chlorine gas. Do not mix homemade cleaners with bleach, ammonia, drain cleaners, toilet cleaners, or other cleaning products unless their labels explicitly confirm that the combination is safe. If an accidental mixture produces strong fumes, leave the area and seek appropriate emergency or poison-control guidance.
Label Every Bottle Clearly
Store homemade cleaners in clean, compatible containers with labels listing the ingredients and preparation date. Never put cleaning solutions into beverage bottles or food containers, where someone could mistake them for something edible. Keep all cleaning products out of reach of children and pets, preferably in a secure storage area.
Prepare Small Batches
Homemade mixtures generally do not contain the preservatives found in many commercial products. Prepare only what you expect to use soon, keep containers clean, and discard solutions that develop an unusual appearance or smell. Do not assume that adding essential oils will preserve a mixture or make it disinfectant.
Use Essential Oils Carefully
Lemon and tea tree essential oils are sometimes added to homemade cleaners for their fragrance. However, essential oils are concentrated substances and may irritate skin, trigger sensitivities, or present risks to pets. They are not required for the recipes in this guide, and their presence does not establish that a cleaner disinfects a surface.
For households with young children, pets, asthma triggers, or fragrance sensitivities, an unscented solution may be the better choice. Follow relevant product safety information and keep concentrated oils away from children and animals.
Common Homemade Cleaning Mistakes to Avoid
Even an easy DIY cleaning recipe can disappoint when it is used on the wrong surface or mixed in the wrong proportions. Avoiding a few common mistakes can improve your results and help protect your home.
Using One Cleaner Everywhere
No single mixture works for every material. Acidic vinegar solutions can etch natural stone, abrasive powders can scratch delicate finishes, and excess moisture can damage wood or laminate. Check care instructions and test an inconspicuous area before cleaning a new surface.
Adding Too Much Soap
More soap does not necessarily mean more cleaning power. Excess detergent may leave a film on counters, mirrors, and floors. Use the smallest effective amount and rinse when necessary, particularly on surfaces that come into contact with food.
Expecting Instant Results
Old grease, heavy soap buildup, and stubborn mineral deposits may require several careful cleaning passes. Removing loose dirt first, using a suitable cleaner, and allowing the recommended contact time can help. Avoid combining ingredients in an attempt to create a stronger solution.
Forgetting to Rinse
Some cleaning jobs require rinsing after the dirt has been removed. This is especially important on food-contact surfaces, floors that may become slippery, and areas where soap residue could build up. Follow the surface care instructions and dry the area when appropriate.
How to Build a Simple DIY Cleaning Routine
You do not need dozens of homemade cleaning recipes to keep your home tidy. A small, organized collection of suitable supplies can cover many everyday tasks without cluttering your cupboards.
- Daily: Wipe kitchen counters with a compatible cleaner, remove crumbs, and clean up spills promptly.
- Weekly: Clean mirrors, sinks, bathroom surfaces, and frequently touched areas using appropriate products.
- As needed: Address greasy stovetops, soap residue, and visible floor dirt with a cleaner designed for the material.
- Periodically: Check stored cleaning supplies, clean reusable cloths, inspect spray bottles, and replace damaged containers.
Keep separate microfiber cloths for kitchen, bathroom, and general cleaning tasks. Washing them regularly helps prevent the transfer of dirt between rooms. If a cloth is used on a contaminated area, do not reuse it on a food-preparation surface without properly laundering it first.
Remember that ordinary cleaning is not always enough when a surface needs disinfection. For situations involving illness, bodily fluids, or specific contamination risks, follow applicable public-health guidance and use a suitable product according to its label.
Quick Points: Homemade Cleaners at a Glance
- All-purpose cleaner: Equal parts white vinegar and water for suitable, vinegar-compatible surfaces.
- Glass cleaner: Equal parts distilled water and white vinegar, used sparingly with a microfiber cloth.
- Kitchen degreaser: Warm water and a small amount of mild dish soap.
- Bathroom cleaner: Vinegar and dish soap for selected compatible surfaces, not natural stone.
- Floor cleaner: Warm water and a few drops of mild dish soap, adjusted to flooring care instructions.
- Safety first: Never mix vinegar with bleach, label containers, and test surfaces before use.
Conclusion: Keep Your Home Clean the Simple Way
Homemade cleaners that actually work do not need complicated ingredients or lengthy preparation. With white vinegar, water, mild dish soap, and a few basic cleaning tools, you can create practical solutions for glass, selected hard surfaces, kitchen grease, bathroom upkeep, and routine floor care.
The best approach is to match each recipe to the task, use only the ingredients you need, and pay attention to the materials in your home. Homemade solutions can help simplify everyday cleaning and reduce reliance on multiple specialized products, but they are not universal substitutes for commercial cleaners, disinfectants, or products specifically recommended for delicate surfaces.
Start with one recipe, test it carefully, and build a routine that works for your household. Keep your bottles labeled, store mixtures safely, and never mix incompatible cleaning products. With a little planning, everyday cleaning can become more affordable, organized, and manageable.
Ready to make your cleaning routine simpler? Save these homemade cleaner recipes for your next cleaning day and keep your favorite formulas handy whenever household messes appear.
Tags
Homemade Cleaners
DIY Cleaning
Natural Cleaning
Cleaning Hacks
Budget-Friendly Cleaning
Homemade Glass Cleaner
DIY Kitchen Degreaser
Eco-Friendly Home Care