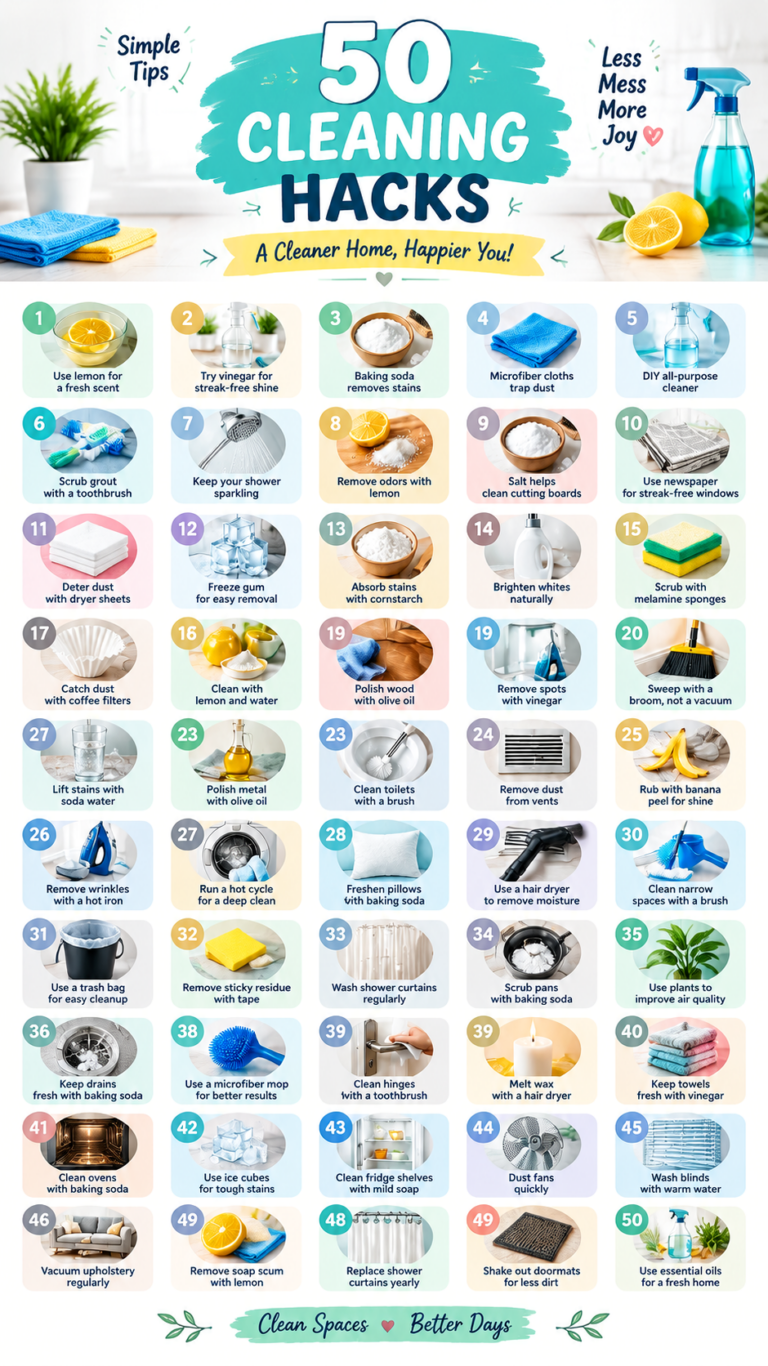
52 Cleaning Hacks for a Sparkling Home Easy Cleaning Tips Tricks
A sparkling home does not have to mean spending hours scrubbing, buying expensive cleaning products, or tackling every room in one exhausting afternoon. With a few practical cleaning hacks, simple household supplies, and a little consistency, you can make everyday chores easier and keep your living space fresh, comfortable, and inviting. From streak-free windows and spotless kitchen counters to cleaner bathrooms, fresher laundry, and dust-free furniture, these easy home cleaning tips can help you build a routine that works for your lifestyle.
Whether you enjoy keeping your home perfectly organized or simply want to spend less time cleaning, the secret is knowing which tasks make the biggest difference. These 52 cleaning hacks combine quick daily habits, useful tools, and room-by-room techniques to help you achieve a cleaner home without unnecessary effort.
Key Takeaways
- Use simple cleaning tools and suitable household products to tackle everyday messes.
- Clean from top to bottom to prevent dust from settling on freshly cleaned surfaces.
- Focus on high-touch areas, kitchen surfaces, bathroom fixtures, and frequently used appliances.
- Create small daily habits that prevent dirt and clutter from building up.
- Choose cleaning methods that suit each surface and always follow product instructions.
- Never mix cleaning chemicals, especially bleach with vinegar, ammonia, or rubbing alcohol.
Easy Kitchen Cleaning Hacks for a Fresher Home
The kitchen is one of the busiest rooms in any home. Cooking splashes, greasy surfaces, food crumbs, and lingering odors can quickly make it feel messy. Fortunately, a few simple kitchen cleaning tips can make daily maintenance much easier.
1. Clean Microwave Splashes With Steam
Place a microwave-safe bowl containing water inside the microwave and heat it until steam forms. Let it stand briefly with the door closed, then carefully remove the bowl and wipe the softened food splashes with a damp cloth. A little lemon can add a fresh scent, but the steam does most of the work. Avoid overheating the water or handling a hot bowl without protection.
2. Use Vinegar for Suitable Glass Surfaces
A diluted white vinegar solution can help remove some mineral deposits and fingerprints from compatible glass surfaces. Spray lightly, wipe with a microfiber cloth, and buff until dry. However, vinegar is acidic, so avoid using it on natural stone, marble, limestone, and other acid-sensitive materials. For delicate or specially coated glass, follow the manufacturer’s cleaning instructions.
3. Refresh Greasy Kitchen Surfaces With Dish Soap
A few drops of dish soap in warm water can loosen everyday grease from many washable kitchen surfaces. Wipe with a soft cloth, rinse away soap residue using a clean damp cloth, and dry thoroughly. Check the surface manufacturer’s recommendations before cleaning wood, stone, or special finishes.
4. Remove Sink Grime With Gentle Scrubbing
For routine sink cleaning, use dish soap, warm water, and a nonabrasive sponge. Pay attention to the drain area, faucet base, and corners where residue collects. Baking soda can provide gentle abrasion on some compatible surfaces, but test it first and avoid aggressive scrubbing on polished or easily scratched finishes.
5. Keep Kitchen Counters Clutter-Free
Clear unnecessary items from the countertop before cleaning. Wipe crumbs into the trash, use a suitable surface cleaner, and dry the counter before returning appliances and containers. Keeping only frequently used items on the counter makes the entire kitchen feel more organized.
6. Clean the Refrigerator in Small Sections
Remove expired food, wipe sticky spills promptly, and clean removable shelves according to the appliance instructions. Use a food-safe cleaning method and dry shelves before replacing food. A quick weekly check helps prevent forgotten leftovers and unpleasant odors.
7. Freshen Your Kitchen Towels Regularly
Kitchen towels collect moisture, food residue, and odors. Replace them frequently, especially when they become damp or dirty, and wash them according to their care labels. Allow towels to dry fully between uses rather than leaving them in a damp pile.
8. Clean Small Kitchen Appliances After Use
Wipe the outside of kettles, coffee makers, and other small appliances with a suitable damp cloth once they have been switched off and cooled. Clean removable parts according to the instructions, and never immerse electrical components in water unless the manufacturer explicitly permits it.
Bathroom Cleaning Tips for Sparkling Fixtures
Bathrooms benefit from frequent light cleaning because moisture, soap residue, and mineral deposits can build up quickly. The goal is to remove visible grime, control moisture, and keep frequently touched surfaces clean.
9. Remove Soap Residue From Shower Fixtures
Use a bathroom cleaner suitable for your shower’s material and a soft cloth or nonabrasive sponge. Rinse thoroughly and dry the fixtures to reduce water spots. Avoid acidic cleaners on natural stone and check the manufacturer’s guidance for specialty finishes.
10. Keep Showerheads Free of Mineral Buildup
Mineral deposits can gradually block showerhead openings. If the manufacturer permits it, soak a removable showerhead in a suitable descaling solution and rinse it thoroughly afterward. Follow the product instructions, particularly for brass, coated, or specialty finishes.
11. Clean Grout With a Soft Brush
Apply a compatible grout cleaner, allow the recommended contact time, and gently scrub with a grout brush. Rinse according to the product directions. Avoid combining cleaners or using harsh acids on cement-based grout and natural stone.
12. Wipe Bathroom Mirrors Without Streaks
Use a glass cleaner labeled as suitable for mirrors or a lightly damp microfiber cloth. Wipe away toothpaste splashes and fingerprints, then buff with a dry, lint-free cloth. Avoid allowing excess liquid to collect along mirror edges, where it can damage the backing.
13. Give the Toilet a Consistent Cleaning Routine
Apply a toilet cleaner according to its label, scrub the bowl with a toilet brush, and clean the exterior with a separate cloth. Pay attention to the handle, seat hinges, and base. Never mix toilet cleaner with bleach or any other cleaning product.
14. Reduce Bathroom Moisture
Run the exhaust fan during showers and afterward as recommended, open a window when practical, and hang towels so they can dry fully. These simple habits help reduce persistent dampness and discourage mold growth.
Important Cleaning Safety Tip: Never mix cleaning products to create a stronger solution. Bleach mixed with vinegar or acidic cleaners can release toxic chlorine gas. Bleach mixed with ammonia can produce dangerous chloramine gases, and bleach mixed with rubbing alcohol can create hazardous compounds. Use one product at a time, follow its label, and ventilate the room.
Dusting and Living Room Cleaning Hacks
Dust can collect on furniture, electronics, shelves, decorative objects, and hard-to-reach corners. A thoughtful dusting routine keeps rooms looking brighter and reduces the amount of dirt that eventually reaches the floor.
15. Dust With a Microfiber Cloth
Microfiber cloths are useful for capturing everyday dust from many hard surfaces. Use a clean, dry cloth for light dusting or a slightly damp one when appropriate. Fold the cloth into sections so you can use a clean surface as you move around the room.
16. Clean From Top to Bottom
Start with ceiling corners, shelves, lampshades, and higher furniture before moving to tables and floors. This prevents dust from falling onto areas you have already cleaned. Finish by vacuuming or mopping the floor.
17. Reach Ceiling Corners With an Extension Tool
A long-handled duster helps remove cobwebs from ceiling corners, curtain rails, and high shelves without climbing on furniture. Choose a stable tool that allows you to reach safely from the floor.
18. Clean Window Tracks With a Small Brush
Window tracks often trap dust, hair, and small debris. Vacuum loose dirt with a narrow attachment, then use a small soft brush and a damp cloth to clean the remaining residue. Dry the tracks before closing the windows.
19. Freshen Upholstery With Regular Vacuuming
Vacuum sofas, armchairs, and cushions using the appropriate upholstery attachment. Check care labels before applying water or upholstery cleaners. For delicate fabrics, test any cleaning product on an inconspicuous area first.
20. Clean Remote Controls and Door Handles
Frequently touched objects deserve regular attention. Use a product suitable for the material and follow its instructions. For electronics, apply cleaner to a cloth rather than spraying directly onto buttons, screens, or openings.
21. Keep Decorative Objects Easy to Dust
Group small decorative pieces on a tray or shelf instead of scattering them across every surface. When cleaning, move the group together, wipe the area underneath, and return the items. This saves time while maintaining an attractive display.
Laundry Room Hacks for Cleaner Clothes
Laundry becomes easier when you prevent odors, clean appliances regularly, and avoid using more detergent than necessary. Small changes can help your clothes stay fresh while supporting the proper care of your washing machine.
22. Clean the Washing Machine According to Its Manual
Use the washer’s cleaning cycle and the cleaner recommended by the manufacturer. Wipe the detergent drawer and door seal as directed, remove visible residue, and leave the door open when appropriate to allow the interior to dry.
23. Measure Laundry Detergent Carefully
More detergent does not necessarily mean cleaner clothes. Excess product can leave residue on fabrics and inside the machine. Follow the dosage instructions and adjust for load size, soil level, and water conditions.
24. Treat Stains Before Washing
Check clothing for stains before placing it in the washer. Use a suitable stain remover, follow its label, and avoid drying stained clothing with heat until the stain has been addressed, since heat can make some stains harder to remove.
25. Keep the Laundry Area Organized
Use separate baskets for different loads and store detergent securely away from children and pets. Keep the floor clear, wipe up spills promptly, and return laundry supplies to their designated places after use.
26. Wash Bedding on a Regular Schedule
Sheets and pillowcases benefit from regular washing, with frequency adjusted for personal needs, pets, allergies, and the manufacturer’s care instructions. Dry bedding thoroughly before making the bed to help it stay fresh and comfortable.
Simple Cleaning Tricks for Floors and Carpets
Floors collect crumbs, dust, outdoor dirt, and pet hair every day. Using the right method for each floor type helps protect the finish while making the whole room feel cleaner.
27. Vacuum Before Mopping
Remove loose dirt and debris before using a wet mop. Otherwise, dust and crumbs may spread across the floor and create a muddy residue. Choose a vacuum attachment suitable for your flooring.
28. Use the Right Amount of Floor Cleaner
Follow the product label and floor manufacturer’s guidance. Too much cleaner can leave a sticky film that attracts dirt. Some floors, especially unsealed wood and certain stone surfaces, require specialized products and minimal moisture.
29. Remove Carpet Stains by Blotting
When a spill happens, blot it with a clean cloth rather than rubbing it deeper into the fibers. Work from the outside toward the center and use a carpet-safe stain remover as directed. Test first in a hidden area.
30. Lift Pet Hair With the Right Tool
A vacuum designed for pet hair, an upholstery attachment, or a suitable reusable lint brush can help remove fur from rugs and furniture. Clean the tool regularly to maintain its effectiveness.
31. Clean Under Furniture
Use a long vacuum attachment or a flat cleaning tool to reach under beds, sofas, and cabinets. Moving lightweight furniture occasionally helps prevent dust and debris from accumulating in hidden areas.
More Everyday Cleaning Hacks That Save Time
Some of the most useful home cleaning tips are small habits that prevent messes from becoming bigger jobs. Try adding a few of these ideas to your regular routine.
32. Make Your Bed Every Morning
Straightening your bedding takes only a few minutes and immediately makes the bedroom look tidier. Combine this habit with opening the bedding briefly to air out before making the bed, when practical.
33. Keep a Small Cleaning Caddy
Gather suitable cloths, gloves, brushes, and commonly used cleaners in one portable container. Store products safely, keep incompatible chemicals separate, and follow all label instructions. Having supplies nearby reduces interruptions while cleaning.
34. Use a Timer for Quick Cleaning Sessions
Set aside ten minutes to tackle one specific task, such as clearing a counter, wiping a bathroom sink, or dusting a shelf. A short time limit can make cleaning feel manageable and help you avoid putting off small chores.
35. Clean Spills Immediately
Fresh spills are usually easier to remove than dried-on messes. Blot liquids, pick up crumbs, and clean sticky patches as soon as it is safe to do so. Use a surface-appropriate product to avoid damage.
36. Keep Cleaning Cloths Separate by Task
Use separate cloths for kitchens, bathrooms, toilets, and general dusting. Wash reusable cloths after use and allow them to dry fully. This simple system reduces the risk of transferring grime between different areas of the home.
37. Empty the Vacuum Cleaner Regularly
Check the vacuum’s dust container, filter, and brush roll according to the manual. Remove trapped hair and debris safely, and replace filters when required. A well-maintained vacuum is easier to use and can collect dirt more effectively.
38. Clean Light Switches and Frequently Touched Areas
Light switches, handles, and cabinet pulls can collect fingerprints and everyday grime. Wipe them with a cleaner compatible with the material, taking care not to let liquid enter electrical openings.
39. Remove Dust From Lampshades
Switch off the lamp and let it cool before cleaning. Use a soft brush or the attachment recommended for the material. Check the care instructions before using moisture on fabric or delicate shades.
40. Clean Air Vents and Fan Covers
Turn off the appliance or system before cleaning accessible covers. Vacuum loose dust with a brush attachment and wipe compatible surfaces with a damp cloth. Follow the equipment instructions and avoid disturbing dust inside inaccessible ductwork.
Why This Matters
The most effective cleaning routine is not necessarily the one with the strongest products or the most steps. Consistency, the right tools, and surface-appropriate methods make a bigger difference than complicated DIY mixtures. Clean small areas regularly, avoid damaging finishes, and give cleaning products the contact time specified on their labels.
How to Keep Your Home Smelling Fresh
A fresh-smelling home begins with removing the source of unwanted odors rather than simply covering them with fragrance. Moisture, food residue, dirty fabrics, and poorly ventilated areas can all contribute to lingering smells.
41. Empty Kitchen and Bathroom Bins Regularly
Remove rubbish before it becomes unpleasant, wipe the inside of the bin when necessary, and allow the container to dry before adding a fresh liner. Clean up any leaks or food residue promptly.
42. Let Damp Areas Dry Completely
Dry shower walls when practical, hang bath mats to air out, and avoid leaving wet cleaning cloths in a closed container. Improving ventilation and addressing leaks promptly can help prevent persistent musty odors.
43. Wash Reusable Sponges and Brushes Properly
Follow the manufacturer’s cleaning and replacement recommendations for sponges, scrubbers, and dish brushes. Replace items that smell unpleasant, remain slimy, or show signs of deterioration. A dirty cleaning tool can spread residue instead of removing it.
44. Refresh Curtains and Washable Fabrics
Curtains, cushion covers, and throws can collect dust and odors over time. Wash or clean them according to their care labels, and vacuum upholstery regularly. Airing fabrics outdoors is useful when the weather and material allow it.
45. Ventilate Your Home When Possible
Opening windows when outdoor conditions are suitable can help exchange stale indoor air. If outdoor air quality is poor or pollen is a concern, use appropriate ventilation or filtration instead. Good airflow is especially helpful after cooking and cleaning.
Cleaning Mistakes to Avoid
Not every popular cleaning hack is suitable for every surface. Some household ingredients are useful in specific situations, but combining them or applying them incorrectly can damage materials or create safety hazards.
46. Do Not Mix Baking Soda and Vinegar Expecting Extra Cleaning Power
These ingredients react with each other and release carbon dioxide, producing fizz. Although the reaction can help loosen some debris in certain situations, the mixture largely neutralizes the ingredients. For most jobs, using a suitable cleaner or one ingredient for a specific purpose is more practical.
47. Avoid Abrasive Scrubbing on Delicate Surfaces
Salt, scouring powders, rough sponges, and stiff brushes can scratch glass coatings, polished metal, nonstick cookware, and delicate finishes. Choose a gentle cleaning tool first and test it on a hidden area whenever you are unsure.
48. Be Careful With Natural Stone
Marble, limestone, and other acid-sensitive stone can be etched by vinegar, lemon juice, and acidic cleaners. Use a stone-safe product and a soft cloth instead. Promptly wipe spills and follow the recommendations for your particular stone finish.
49. Do Not Use Unapproved Products on Leather
Leather furniture and accessories need care suited to their specific finish. Avoid experimenting with cooking oils, banana peels, alcohol, or general-purpose cleaners. Use a leather-care product recommended for the material and test it in a discreet spot.
50. Never Ignore Appliance Instructions
Popular suggestions such as adding vinegar to a washing machine, using ice to remove candle wax, or applying homemade mixtures to appliances may not be suitable for every model or material. Check the manufacturer’s instructions before trying an unfamiliar method.
51. Avoid Using Cleaning Products on Food-Contact Surfaces Without Checking the Label
Kitchen counters, cutting boards, and food-preparation areas need appropriate cleaning methods. If a product requires rinsing after use on food-contact surfaces, follow that direction carefully. Never assume that a pleasant scent means a surface is safe for food preparation.
52. Make Prevention Part of Your Cleaning Routine
Use doormats to catch outdoor dirt, put items away after use, wipe cooking splashes quickly, and deal with small messes before they spread. These habits may seem simple, but they reduce the amount of time needed for weekly cleaning.
Create a Simple Weekly Home Cleaning Schedule
Trying to complete every cleaning task in one day can feel overwhelming. Instead, divide chores into smaller sessions so that each room receives regular attention without taking over your free time.
A Practical Room-by-Room Plan
- Monday: Dust living room surfaces and tidy shared spaces.
- Tuesday: Clean kitchen counters, the sink, and appliance exteriors.
- Wednesday: Refresh bathroom sinks, mirrors, and shower surfaces.
- Thursday: Vacuum carpets and clean floors according to their material.
- Friday: Wash towels, change bedding as needed, and organize laundry.
- Saturday: Tackle one deeper cleaning task, such as window tracks or refrigerator shelves.
- Sunday: Put away clutter, prepare cleaning supplies, and enjoy a lighter day.
Adjust this schedule to suit your household. A home with pets, children, or frequent visitors may need more frequent attention in certain areas, while other tasks can be completed less often. The aim is to create a realistic routine, not a rigid list of obligations.
Quick Points: 52 Cleaning Hacks at a Glance
Your Everyday Cleaning Checklist
- Steam-clean microwave splashes with water and wipe them away safely.
- Use microfiber cloths for dusting and suitable glass cleaners for mirrors.
- Clean kitchen grease with an appropriate dish soap solution.
- Scrub bathroom grout gently with a compatible cleaner and soft brush.
- Vacuum floors before mopping and use products designed for each floor type.
- Clean washing machines according to the manufacturer’s instructions.
- Wash bedding and towels regularly and dry them thoroughly.
- Wipe spills promptly and keep high-touch surfaces clean.
- Improve ventilation and prevent moisture from lingering.
- Never mix cleaning chemicals or experiment on delicate surfaces without checking compatibility.
Conclusion: Small Cleaning Habits, Big Results
A sparkling home is built through small, repeatable actions rather than occasional marathon cleaning sessions. These 52 cleaning hacks offer practical ways to care for kitchen surfaces, refresh bathrooms, control dust, maintain floors, and keep everyday messes under control.
Start with two or three tips that solve your biggest cleaning challenges. You might begin by wiping kitchen counters after cooking, keeping a microfiber cloth nearby, or spending ten minutes tidying one room each evening. As these habits become part of your routine, maintaining a fresh and organized home can feel much more manageable.
Remember: The best cleaning hack is one that saves time without putting your health, belongings, or home at risk. Use the right products for each surface, follow safety instructions, and never mix chemicals. A few smart habits can make a noticeable difference in how your home looks and feels.
Which cleaning trick will you try first? Save this list of easy home cleaning tips and return whenever you need a little inspiration to make your space cleaner, fresher, and more comfortable. A happier home starts with small steps!
Tags
Cleaning Hacks
Home Cleaning Tips
Kitchen Cleaning
Bathroom Cleaning
DIY Cleaning Tips
Cleaning Checklist
Home Organization
Household Cleaning